Blend 元素用指定的模式混合兩個 Item 。在我們使用 QPainter 繪圖時,支持 Composition Modes ,Blend 干的事兒與此類似。
使用 Blend 需要:
import QtGraphicalEffects 1.0
博客之星評選,點擊投我一票,謝謝。投過了也可以點哦,每天都可以投投一票。
Blend 是 Item 的派生類,有下列屬性:
source,指定源ItemforegroundSource,指定作為前景的源 Itemmode,一個字符串,指定要使用的混合模式cached,布爾變量,默認值為 false 。設置為 true ,可以緩存輸出的效果圖像,提升渲染效率,不過會占用更多的內存。如果源 Item 具有動態效果,建議禁用 cache 。Blend 元素本身是一個 Item ,你可以使用 anchors 來對它布局,也可以使用 x 、 y 、 width 、 height 等調整它的大小和位置。
下面是 Qt 幫助裡的示例代碼:
import QtQuick 2.2
import QtGraphicalEffects 1.0

Item {
    width: 300
    height: 300

    Image {
        id: bug
        source: "images/bug.jpg"
        sourceSize: Qt.size(parent.width, parent.height)
        smooth: true
        visible: false
    }

    Image {
        id: butterfly
        source: "images/butterfly.png"
        sourceSize: Qt.size(parent.width, parent.height)
        smooth: true
        visible: false
    }

    Blend {
        anchors.fill: bug
        source: bug
        foregroundSource: butterfly
        mode: "subtract"
    }
}
如代碼所示,Blend 對象指定了 source 、 foregroundSource 、 mode 三個屬性。
注意到 anchors.fill 屬性了嗎,它產生效果是: Blend 元素占據 bug 的位置,並且充滿它。那實際上在定義 Blend 對象時也可以這樣:
    Blend {
        anchors.top: parent.top;
        anchors.right: parent.right;
        width: 240;
        height: 240;
        source: bug;
        foregroundSource: butterfly;
        mode: "subtract";
    }
值得一提的是,如果使用錨布局來定位 Blend 對象,那它錨定的 Item 必須是 Blend 的父或者兄弟。
如你所見,示例代碼將 bug 和 butterfly 的 visible 屬性設置為 false ,這並不是必須的。如果我們將 Blend 元素當作是 source 、 foregroundSource 根據 mode 混合後的那個元素,理解起來就會容易得多。Blend 、 source 、 foregroundSource 是三個邏輯上相互獨立的元素,你可以隨意擺布它們,它們的位置、可見屬性等相互沒有任何影響。
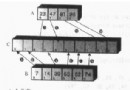
BlendExample.qml 演示了各種混合模式。效果圖如下:
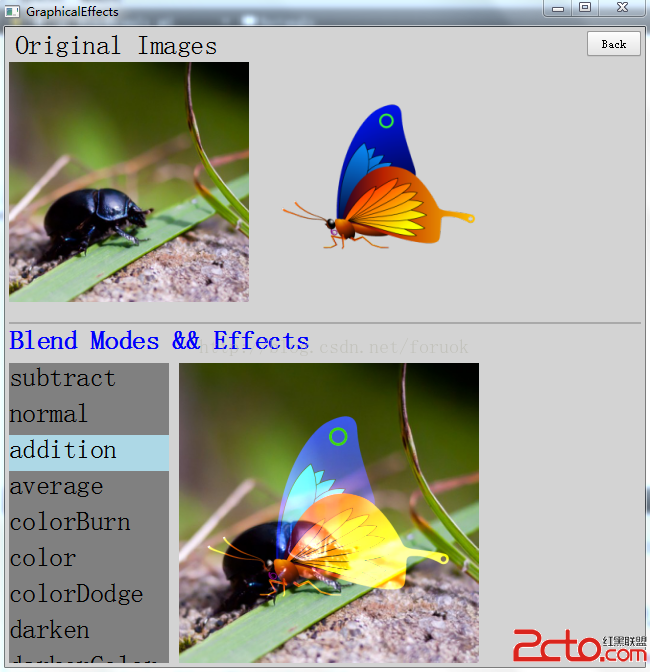
圖 1 混合示例效果圖
如圖 1 所示,界面分成兩部分,上方是原始圖片,下方是混合效果。
我使用一個 ListView 展示 Blend 支持的所有混合模式,在 ListView 右側顯示混合結果,當選中 ListView 內的條目時,動態改變 Blend 的 mode 屬性,Blend 就會重新混合兩個源 Item ,我們就能看到新的混合效果。
下面是 BlendExample.qml :
import QtQuick 2.2
import QtGraphicalEffects 1.0
import QtQuick.Controls 1.2

Rectangle {
    id: example;
    signal back();
    anchors.fill: parent;
    Text {
        id: origLabel;
        x: 10;
        y: 4;
        font.pointSize: 20;
        text: "Original Images";
    }

    Button {
        anchors.right: parent.right;
        anchors.top: parent.top;
        anchors.margins: 4;
        text: "Back";
        onClicked: example.back();
    }

    Row {
        id: origImages;
        width: 500;
        height: 260;
        anchors.left: parent.left;
        anchors.top: origLabel.bottom;
        anchors.margins: 4;
        spacing: 10;
        Image {
            source: "bug.jpg";
            sourceSize: Qt.size(240, 240);
            smooth: true;
        }
        Image {
            source: "butterfly.png";
            sourceSize: Qt.size(240, 240);
            smooth: true;
        }
    }
    Rectangle{
        anchors.left: parent.left;
        anchors.leftMargin: 4;
        anchors.right: parent.right;
        anchors.rightMargin: 4;
        anchors.top: origImages.bottom;
        height: 2;
        border.width: 1;
        border.color: "darkgray";
    }

    Text {
        id: blendLabel;
        anchors.top: origImages.bottom;
        anchors.margins: 4;
        anchors.left: parent.left;
        font.pointSize: 20;
        font.bold: true;
        text: "Blend Modes && Effects";
        color: "blue";
    }

    Rectangle {
        id: blendModes;
        anchors.left: parent.left;
        anchors.leftMargin: 4;
        anchors.top: blendLabel.bottom;
        anchors.topMargin: 10;
        anchors.bottom: parent.bottom;
        anchors.bottomMargin: 4;
        width: 160;
        color: "gray";

        ListView {
            anchors.fill: parent;
            clip: true;
            focus: true;
            delegate: Text {
                id: wrapper;
                text: name;
                width: parent.width;
                height: 36;
                font.pointSize: 20;
                Keys.onEnterPressed: {
                    blender.mode = name;
                    event.accepted = true;
                }

                Keys.onReturnPressed: {
                    blender.mode = name;
                    event.accepted = true;
                }

                MouseArea {
                    anchors.fill: parent;
                    onClicked: {
                        wrapper.ListView.view.currentIndex = index;
                        blender.mode = name;
                    }
                }
            }
            highlight: Rectangle {
                width: parent.width;
                color: "lightblue";
            }

            model: modesModel;
        }
    }

    Image {
        id: bug;
        anchors.top: blendLabel.bottom;
        anchors.topMargin: 10;
        anchors.left: blendModes.right;
        anchors.leftMargin: 10;
        source: "bug.jpg";
        sourceSize: Qt.size(300, 300);
        smooth: true;
        visible: false;
    }

    Image {
        id: bufferFly;
        source: "butterfly.png";
        sourceSize: Qt.size(300, 300);
        smooth: true;
        visible: false;
    }

    Blend {
        id: blender;
        source: bug;
        anchors.fill: bug;
        foregroundSource: bufferFly;
        mode: "subtract";
    }

    ListModel {
        id: modesModel;
        ListElement {
            name: "subtract";
        }
        ListElement {
            name: "normal";
        }
        ListElement {
            name: "addition";
        }
        ListElement {
            name: "average";
        }
        ListElement {
            name: "colorBurn";
        }
        ListElement {
            name: "color";
        }
        ListElement {
            name: "colorDodge";
        }
        ListElement {
            name: "darken";
        }
        ListElement {
            name: "darkerColor";
        }
        ListElement {
            name: "difference";
        }
        ListElement {
            name: "divide";
        }
        ListElement {
            name: "exclusion";
        }
        ListElement {
            name: "hardLight";
        }
        ListElement {
            name: "hue";
        }
        ListElement {
            name: "lighten";
        }
        ListElement {
            name: "lighterColor";
        }
        ListElement {
            name: "lightness";
        }
        ListElement {
            name: "multiply";
        }
        ListElement {
            name: "negation";
        }
        ListElement {
            name: "saturation";
        }
        ListElement {
            name: "screen";
        }
        ListElement {
            name: "softLight";
        }
    }
}圖 1 右上角有一個 “Back” 按鈕,點擊後會發射一個 back() 信號。 back 信號用來通知我們在“Qt Quick裡的圖形效果(1)”中提到的 main.qml :用戶要從當前示例返回了。 main.qml 收到 back 信號時,會銷毀動態創建的示例組件。
以後我們看到 ColorExample 等等針對某類效果設計的示例,都使用同一種策略。
混合模式列表使用 ListView 的展示,ListElement 只有一個角色——name,它的值就是混合模式的名字。當用戶點擊列表中的某個條目時, delegate 的 MouseArea 的 onClicked 信號處理器改變 Blend 元素的 mode 屬性。
好了,這次就到這裡,每種混合模式效果如何,還請運行示例實際看一下。下次我們會介紹顏色(Color)效果。
博客之星評選,點擊投我一票,謝謝。投過了也可以點哦,每天都可以投投一票。
--------
回顧一下我的Qt Quick系列文章: