本章內容:
Python Module(模塊),就是一個保存了Python代碼的文件。模塊能定義函數,類和變量。模塊裡也能包含可執行的代碼。
文件名就是模塊名加上後綴.py,在模塊內部,模塊名存儲在全局變量__name__中,是一個string,可以直接在module中通過__name__引用到module name。
模塊分為三種:
導入模塊:
import module
from module.xx.xx import xx
from module.xx.xx import xx as rename
from module.xx.xx import *
模塊路徑:
#獲取路徑
import sys
for i in sys.path:
    print(i)
#輸出結果:
S:\Myproject
S:\Python 3.5.1\python35.zip
S:\Python 3.5.1\DLLs
S:\Python 3.5.1\lib                  #存放標准庫
S:\Python 3.5.1
S:\Python 3.5.1\lib\site-packages    #存放第三方庫,擴充庫

#添加路徑
import sys
import os
pre_path = os.path.abspath('../')
sys.path.append(pre_path)
開源模塊:
#先安裝 gcc 編譯和 python 開發環境
yum install gcc
yum install python-devel
或
apt-get python-dev

#安裝方式(安裝成功後,模塊會自動安裝到 sys.path 中的某個目錄中)
yum
pip
apt-get
...
#進入python環境,導入模塊檢查是否安裝成功
time & datetime 模塊
時間相關的操作,時間有三種表示方式:
import time
print(time.time())                  #返回當前系統時間戳(1970年1月1日0時0分0秒開始)
print(time.ctime())                 #輸出Tue May 17 16:07:11 2016,當前系統時間
print(time.ctime(time.time() - 86400))        #將時間戳轉換為字符串格式
print(time.gmtime(time.time() - 86400))      #將時間戳轉換為struct_time格式
print(time.localtime(time.time() - 86400))     #將時間戳轉換為struct_time格式,返回本地時間
print(time.mktime(time.localtime()))         #與time.localtime()功能相反,將struct_time格式轉回成時間戳格式
#time.sleep(5)                    #sleep停頓
print(time.strftime("%Y-%m-%d %H:%M:%S",time.gmtime()))  #將struct_time格式轉成指定的字符串格式
print(time.strptime("2016-05-17","%Y-%m-%d"))   #將字符串格式轉換成struct_time格式


print("----------------------------------------------------------------")
import datetime
print(datetime.date.today())             #輸出格式 2016-05-17
print(datetime.date.fromtimestamp(time.time() - 86400)) #2016-05-16 將時間戳轉成日期格式
current_time = datetime.datetime.now()
print(current_time)                 #輸出2016-05-17 16:18:28.737561
print(current_time.timetuple())          #返回struct_time格式
print(current_time.replace(2008,8,8))         #輸出2008-08-08 16:21:34.798203,返回當前時間,但指定的值將被替換

str_to_date = datetime.datetime.strptime("28/7/08 11:20","%d/%m/%y %H:%M")  #將字符串轉換成日期格式
new_date = datetime.datetime.now() + datetime.timedelta(days=10)         #比現在加10天
new_date = datetime.datetime.now() + datetime.timedelta(days=-10)       #比現在減10天
new_date = datetime.datetime.now() + datetime.timedelta(hours=-10)       #比現在減10小時
new_date = datetime.datetime.now() + datetime.timedelta(seconds=120)      #比現在+120s
print(new_date)
random 模塊
隨機數:
import random

print(random.random())          #用於生成一個0到1的隨機符點數: 0 <= n < 1.0
print(random.randint(1,2))      #用於生成一個指定范圍內的整數
print(random.randrange(1,10))   #從指定范圍內,按指定基數遞增的集合中獲取一個隨機數
print(random.uniform(1,10))     #用於生成一個指定范圍內的隨機符點數
print(random.choice('nick'))    #從序列中獲取一個隨機元素
li = ['nick','jenny','car',]
random.shuffle(li)              #用於將一個列表中的元素打亂
print(li)
li_new = random.sample(li,2)    #從指定序列中隨機獲取指定長度的片斷(從li中隨機獲取2個元素,作為一個片斷返回)
print(li_new)
生成隨機驗證碼:
########## 隨機驗證碼 ############
import random
temp = ''
for i in range(4):
    num = random.randrange(0,4)
    if num == 0 or num == 3:        #一半的概率
        rad2 = random.randrange(0,10)
        temp = temp + str(rad2)
    else:
        rad1 = random.randrange(65,91)
        c1 = chr(rad1)
        temp = temp + c1
print(temp)
os模塊
os模塊用於提供系統級別的操作
os.getcwd()                 獲取當前工作目錄,即當前python腳本工作的目錄路徑
os.chdir("dirname")         改變當前腳本工作目錄;相當於shell下cd
os.curdir                   返回當前目錄: ('.')
os.pardir                   獲取當前目錄的父目錄字符串名:('..')
os.makedirs('dir1/dir2')    可生成多層遞歸目錄
os.removedirs('dirname1')   若目錄為空,則刪除,並遞歸到上一級目錄,如若也為空,則刪除,依此類推
os.mkdir('dirname')         生成單級目錄;相當於shell中mkdir dirname
os.rmdir('dirname')         刪除單級空目錄,若目錄不為空則無法刪除,報錯;相當於shell中rmdir dirname
os.listdir('dirname')       列出指定目錄下的所有文件和子目錄,包括隱藏文件,並以列表方式打印
os.remove()                 刪除一個文件
os.rename("oldname","new")  重命名文件/目錄
os.stat('path/filename')    獲取文件/目錄信息
os.sep                      操作系統特定的路徑分隔符,win下為"\\",Linux下為"/"
os.linesep                  當前平台使用的行終止符,win下為"\t\n",Linux下為"\n"
os.pathsep                  用於分割文件路徑的字符串
os.name                     字符串指示當前使用平台。win->'nt'; Linux->'posix'
os.system("bash command")   運行shell命令,直接顯示
os.environ                  獲取系統環境變量
os.path.abspath(path)       返回path規范化的絕對路徑
os.path.split(path)         將path分割成目錄和文件名二元組返回
os.path.dirname(path)       返回path的目錄。其實就是os.path.split(path)的第一個元素
os.path.basename(path)      返回path最後的文件名。如何path以/或\結尾,那麼就會返回空值。即os.path.split(path)的第二個元素
os.path.exists(path)        如果path存在,返回True;如果path不存在,返回False
os.path.isabs(path)         如果path是絕對路徑,返回True
os.path.isfile(path)        如果path是一個存在的文件,返回True。否則返回False
os.path.isdir(path)         如果path是一個存在的目錄,則返回True。否則返回False
os.path.join(path1[, path2[, ...]])  將多個路徑組合後返回,第一個絕對路徑之前的參數將被忽略
os.path.getatime(path)      返回path所指向的文件或者目錄的最後存取時間
os.path.getmtime(path)      返回path所指向的文件或者目錄的最後修改時間
sys模塊
用於提供對解釋器相關的操作
sys.argv           命令行參數List,第一個元素是程序本身路徑
sys.exit(n)        退出程序,正常退出時exit(0)
sys.version        獲取Python解釋程序的版本信息
sys.maxint         最大的Int值
sys.path           返回模塊的搜索路徑,初始化時使用PYTHONPATH環境變量的值
sys.platform       返回操作系統平台名稱
sys.stdin          輸入相關
sys.stdout         輸出相關
sys.stderror       錯誤相關


# 手寫進度條
import sys,time
for ii in range(101):
    sys.stdout.write('\r')  #每一次清空原行。
    sys.stdout.write("%s%%  |%s|"%(int(int(ii)/100*100),int(int(ii)/100*100) * '#'))     #一共次數除當前次數算進度
    sys.stdout.flush()      #強制刷新到屏幕
    time.sleep(0.05)
手寫進度條
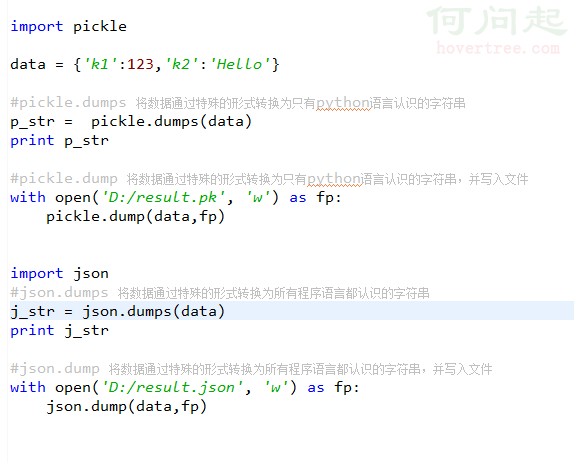
json & picle 模塊
用於序列化的兩個模塊
Json模塊提供了四個功能:dumps、dump、loads、load
pickle模塊提供了四個功能:dumps、dump、loads、load
dump()函數接受一個文件句柄和一個數據對象作為參數,把數據對象以特定的格式保存 到給定的文件中。當我們使用load()函數從文件中取出已保存的對象時,pickle知道如何恢復這些對象到它們本來的格式。
dumps()函數執行和dump() 函數相同的序列化。取代接受流對象並將序列化後的數據保存到磁盤文件,這個函數簡單的返回序列化的數據。
loads()函數執行和load() 函數一樣的反序列化。取代接受一個流對象並去文件讀取序列化後的數據,它接受包含序列化後的數據的str對象, 直接返回的對象。
##### json.loads 將字符串轉換為python基本數據類型 列表字典 #####
import json
l = '["nick","jenny","car"]'
print(l,type(l))
l = json.loads(l)
print(l,type(l))

l = '{"k1":"nick","k2:":"jenny"}'
print(l,type(l))
l = json.loads(l)
print(l,type(l))

##### json.dumps 將python的數據類型列表字典轉換為字符串 ######
import json
l = ["nick","jenny","car"]
print(l,type(l))
l = json.dumps(l)
print(l,type(l))

l = {"k1":"nick","k2:":"jenny"}
print(l,type(l))
l = json.dumps(l)
print(l,type(l))

##### json dump、load 文件相關 #####
import json
l = {"k1":"nick","k2:":"jenny"}
json.dump(l,open('db','w'))

ret = json.load(open('db'))
print(ret)
hashlib 模塊
用於加密相關的操作,代替了md5模塊和sha模塊,主要提供md5(), sha1(), sha224(), sha256(), sha384(), and sha512()算法
import hashlib

# ######## md5 ########
hash = hashlib.md5()
# help(hash.update)
hash.update(bytes('admin', encoding='utf-8'))
print(hash.hexdigest())
print(hash.digest())


######## sha1 ########

hash = hashlib.sha1()
hash.update(bytes('admin', encoding='utf-8'))
print(hash.hexdigest())

# ######## sha256 ########

hash = hashlib.sha256()
hash.update(bytes('admin', encoding='utf-8'))
print(hash.hexdigest())


# ######## sha384 ########

hash = hashlib.sha384()
hash.update(bytes('admin', encoding='utf-8'))
print(hash.hexdigest())

# ######## sha512 ########

hash = hashlib.sha512()
hash.update(bytes('admin', encoding='utf-8'))
print(hash.hexdigest())


##### 加鹽 ######
# ######## md5 ########

hash = hashlib.md5(bytes('898oaFs09f',encoding="utf-8"))
hash.update(bytes('admin',encoding="utf-8"))
print(hash.hexdigest())

#python內置還有一個 hmac 模塊,它內部對我們創建 key 和 內容 進行進一步的處理然後再加密

import hmac

h = hmac.new(bytes('898oaFs09f',encoding="utf-8"))
h.update(bytes('admin',encoding="utf-8"))
print(h.hexdigest())
XML 模塊
XML是實現不同語言或程序之間進行數據交換的協議,XML文件格式如下:
<data>
    <country name="Liechtenstein">
        <rank updated="yes">2</rank>
        <year>2023</year>
        <gdppc>141100</gdppc>
        <neighbor direction="E" name="Austria" />
        <neighbor direction="W" name="Switzerland" />
    </country>
    <country name="Singapore">
        <rank updated="yes">5</rank>
        <year>2026</year>
        <gdppc>59900</gdppc>
        <neighbor direction="N" name="Malaysia" />
    </country>
    <country name="Panama">
        <rank updated="yes">69</rank>
        <year>2026</year>
        <gdppc>13600</gdppc>
        <neighbor direction="W" name="Costa Rica" />
        <neighbor direction="E" name="Colombia" />
    </country>
</data>
1、解析XML
from xml.etree import ElementTree as ET

# 打開文件,讀取XML內容
str_xml = open('xo.xml', 'r').read()

# 將字符串解析成xml特殊對象,root代指xml文件的根節點
root = ET.XML(str_xml)
利用ElementTree.XML將字符串解析成xml對象
from xml.etree import ElementTree as ET

# 直接解析xml文件
tree = ET.parse("xo.xml")

# 獲取xml文件的根節點
root = tree.getroot()
利用ElementTree.parse將文件直接解析成xml對象
2、操作XML
XML格式類型是節點嵌套節點,對於每一個節點均有以下功能,以便對當前節點進行操作:
class Element:
    """An XML element.

    This class is the reference implementation of the Element interface.

    An element's length is its number of subelements.  That means if you
    want to check if an element is truly empty, you should check BOTH
    its length AND its text attribute.

    The element tag, attribute names, and attribute values can be either
    bytes or strings.

    *tag* is the element name.  *attrib* is an optional dictionary containing
    element attributes. *extra* are additional element attributes given as
    keyword arguments.

    Example form:
        <tag attrib>text<child/>...</tag>tail

    """

    當前節點的標簽名
    tag = None
    """The element's name."""

    當前節點的屬性

    attrib = None
    """Dictionary of the element's attributes."""

    當前節點的內容
    text = None
    """
    Text before first subelement. This is either a string or the value None.
    Note that if there is no text, this attribute may be either
    None or the empty string, depending on the parser.

    """

    tail = None
    """
    Text after this element's end tag, but before the next sibling element's
    start tag.  This is either a string or the value None.  Note that if there
    was no text, this attribute may be either None or an empty string,
    depending on the parser.

    """

    def __init__(self, tag, attrib={}, **extra):
        if not isinstance(attrib, dict):
            raise TypeError("attrib must be dict, not %s" % (
                attrib.__class__.__name__,))
        attrib = attrib.copy()
        attrib.update(extra)
        self.tag = tag
        self.attrib = attrib
        self._children = []

    def __repr__(self):
        return "<%s %r at %#x>" % (self.__class__.__name__, self.tag, id(self))

    def makeelement(self, tag, attrib):
        創建一個新節點
        """Create a new element with the same type.

        *tag* is a string containing the element name.
        *attrib* is a dictionary containing the element attributes.

        Do not call this method, use the SubElement factory function instead.

        """
        return self.__class__(tag, attrib)

    def copy(self):
        """Return copy of current element.

        This creates a shallow copy. Subelements will be shared with the
        original tree.

        """
        elem = self.makeelement(self.tag, self.attrib)
        elem.text = self.text
        elem.tail = self.tail
        elem[:] = self
        return elem

    def __len__(self):
        return len(self._children)

    def __bool__(self):
        warnings.warn(
            "The behavior of this method will change in future versions.  "
            "Use specific 'len(elem)' or 'elem is not None' test instead.",
            FutureWarning, stacklevel=2
            )
        return len(self._children) != 0 # emulate old behaviour, for now

    def __getitem__(self, index):
        return self._children[index]

    def __setitem__(self, index, element):
        # if isinstance(index, slice):
        #     for elt in element:
        #         assert iselement(elt)
        # else:
        #     assert iselement(element)
        self._children[index] = element

    def __delitem__(self, index):
        del self._children[index]

    def append(self, subelement):
        為當前節點追加一個子節點
        """Add *subelement* to the end of this element.

        The new element will appear in document order after the last existing
        subelement (or directly after the text, if it's the first subelement),
        but before the end tag for this element.

        """
        self._assert_is_element(subelement)
        self._children.append(subelement)

    def extend(self, elements):
        為當前節點擴展 n 個子節點
        """Append subelements from a sequence.

        *elements* is a sequence with zero or more elements.

        """
        for element in elements:
            self._assert_is_element(element)
        self._children.extend(elements)

    def insert(self, index, subelement):
        在當前節點的子節點中插入某個節點,即:為當前節點創建子節點,然後插入指定位置
        """Insert *subelement* at position *index*."""
        self._assert_is_element(subelement)
        self._children.insert(index, subelement)

    def _assert_is_element(self, e):
        # Need to refer to the actual Python implementation, not the
        # shadowing C implementation.
        if not isinstance(e, _Element_Py):
            raise TypeError('expected an Element, not %s' % type(e).__name__)

    def remove(self, subelement):
        在當前節點在子節點中刪除某個節點
        """Remove matching subelement.

        Unlike the find methods, this method compares elements based on
        identity, NOT ON tag value or contents.  To remove subelements by
        other means, the easiest way is to use a list comprehension to
        select what elements to keep, and then use slice assignment to update
        the parent element.

        ValueError is raised if a matching element could not be found.

        """
        # assert iselement(element)
        self._children.remove(subelement)

    def getchildren(self):
        獲取所有的子節點(廢棄)
        """(Deprecated) Return all subelements.

        Elements are returned in document order.

        """
        warnings.warn(
            "This method will be removed in future versions.  "
            "Use 'list(elem)' or iteration over elem instead.",
            DeprecationWarning, stacklevel=2
            )
        return self._children

    def find(self, path, namespaces=None):
        獲取第一個尋找到的子節點
        """Find first matching element by tag name or path.

        *path* is a string having either an element tag or an XPath,
        *namespaces* is an optional mapping from namespace prefix to full name.

        Return the first matching element, or None if no element was found.

        """
        return ElementPath.find(self, path, namespaces)

    def findtext(self, path, default=None, namespaces=None):
        獲取第一個尋找到的子節點的內容
        """Find text for first matching element by tag name or path.

        *path* is a string having either an element tag or an XPath,
        *default* is the value to return if the element was not found,
        *namespaces* is an optional mapping from namespace prefix to full name.

        Return text content of first matching element, or default value if
        none was found.  Note that if an element is found having no text
        content, the empty string is returned.

        """
        return ElementPath.findtext(self, path, default, namespaces)

    def findall(self, path, namespaces=None):
        獲取所有的子節點
        """Find all matching subelements by tag name or path.

        *path* is a string having either an element tag or an XPath,
        *namespaces* is an optional mapping from namespace prefix to full name.

        Returns list containing all matching elements in document order.

        """
        return ElementPath.findall(self, path, namespaces)

    def iterfind(self, path, namespaces=None):
        獲取所有指定的節點,並創建一個迭代器(可以被for循環)
        """Find all matching subelements by tag name or path.

        *path* is a string having either an element tag or an XPath,
        *namespaces* is an optional mapping from namespace prefix to full name.

        Return an iterable yielding all matching elements in document order.

        """
        return ElementPath.iterfind(self, path, namespaces)

    def clear(self):
        清空節點
        """Reset element.

        This function removes all subelements, clears all attributes, and sets
        the text and tail attributes to None.

        """
        self.attrib.clear()
        self._children = []
        self.text = self.tail = None

    def get(self, key, default=None):
        獲取當前節點的屬性值
        """Get element attribute.

        Equivalent to attrib.get, but some implementations may handle this a
        bit more efficiently.  *key* is what attribute to look for, and
        *default* is what to return if the attribute was not found.

        Returns a string containing the attribute value, or the default if
        attribute was not found.

        """
        return self.attrib.get(key, default)

    def set(self, key, value):
        為當前節點設置屬性值
        """Set element attribute.

        Equivalent to attrib[key] = value, but some implementations may handle
        this a bit more efficiently.  *key* is what attribute to set, and
        *value* is the attribute value to set it to.

        """
        self.attrib[key] = value

    def keys(self):
        獲取當前節點的所有屬性的 key

        """Get list of attribute names.

        Names are returned in an arbitrary order, just like an ordinary
        Python dict.  Equivalent to attrib.keys()

        """
        return self.attrib.keys()

    def items(self):
        獲取當前節點的所有屬性值,每個屬性都是一個鍵值對
        """Get element attributes as a sequence.

        The attributes are returned in arbitrary order.  Equivalent to
        attrib.items().

        Return a list of (name, value) tuples.

        """
        return self.attrib.items()

    def iter(self, tag=None):
        在當前節點的子孫中根據節點名稱尋找所有指定的節點,並返回一個迭代器(可以被for循環)。
        """Create tree iterator.

        The iterator loops over the element and all subelements in document
        order, returning all elements with a matching tag.

        If the tree structure is modified during iteration, new or removed
        elements may or may not be included.  To get a stable set, use the
        list() function on the iterator, and loop over the resulting list.

        *tag* is what tags to look for (default is to return all elements)

        Return an iterator containing all the matching elements.

        """
        if tag == "*":
            tag = None
        if tag is None or self.tag == tag:
            yield self
        for e in self._children:
            yield from e.iter(tag)

    # compatibility
    def getiterator(self, tag=None):
        # Change for a DeprecationWarning in 1.4
        warnings.warn(
            "This method will be removed in future versions.  "
            "Use 'elem.iter()' or 'list(elem.iter())' instead.",
            PendingDeprecationWarning, stacklevel=2
        )
        return list(self.iter(tag))

    def itertext(self):
        在當前節點的子孫中根據節點名稱尋找所有指定的節點的內容,並返回一個迭代器(可以被for循環)。
        """Create text iterator.

        The iterator loops over the element and all subelements in document
        order, returning all inner text.

        """
        tag = self.tag
        if not isinstance(tag, str) and tag is not None:
            return
        if self.text:
            yield self.text
        for e in self:
            yield from e.itertext()
            if e.tail:
                yield e.tail
源碼
由於 每個節點 都具有以上的方法,並且在上一步驟中解析時均得到了root(xml文件的根節點),so 可以利用以上方法進行操作xml文件。
a. 遍歷XML文檔的所有內容
from xml.etree import ElementTree as ET

############ 解析方式一 ############
"""
# 打開文件,讀取XML內容
str_xml = open('xo.xml', 'r').read()

# 將字符串解析成xml特殊對象,root代指xml文件的根節點
root = ET.XML(str_xml)
"""
############ 解析方式二 ############

# 直接解析xml文件
tree = ET.parse("xo.xml")

# 獲取xml文件的根節點
root = tree.getroot()


### 操作

# 頂層標簽
print(root.tag)


# 遍歷XML文檔的第二層
for child in root:
    # 第二層節點的標簽名稱和標簽屬性
    print(child.tag, child.attrib)
    # 遍歷XML文檔的第三層
    for i in child:
        # 第二層節點的標簽名稱和內容
        print(i.tag,i.text)
View Code
b、遍歷XML中指定的節點
from xml.etree import ElementTree as ET

############ 解析方式一 ############
"""
# 打開文件,讀取XML內容
str_xml = open('xo.xml', 'r').read()

# 將字符串解析成xml特殊對象,root代指xml文件的根節點
root = ET.XML(str_xml)
"""
############ 解析方式二 ############

# 直接解析xml文件
tree = ET.parse("xo.xml")

# 獲取xml文件的根節點
root = tree.getroot()


### 操作

# 頂層標簽
print(root.tag)


# 遍歷XML中所有的year節點
for node in root.iter('year'):
    # 節點的標簽名稱和內容
    print(node.tag, node.text)
View Code
c、修改節點內容
由於修改的節點時,均是在內存中進行,其不會影響文件中的內容。所以,如果想要修改,則需要重新將內存中的內容寫到文件。
from xml.etree import ElementTree as ET

############ 解析方式一 ############

# 打開文件,讀取XML內容
str_xml = open('xo.xml', 'r').read()

# 將字符串解析成xml特殊對象,root代指xml文件的根節點
root = ET.XML(str_xml)

############ 操作 ############

# 頂層標簽
print(root.tag)

# 循環所有的year節點
for node in root.iter('year'):
    # 將year節點中的內容自增一
    new_year = int(node.text) + 1
    node.text = str(new_year)

    # 設置屬性
    node.set('name', 'alex')
    node.set('age', '18')
    # 刪除屬性
    del node.attrib['name']


############ 保存文件 ############
tree = ET.ElementTree(root)
tree.write("newnew.xml", encoding='utf-8')
解析字符串方式,修改,保存
from xml.etree import ElementTree as ET

############ 解析方式二 ############

# 直接解析xml文件
tree = ET.parse("xo.xml")

# 獲取xml文件的根節點
root = tree.getroot()

############ 操作 ############

# 頂層標簽
print(root.tag)

# 循環所有的year節點
for node in root.iter('year'):
    # 將year節點中的內容自增一
    new_year = int(node.text) + 1
    node.text = str(new_year)

    # 設置屬性
    node.set('name', 'alex')
    node.set('age', '18')
    # 刪除屬性
    del node.attrib['name']


############ 保存文件 ############
tree.write("newnew.xml", encoding='utf-8')
解析文件方式,修改,保存
d、刪除節點
from xml.etree import ElementTree as ET

############ 解析字符串方式打開 ############

# 打開文件,讀取XML內容
str_xml = open('xo.xml', 'r').read()

# 將字符串解析成xml特殊對象,root代指xml文件的根節點
root = ET.XML(str_xml)

############ 操作 ############

# 頂層標簽
print(root.tag)

# 遍歷data下的所有country節點
for country in root.findall('country'):
    # 獲取每一個country節點下rank節點的內容
    rank = int(country.find('rank').text)

    if rank > 50:
        # 刪除指定country節點
        root.remove(country)

############ 保存文件 ############
tree = ET.ElementTree(root)
tree.write("newnew.xml", encoding='utf-8')
解析字符串方式打開,刪除,保存
from xml.etree import ElementTree as ET

############ 解析文件方式 ############

# 直接解析xml文件
tree = ET.parse("xo.xml")

# 獲取xml文件的根節點
root = tree.getroot()

############ 操作 ############

# 頂層標簽
print(root.tag)

# 遍歷data下的所有country節點
for country in root.findall('country'):
    # 獲取每一個country節點下rank節點的內容
    rank = int(country.find('rank').text)

    if rank > 50:
        # 刪除指定country節點
        root.remove(country)

############ 保存文件 ############
tree.write("newnew.xml", encoding='utf-8')
解析文件方式打開,刪除,保存
3、創建XML文檔
from xml.etree import ElementTree as ET


# 創建根節點
root = ET.Element("famliy")


# 創建節點大兒子
son1 = ET.Element('son', {'name': '兒1'})
# 創建小兒子
son2 = ET.Element('son', {"name": '兒2'})

# 在大兒子中創建兩個孫子
grandson1 = ET.Element('grandson', {'name': '兒11'})
grandson2 = ET.Element('grandson', {'name': '兒12'})
son1.append(grandson1)
son1.append(grandson2)


# 把兒子添加到根節點中
root.append(son1)
root.append(son1)

tree = ET.ElementTree(root)
tree.write('oooo.xml',encoding='utf-8', short_empty_elements=False)
創建方式(一)
from xml.etree import ElementTree as ET

# 創建根節點
root = ET.Element("famliy")


# 創建大兒子
# son1 = ET.Element('son', {'name': '兒1'})
son1 = root.makeelement('son', {'name': '兒1'})
# 創建小兒子
# son2 = ET.Element('son', {"name": '兒2'})
son2 = root.makeelement('son', {"name": '兒2'})

# 在大兒子中創建兩個孫子
# grandson1 = ET.Element('grandson', {'name': '兒11'})
grandson1 = son1.makeelement('grandson', {'name': '兒11'})
# grandson2 = ET.Element('grandson', {'name': '兒12'})
grandson2 = son1.makeelement('grandson', {'name': '兒12'})

son1.append(grandson1)
son1.append(grandson2)


# 把兒子添加到根節點中
root.append(son1)
root.append(son1)

tree = ET.ElementTree(root)
tree.write('oooo.xml',encoding='utf-8', short_empty_elements=False)
創建方式(二)
from xml.etree import ElementTree as ET


# 創建根節點
root = ET.Element("famliy")


# 創建節點大兒子
son1 = ET.SubElement(root, "son", attrib={'name': '兒1'})
# 創建小兒子
son2 = ET.SubElement(root, "son", attrib={"name": "兒2"})

# 在大兒子中創建一個孫子
grandson1 = ET.SubElement(son1, "age", attrib={'name': '兒11'})
grandson1.text = '孫子'


et = ET.ElementTree(root)  #生成文檔對象
et.write("test.xml", encoding="utf-8", xml_declaration=True, short_empty_elements=False)
創建方式(三)
由於原生保存的XML時默認無縮進,如果想要設置縮進的話, 需要修改保存方式:
from xml.etree import ElementTree as ET
from xml.dom import minidom


def prettify(elem):
    """將節點轉換成字符串,並添加縮進。
    """
    rough_string = ET.tostring(elem, 'utf-8')
    reparsed = minidom.parseString(rough_string)
    return reparsed.toprettyxml(indent="\t")

# 創建根節點
root = ET.Element("famliy")


# 創建大兒子
# son1 = ET.Element('son', {'name': '兒1'})
son1 = root.makeelement('son', {'name': '兒1'})
# 創建小兒子
# son2 = ET.Element('son', {"name": '兒2'})
son2 = root.makeelement('son', {"name": '兒2'})

# 在大兒子中創建兩個孫子
# grandson1 = ET.Element('grandson', {'name': '兒11'})
grandson1 = son1.makeelement('grandson', {'name': '兒11'})
# grandson2 = ET.Element('grandson', {'name': '兒12'})
grandson2 = son1.makeelement('grandson', {'name': '兒12'})

son1.append(grandson1)
son1.append(grandson2)


# 把兒子添加到根節點中
root.append(son1)
root.append(son1)


raw_str = prettify(root)

f = open("xxxoo.xml",'w',encoding='utf-8')
f.write(raw_str)
f.close()
寫入縮進
4、命名空間
from xml.etree import ElementTree as ET

ET.register_namespace('com',"http://www.company.com") #some name

# build a tree structure
root = ET.Element("{http://www.company.com}STUFF")
body = ET.SubElement(root, "{http://www.company.com}MORE_STUFF", attrib={"{http://www.company.com}hhh": "123"})
body.text = "STUFF EVERYWHERE!"

# wrap it in an ElementTree instance, and save as XML
tree = ET.ElementTree(root)

tree.write("page.xml",
           xml_declaration=True,
           encoding='utf-8',
           method="xml")
命名空間
requests 模塊
Python標准庫中提供了:urllib等模塊以供Http請求,但是,它的 API 太渣了。它是為另一個時代、另一個互聯網所創建的。它需要巨量的工作,甚至包括各種方法覆蓋,來完成最簡單的任務。
import urllib.request

f=urllib.request.urlopen('http://www.webxml.com.cn//webservices/qqOnlineWebService.asmx/qqCheckOnline?qqCode=424662508')
result = f.read().decode('utf-8')
發送GET請求
import urllib.request

req = urllib.request.Request('http://www.example.com/')
req.add_header('Referer', 'http://www.python.org/')
r = urllib.request.urlopen(req)

result = f.read().decode('utf-8')
發送攜帶請求頭的GET請求
注:更多見Python官方文檔:https://docs.python.org/3.5/library/urllib.request.html#module-urllib.request
Requests 是使用 Apache2 Licensed 許可證的 基於Python開發的HTTP 庫,其在Python內置模塊的基礎上進行了高度的封裝,從而使得Pythoner進行網絡請求時,變得美好了許多,使用Requests可以輕而易舉的完成浏覽器可有的任何操作。
1、安裝模塊
pip3 install requests
2、使用模塊
# 1、無參數實例

import requests

ret = requests.get('https://github.com/timeline.json')

print(ret.url)
print(ret.text)


# 2、有參數實例

import requests

payload = {'key1': 'value1', 'key2': 'value2'}
ret = requests.get("http://httpbin.org/get", params=payload)

print(ret.url)
print(ret.text)
GET請求
# 1、基本POST實例

import requests

payload = {'key1': 'value1', 'key2': 'value2'}
ret = requests.post("http://httpbin.org/post", data=payload)

print(ret.text)


# 2、發送請求頭和數據實例

import requests
import json

url = 'https://api.github.com/some/endpoint'
payload = {'some': 'data'}
headers = {'content-type': 'application/json'}

ret = requests.post(url, data=json.dumps(payload), headers=headers)

print(ret.text)
print(ret.cookies)
POST請求
requests.get(url, params=None, **kwargs)
requests.post(url, data=None, json=None, **kwargs)
requests.put(url, data=None, **kwargs)
requests.head(url, **kwargs)
requests.delete(url, **kwargs)
requests.patch(url, data=None, **kwargs)
requests.options(url, **kwargs)

# 以上方法均是在此方法的基礎上構建
requests.request(method, url, **kwargs)
其他請求
更多requests模塊相關的文檔見:http://cn.python-requests.org/zh_CN/latest/
3、Http請求和XML實例
實例:檢測QQ賬號是否在線
import urllib
import requests
from xml.etree import ElementTree as ET

# 使用內置模塊urllib發送HTTP請求,或者XML格式內容
"""
f = urllib.request.urlopen('http://www.webxml.com.cn//webservices/qqOnlineWebService.asmx/qqCheckOnline?qqCode=630571017')
result = f.read().decode('utf-8')
"""


# 使用第三方模塊requests發送HTTP請求,或者XML格式內容
r = requests.get('http://www.webxml.com.cn//webservices/qqOnlineWebService.asmx/qqCheckOnline?qqCode=424662508')
result = r.text

# 解析XML格式內容
node = ET.XML(result)

# 獲取內容
if node.text == "Y":
    print("在線")
else:
    print("離線")
檢測QQ賬號是否在線
實例:查看火車停靠信息
import urllib
import requests
from xml.etree import ElementTree as ET

# 使用內置模塊urllib發送HTTP請求,或者XML格式內容
"""
f = urllib.request.urlopen('http://www.webxml.com.cn/WebServices/TrainTimeWebService.asmx/getDetailInfoByTrainCode?TrainCode=G666&UserID=')
result = f.read().decode('utf-8')
"""

# 使用第三方模塊requests發送HTTP請求,或者XML格式內容
r = requests.get('http://www.webxml.com.cn/WebServices/TrainTimeWebService.asmx/getDetailInfoByTrainCode?TrainCode=G666&UserID=')
result = r.text

# 解析XML格式內容
root = ET.XML(result)
for node in root.iter('TrainDetailInfo'):
    print(node.find('TrainStation').text,node.find('StartTime').text,node.tag,node.attrib)
查看火車停靠信息
實例:查看天氣信息
import requests

response = requests.get("http://www.weather.com.cn/data/sk/101010100.html")
response.encoding = "utf-8"
result = response.text
print(result)
查看天氣信息
configparser 模塊
configparser用於處理特定格式的文件,其本質上是利用open來操作文件。
#指定格式

#注釋
;注釋2

[nick]           #節點
age = 18         #值
gender = ning    #值
dearm = girl     #值

[jenny]          #節點
age = 21         #值
gender = jia     #值
1、獲取所有節點
import configparser

con = configparser.ConfigParser()
con.read("ini",encoding="utf-8")

result = con.sections()
print(result)
2、獲取指定節點下所有的鍵值對
import configparser

con = configparser.ConfigParser()
con.read("ini",encoding="utf-8")

result = con.items("nick")
print(result)
3、獲取指定節點下所有的鍵
import configparser

con = configparser.ConfigParser()
con.read("ini",encoding="utf-8")

ret = con.options("nick")
print(ret)
4、獲取指定節點下指定key的值
import configparser

con = configparser.ConfigParser()
con.read("ini",encoding="utf-8")

v = con.get("nick","age")
v = con.get("nick","gender")
v = con.get("jenny","age")
v = con.get("jenny","gender")
print(v)
5、檢查、刪除、添加節點
#檢查、刪除、添加節點
import configparser

con = configparser.ConfigParser()
con.read("ini",encoding="utf-8")

#檢查
has_sec = con.has_section("nick")
print(has_sec)

#添加節點
con.add_section("car")
con.write(open("ini","w"))

#刪除節點
con.remove_section("car")
con.write(open("ini","w"))
6、檢查、刪除、設置指定組內的鍵值對
#檢查、刪除、設置指定組內的鍵值對
import configparser

con = configparser.ConfigParser()
con.read("ini",encoding="utf-8")

#檢查
hac_opt = con.has_option("nick","age")
print(hac_opt)

#刪除
con.remove_option("nick","dearm")
con.write(open("ini","w"))

#設置
con.set("nick","dearm","girl")
con.write(open("ini","w"))
logging 模塊
用於便捷記錄日志且線程安全的模塊
1、單日志文件
import logging

logging.basicConfig(filename="log.log",
                    format="%(asctime)s - %(name)s - %(levelname)s - %(module)s: %(message)s",
                    datefmt="%Y-%m-%d %H:%M:%S %p",
                    level=logging.INFO)

logging.critical("critical")
logging.fatal("fatal")
logging.error("error")
logging.warn("warn")
logging.warning("warning")
logging.info("info")
logging.debug("debug")
logging.log(8,"log")
日志等級
"""
CRITICAL = 50
FATAL = CRITICAL
ERROR = 40
WARNING = 30
WARN = WARNING
INFO = 20
DEBUG = 10
NOTSET = 0
"""
注:只有【當前寫等級】大於【日志等級】時,日志文件才被記錄。

2、多文件日志
對於上述記錄日志的功能,只能將日志記錄在單文件中,如果想要設置多個日志文件,logging.basicConfig將無法完成,需要自定義文件和日志操作對象。
# 定義文件
file_1_1 = logging.FileHandler('l1_1.log', 'a')
fmt = logging.Formatter(fmt="%(asctime)s - %(name)s - %(levelname)s -%(module)s:  %(message)s")
file_1_1.setFormatter(fmt)

file_1_2 = logging.FileHandler('l1_2.log', 'a')
fmt = logging.Formatter()
file_1_2.setFormatter(fmt)

# 定義日志
logger1 = logging.Logger('s1', level=logging.ERROR)
logger1.addHandler(file_1_1)
logger1.addHandler(file_1_2)


# 寫日志
logger1.critical('1111')
日志(一)
# 定義文件
file_2_1 = logging.FileHandler('l2_1.log', 'a')
fmt = logging.Formatter()
file_2_1.setFormatter(fmt)

# 定義日志
logger2 = logging.Logger('s2', level=logging.INFO)
logger2.addHandler(file_2_1)
日志(二)
如上述創建的兩個日志對象
shutil 模塊
高級的 文件、文件夾、壓縮包 處理模塊
shutil.copyfileobj(fsrc, fdst[, length])
將文件內容拷貝到另一個文件中
import shutil

shutil.copyfileobj(open('old.xml','r'), open('new.xml', 'w'))
shutil.copyfile(src, dst)
拷貝文件
shutil.copyfile('f1.log', 'f2.log')
shutil.copymode(src, dst)
僅拷貝權限。內容、組、用戶均不變
shutil.copymode('f1.log', 'f2.log')
shutil.copystat(src, dst)
拷貝狀態的信息,包括:mode bits, atime, mtime, flags
shutil.copystat('f1.log', 'f2.log')
shutil.copy(src, dst)
拷貝文件和權限
import shutil

shutil.copy('f1.log', 'f2.log')
shutil.copy2(src, dst)
拷貝文件和狀態信息
import shutil

shutil.copy2('f1.log', 'f2.log')
shutil.ignore_patterns(*patterns)
shutil.copytree(src, dst, symlinks=False, ignore=None)
遞歸的去拷貝文件夾
import shutil

shutil.copytree('folder1', 'folder2', ignore=shutil.ignore_patterns('*.pyc', 'tmp*'))
shutil.rmtree(path[, ignore_errors[, onerror]])
遞歸的去刪除文件
import shutil

shutil.rmtree('folder1')
shutil.move(src, dst)
遞歸的去移動文件,它類似mv命令,其實就是重命名。
import shutil

shutil.move('folder1', 'folder3')
shutil.make_archive(base_name, format,...)
創建壓縮包並返回文件路徑,例如:zip、tar
創建壓縮包並返回文件路徑,例如:zip、tar
#將 /Users/wupeiqi/Downloads/test 下的文件打包放置當前程序目錄
import shutil
ret = shutil.make_archive("wwwwwwwwww", 'gztar', root_dir='/Users/wupeiqi/Downloads/test')


#將 /Users/wupeiqi/Downloads/test 下的文件打包放置 /Users/wupeiqi/目錄
import shutil
ret = shutil.make_archive("/Users/wupeiqi/wwwwwwwwww", 'gztar', root_dir='/Users/wupeiqi/Downloads/test')
shutil 對壓縮包的處理是調用 ZipFile 和 TarFile 兩個模塊來進行的,詳細:
import zipfile

z = zipfile.ZipFile("ini.zip","w")
z.write("ini")
z.write("pip")
z.close()
#壓縮包裡追加內容(打開模式變為a)
#z = zipfile.ZipFile("ini.zip","a")
#z.write("db")
z.close()

#解壓
z = zipfile.ZipFile("ini.zip","r")
z.extractall()    #解壓全部
# z.extract("pip")    #解壓指定文件
z.close()
zipfile解壓縮
import tarfile

#壓縮
tar = tarfile.open("ini.zip","w")
tar.add("S:\stud\ini",arcname="iiini.txt")    #路徑、重命名
tar.add("./pip",arcname="pip.log")
tar.close()

#解壓
tar = tarfile.open("ini.zip","r")
tar.extractall()    #可設置解壓地址
tar.close()
tarfile解壓縮
subprocess
可以執行shell命令的相關模塊和函數有:
import commands

result = commands.getoutput('cmd')
result = commands.getstatus('cmd')
result = commands.getstatusoutput('cmd')
commands
以上執行shell命令的相關的模塊和函數的功能均在 subprocess 模塊中實現,並提供了更豐富的功能。
call
執行命令,返回狀態碼
ret = subprocess.call(["ls", "-l"], shell=False)
ret = subprocess.call("ls -l", shell=True)
check_call
執行命令,如果執行狀態碼是 0 ,則返回0,否則拋異常
subprocess.check_call(["ls", "-l"])
subprocess.check_call("exit 1", shell=True)
check_output
執行命令,如果狀態碼是 0 ,則返回執行結果,否則拋異常
subprocess.check_output(["echo", "Hello World!"])
subprocess.check_output("exit 1", shell=True)
subprocess.Popen(...)
用於執行復雜的系統命令
參數:
import subprocess
ret1 = subprocess.Popen(["mkdir","t1"])
ret2 = subprocess.Popen("mkdir t2", shell=True)
執行普通命令
終端輸入的命令分為兩種:
import subprocess

obj = subprocess.Popen("mkdir t3", shell=True, cwd='/home/dev',)
View Code
import subprocess

obj = subprocess.Popen(["python"], stdin=subprocess.PIPE, stdout=subprocess.PIPE, stderr=subprocess.PIPE, universal_newlines=True)
obj.stdin.write("print(1)\n")
obj.stdin.write("print(2)")
obj.stdin.close()

cmd_out = obj.stdout.read()
obj.stdout.close()
cmd_error = obj.stderr.read()
obj.stderr.close()

print(cmd_out)
print(cmd_error)
View Code
import subprocess

obj = subprocess.Popen(["python"], stdin=subprocess.PIPE, stdout=subprocess.PIPE, stderr=subprocess.PIPE, universal_newlines=True)
obj.stdin.write("print(1)\n")
obj.stdin.write("print(2)")

out_error_list = obj.communicate()
print(out_error_list)
View Code
import subprocess

obj = subprocess.Popen(["python"], stdin=subprocess.PIPE, stdout=subprocess.PIPE, stderr=subprocess.PIPE, universal_newlines=True)
out_error_list = obj.communicate('print("hello")')
print(out_error_list)
View Code