Qt對線程提供了支持,基本形式有獨立於平台的線程類、線程安全方式的事件傳遞和一個全局Qt庫互斥量允許你可以從不同的線程調用Qt方法。
每個程序啟動後就會擁有一個線程。該線程稱為”主線程”(在Qt應用程序中也叫”GUI線程”)。Qt GUI必須運行在此線程上。所有的圖形元件和幾個相關的類,如QPixmap,不能工作於非主線程中。非主線程通常稱為”工作者線程”,因為它主要處理從主線程中卸下的一些工作。
有時候,你需要的不僅僅是在另一線程的上下文中運行一個函數。您可能需要有一個生存在另一個線程中的對象來為 GUI線程提供服務。也許你想在另一個始終運行的線程中來輪詢硬件端口並在有關注的事情發生時發送信號到GUI線程。Qt為開發多線程應用程序提供了多種 不同的解決方案。解決方案的選擇依賴於新線程的目的以及線程的生命周期。
環境
Ubuntu 12.04 64bit
Qt 4.8.1
首先來看一個單線程的例子。
用Qt Creator創建一個Qt Gui工程,只有一個mainwindow類,代碼如下:
mainwindow.h
#ifndef MAINWINDOW_H #define MAINWINDOW_H #include#include #include #include class MainWindow : public QMainWindow { Q_OBJECT private: QPushButton *calButton; QPushButton *hiButton; QLabel *mLabel; public: MainWindow(QWidget *parent = 0); ~MainWindow(); private slots: void slotGetPi(); void slotSayHi(); }; #endif // MAINWINDOW_H
#include mainwindow.h

MainWindow::MainWindow(QWidget *parent)
    : QMainWindow(parent)
{
    QHBoxLayout *mainLayout=new QHBoxLayout();

    calButton = new QPushButton(this);
    calButton->setText(GetPi);

    hiButton = new QPushButton(this);
    hiButton->setText(Hi);

    mLabel = new QLabel();
    mLabel->setText(Bitch);

    mainLayout->setSpacing(10);
    mainLayout->addWidget(calButton);
    mainLayout->addWidget(hiButton);
    mainLayout->addWidget(mLabel);

    QWidget *centreWidget=new QWidget(this);
    centreWidget->setLayout(mainLayout);
    this->setCentralWidget(centreWidget);

    this->connect(calButton,SIGNAL(released()),this, SLOT(slotGetPi()));
    this->connect(hiButton,SIGNAL(released()),this, SLOT(slotSayHi()));
}

MainWindow::~MainWindow()
{

}
void MainWindow::slotGetPi()

{
    int time = 1000000000;
    float result=0;
    for(int i=1;i<=time;i++)
    {
        double value=4.0/(2*i-1);
        if (i % 2 == 1) result+=value;
        else result-=value;
    }
    mLabel->setText(QString::number(result));
}

void MainWindow::slotSayHi()
{
    mLabel->setText(Hei,gay~);
}
#include#include mainwindow.h int main(int argc, char *argv[]) { QApplication a(argc, argv); MainWindow w; w.show(); return a.exec(); }
預記的運行效果是點擊button之後就可以改變label的值,但實際情況是...

因為我在點擊GetPi這個Button的時候,程序就開始計算,當然是在主線程中,這時候整個界面就阻塞了,Hi Button 設置關閉窗口操作都無法完成,這時就不得不用線程了。
用線程改寫一下。
創建一個ComputeThread類,繼承自QThread。
computethread.h
#ifndef COMPUTETHREAD_H #define COMPUTETHREAD_H #include#include #include class ComputeThread : public QThread { Q_OBJECT private: void run(); public: explicit ComputeThread(QObject *parent = 0); signals: void computeFinish(double result); public slots: }; #endif // COMPUTETHREAD_H
#include computethread.h

ComputeThread::ComputeThread(QObject *parent) :
    QThread(parent)
{
}


void ComputeThread::run()
{
    qDebug()<currentThreadId()<<:Begin computing!<computeFinish(result);
}
mainwindow中添加一個ComputeThread對象和一個槽。
private:
    ComputeThread *computePiThread;

private slots:
    void slotShowResult(double result);
#include mainwindow.h

MainWindow::MainWindow(QWidget *parent)
    : QMainWindow(parent)
{
    QVBoxLayout *mainLayout=new QVBoxLayout();

    calButton = new QPushButton(this);
    calButton->setText(GetPi);

    hiButton = new QPushButton(this);
    hiButton->setText(Hi);

    mLabel = new QLabel();
    mLabel->setText(Bitch);

    computePiThread = new ComputeThread;

    mainLayout->setSpacing(10);
    mainLayout->addWidget(calButton);
    mainLayout->addWidget(hiButton);
    mainLayout->addWidget(mLabel);

    QWidget *centreWidget=new QWidget(this);
    centreWidget->setLayout(mainLayout);
    this->setCentralWidget(centreWidget);

    this->connect(computePiThread,SIGNAL(computeFinish(double)),this, SLOT(slotShowResult(double)));
    this->connect(hiButton,SIGNAL(released()),this, SLOT(slotSayHi()));
    this->connect(calButton,SIGNAL(released()),this, SLOT(slotGetPi()));

}

MainWindow::~MainWindow()
{
    computePiThread->terminate();
    computePiThread->wait();
    delete computePiThread;
    computePiThread = 0;
}
void MainWindow::slotGetPi()

{
    computePiThread->start();
}


void MainWindow::slotSayHi()
{
    mLabel->setText(Hei,gay~);
}

void MainWindow::slotShowResult(double result)
{
    mLabel->setText(QString::number(result));
}

修改之後計算就在子線程中進行,主線程就沒有卡死的情況了。
之前有用QT作為框架來學習OpenGL,參考這裡。
當是有個問題沒有解決,就是當想要GLWidget中的圖形不斷的進行變換的話,就要在主線程中加一個死循環,這樣做只是權宜之記,最好的解決方法就是用多線程。
創建一個GLThread類專門用來渲染:
glthread.h
#ifndef GLTHREAD_H #define GLTHREAD_H #include#include #include #include class GLWidget; class GLThread : public QThread { public: GLThread(GLWidget *glWidget); void resizeViewport(const QSize &size); void run(); void stop(); private: bool doRendering; bool doResize; int w; int h; GLWidget *glw; }; #endif // GLTHREAD_H
glthread.cpp
#include glthread.h
#include glwidget.h

GLThread::GLThread(GLWidget *gl)
    : QThread(), glw(gl)
{
    doRendering = true;
    doResize = false;
}

void GLThread::stop()
{
    doRendering = false;
}

void GLThread::resizeViewport(const QSize &size)
{
    w = size.width();
    h = size.height();
    doResize = true;
}

void GLThread::run()
{

    glw->makeCurrent();
    this->rotAngle = 0.0;
    glClearColor(0.0f, 0.0f, 0.0f, 0.0f);		// This Will Clear The Background Color To Black
    glClearDepth(1.0);				// Enables Clearing Of The Depth Buffer
    glDepthFunc(GL_LESS);				// The Type Of Depth Test To Do
    glEnable(GL_DEPTH_TEST);			// Enables Depth Testing
    glShadeModel(GL_SMOOTH);			// Enables Smooth Color Shading

    glMatrixMode(GL_PROJECTION);
    glLoadIdentity();				// Reset The Projection Matrix

    gluPerspective(45.0f,(GLfloat)w/(GLfloat)h,0.1f,100.0f);	// Calculate The Aspect Ratio Of The Window

    glMatrixMode(GL_MODELVIEW);

    while (doRendering)
    {
        rotAngle +=5;
        if(rotAngle>=360)
            rotAngle = 0;
        if (doResize)
        {
            glViewport(0, 0, w, h);
            doResize = false;

            glMatrixMode(GL_PROJECTION);
            glLoadIdentity();

            gluPerspective(45.0f,(GLfloat)w/(GLfloat)h,0.1f,100.0f);
            glMatrixMode(GL_MODELVIEW);
        }
        glClear(GL_COLOR_BUFFER_BIT | GL_DEPTH_BUFFER_BIT);		// Clear The Screen And The Depth Buffer
        glLoadIdentity();				// Reset The View

        glTranslatef(-1.5f,0.0f,-6.0f);		// Move Left 1.5 Units And Into The Screen 6.0

        glRotatef(rotAngle,0.0f,0.0f,1.0f);		// Rotate The Triangle On The Y axis
        // draw a triangle (in smooth coloring mode)
        glBegin(GL_POLYGON);				// start drawing a polygon
        glColor3f(1.0f,0.0f,0.0f);			// Set The Color To Red
        glVertex3f( 0.0f, 1.0f, 0.0f);		// Top
        glColor3f(0.0f,1.0f,0.0f);			// Set The Color To Green
        glVertex3f( 1.0f,-1.0f, 0.0f);		// Bottom Right
        glColor3f(0.0f,0.0f,1.0f);			// Set The Color To Blue
        glVertex3f(-1.0f,-1.0f, 0.0f);		// Bottom Left
        glEnd();					// we're done with the polygon (smooth color interpolation)
        glw->swapBuffers();
        msleep(50);
        qDebug(rendering);
    }
}
GLWidget也要進行相應的修改:
glwidget.h
#ifndef GLWIDGET_H #define GLWIDGET_H #include#include glthread.h #include class GLWidget : public QGLWidget { public: GLWidget(QWidget *parent); void startRendering(); void stopRendering(); protected: void resizeEvent(QResizeEvent *evt); void paintEvent(QPaintEvent *); void closeEvent(QCloseEvent *evt); GLThread glt; }; #endif // GLWIDGET_H
#include glwidget.h

GLWidget::GLWidget(QWidget *parent)
       : glt(this)
   {
       setAutoBufferSwap(false);
       resize(320, 240);
   }

   void GLWidget::startRendering()
   {
        glt.start();
   }

   void GLWidget::stopRendering()
   {
       glt.stop();
       glt.wait();
   }

   void GLWidget::resizeEvent(QResizeEvent *evt)
   {
       glt.resizeViewport(evt->size());
   }

   void GLWidget::paintEvent(QPaintEvent *)
   {
       // Handled by the GLThread.
   }

   void GLWidget::closeEvent(QCloseEvent *evt)
   {
       stopRendering();
       QGLWidget::closeEvent(evt);
   }
這裡還涉及到數據的訪問。最開始的例子用的是信號槽的方式進行訪問,而這裡直接使用的指針進行訪問。
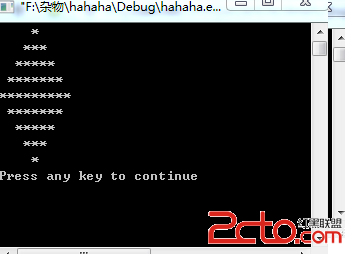
渲染結果:一個不斷旋轉的正方形,(假裝看見了...)

待研究
待研究