Create a libraries folder underneath your project main directory. For example, if your project is OpenCVExamples, you would create a OpenCVExamples/libraries folder.
Go to the location where you have SDK OpenCV-2.4.8-android-sdksdk here you will find the java folder, rename it to opencv.
Now copy the complete opencv directory from the SDK into the libraries folder you just created.
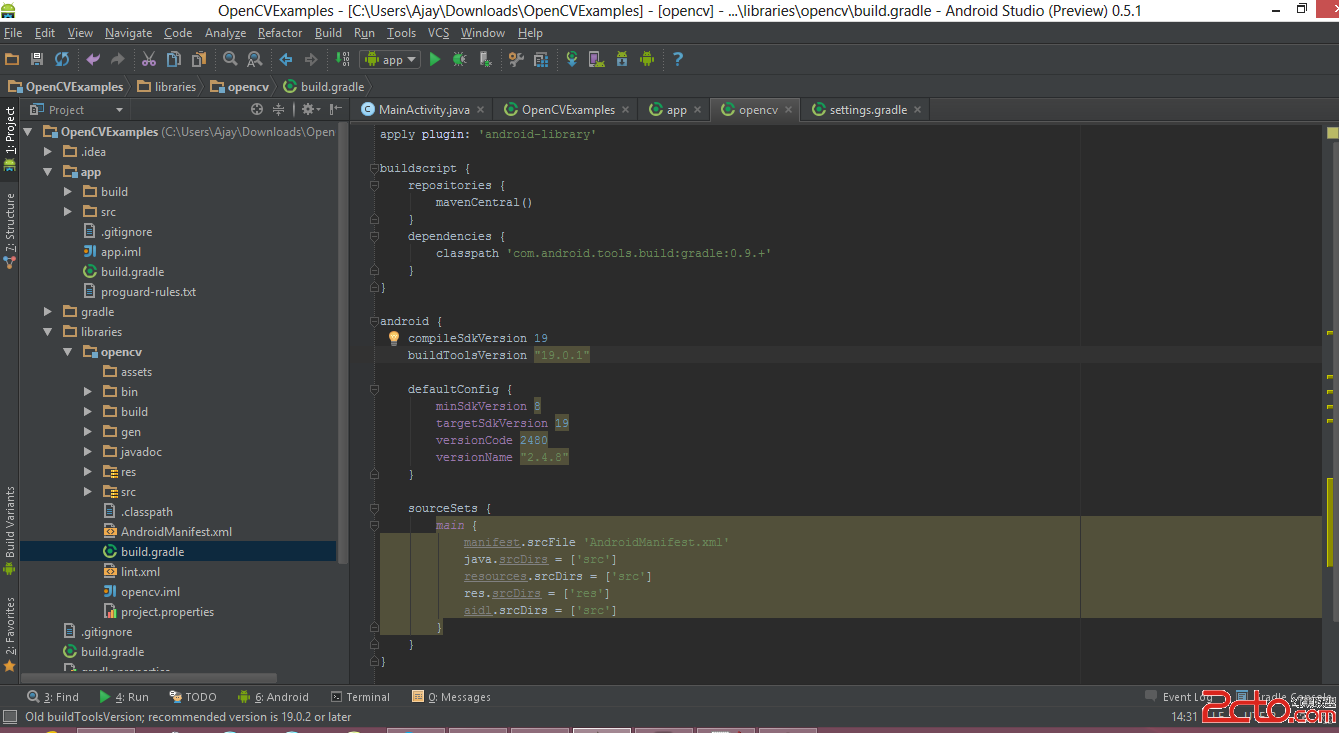
Now create a build.gradle file in the opencv directory with the following contents
apply plugin: 'android-library'

buildscript {
    repositories {
        mavenCentral()
    }
    dependencies {
        classpath 'com.android.tools.build:gradle:0.9.+'
    }
}

android {
    compileSdkVersion 19
    buildToolsVersion 19.0.1

    defaultConfig {
        minSdkVersion 8
        targetSdkVersion 19
        versionCode 2480
        versionName 2.4.8
    }

    sourceSets {
        main {
            manifest.srcFile 'AndroidManifest.xml'
            java.srcDirs = ['src']
            resources.srcDirs = ['src']
            res.srcDirs = ['res']
            aidl.srcDirs = ['src']
        }
    }
}
Edit your settings.gradle file in your application’s main directory and add this line:
include ':libraries:opencv'
Sync your project with Gradle and it should looks like this

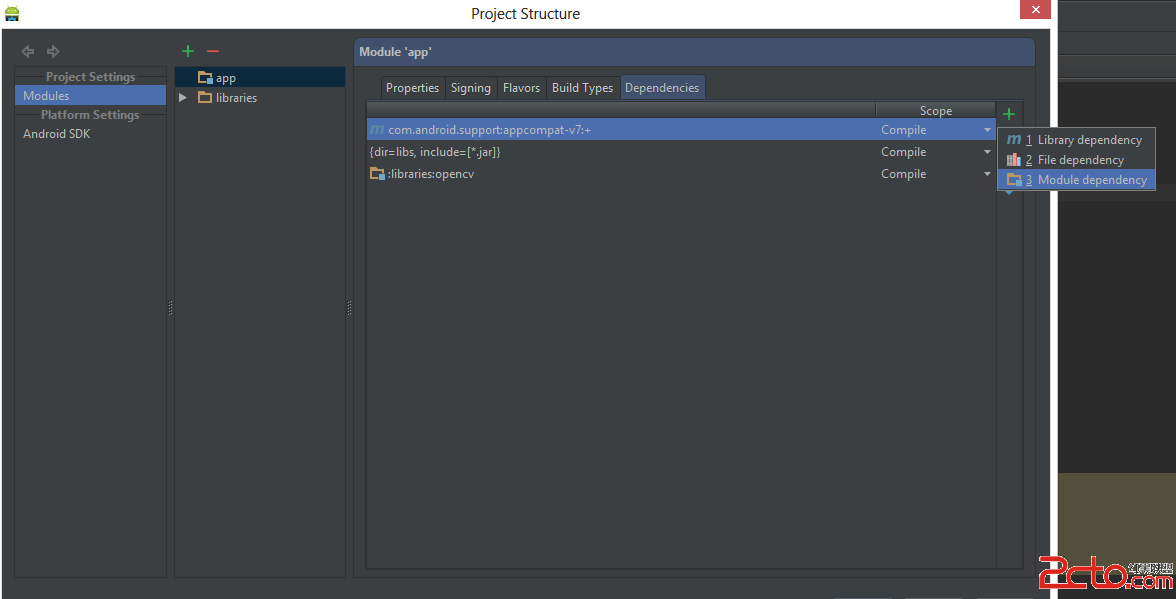
Right click on your project then click on the Open Module Settings then Choose Modules from the left-hand list, click on your application’s module, click on the Dependencies tab, and click on the + button to add a new module dependency.

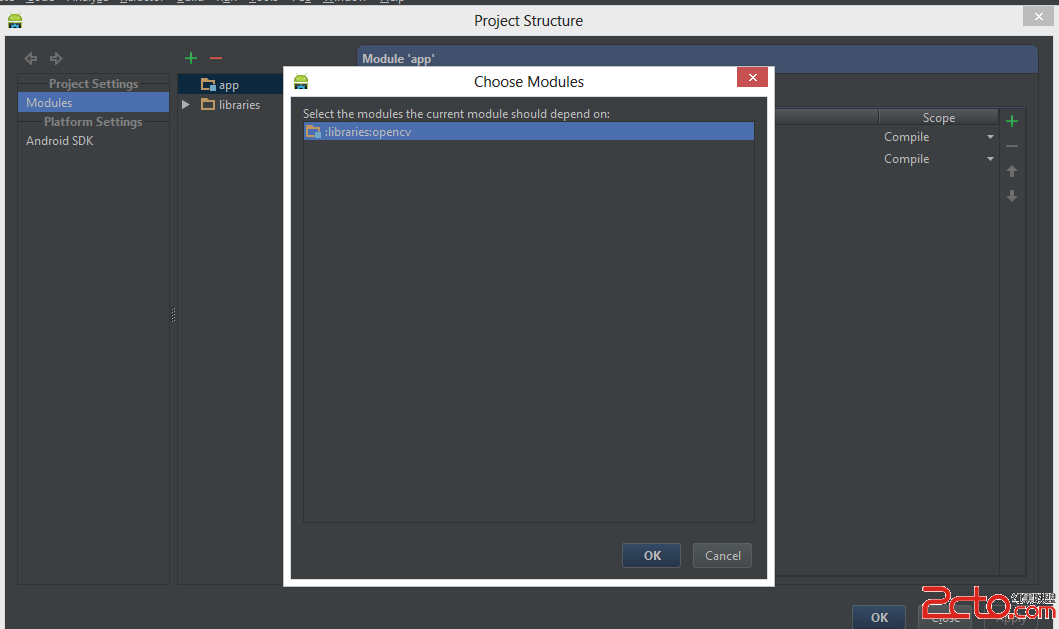
Choose Module dependency. It will open a dialog with a list of modules to choose from; select “:libraries:opencv”.

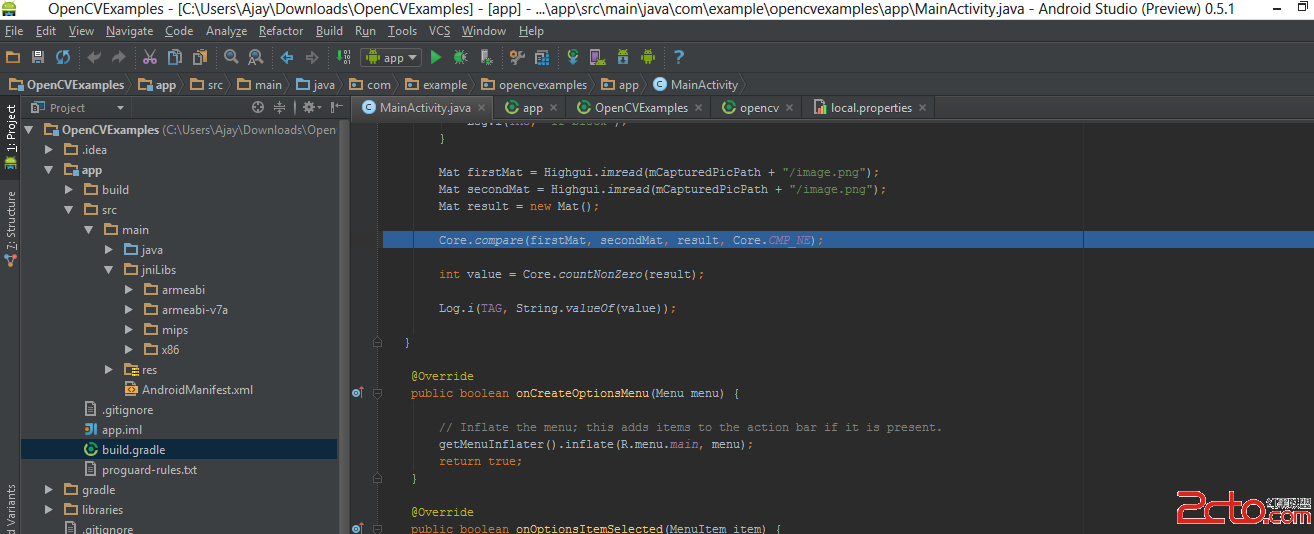
Create a jniLibs folder in the /app/src/main/ location and copy the all the folder with *.so files (armeabi, armeabi-v7a, mips, x86) in the jniLibs from the OpenCV SDK.

Click OK. Now everything done, go and enjoy with OpenCV.