前言
C中對序列化討論少, 因為很多傳輸的內容都有自己解析的輪子. 對於序列化本質是統一編碼, 統一解碼的方式.
本文探討是一種簡單的序列化方案. 保證不同使用端都能解析出正確結果.
在文章一開始, 看一個最簡單的序列化代碼 如下
#include <stdio.h>
#include <stdlib.h>
#define _INT_NAME (64)
#define _STR_TXT "student.struct"
struct student {
int id;
char sex;
int age;
char name[_INT_NAME + 1];
double high;
double weight;
};
// struct student 結構體序列化到文件的方法
static void _student_serialize(struct student* stu, FILE* txt) {
fprintf(txt, "%d %c %d %s %lf %lf ", stu->id, stu->sex,
stu->age, stu->name, stu->high, stu->weight);
}
// struct student 結構體反序列化
static void _student_deserialize(struct student* stu, FILE* txt) {
fscanf(txt, "%d %c %d %s %lf %lf ", &stu->id, &stu->sex,
&stu->age, stu->name, &stu->high, &stu->weight);
}
// 簡單打印數據
static void _student_print(struct student* stu) {
static int _idx;
printf("%d: %d %c %d %s %lf %lf \n", _idx++, stu->id,
stu->sex, stu->age, stu->name, stu->high, stu->weight);
}
/*
* 一種最簡單的通用序列化方法
*/
int main(int argc, char* argv[]) {
FILE* txt = fopen(_STR_TXT, "wb+");
if (NULL == txt) {
fprintf(stderr, "fopen " _STR_TXT " error!\n");
return -1;
}
// 這裡寫入數據
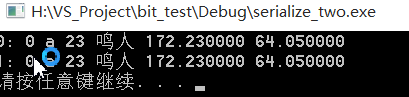
struct student stu = { 0, 0, 23, "鳴人", 172.23, 64.05 };
_student_print(&stu);
// 這裡序列化並寫入數據到文件
_student_serialize(&stu, txt);
// 我們讀取這個文件, 先設置文件指針到文件開頭
fseek(txt, 0, SEEK_SET);
// 開始讀取數據
struct student ts;
_student_deserialize(&ts, txt);
_student_print(&ts);
fclose(txt);
system("pause");
return 0;
}
本質在 自定義編碼解碼,並利用 scanf和printf 對映關系
// struct student 結構體序列化到文件的方法
static void _student_serialize(struct student* stu, FILE* txt) {
    fprintf(txt, "%d %c %d %s %lf %lf ", stu->id, stu->sex,
        stu->age, stu->name, stu->high, stu->weight);
}

// struct student 結構體反序列化
static void _student_deserialize(struct student* stu, FILE* txt) {
    fscanf(txt, "%d %c %d %s %lf %lf ", &stu->id, &stu->sex,
        &stu->age, stu->name, &stu->high, &stu->weight);
}
運行結果 如下:
通過這種實現, 是跨平台的. 因為C實現標准和自己定義協議支持
"%d %c %d %s %lf %lf "
最後我們還會討論這種情況.
正文
1. 一次失敗擴展 fscanf -> fread ; fprintf -> fwrite
測試如下, 在window上測試代碼 main.c

核心是
// struct student 結構體序列化到文件的方法
static void _student_serialize(struct student* stu, FILE* txt) {
    fwrite(stu, sizeof(*stu), 1, txt);
}

// struct student 結構體反序列化
static void _student_deserialize(struct student* stu, FILE* txt) {
    fread(stu, sizeof(*stu), 1, txt);
}
在 linux 上處理的代碼 是 serialize.c
#include <stdio.h>
#include <stdlib.h>

#define _INT_NAME       (64)
#define _STR_TXT        "student.struct"

struct student {
    int id;
    char sex;
    int age;
    char name[_INT_NAME + 1];
    double high;
    double weight;
};

// struct student 結構體反序列化
static void _student_deserialize(struct student* stu, FILE* txt) {
    fread(stu, sizeof(*stu), 1, txt);
}

// 簡單打印數據
static void _student_print(struct student* stu) {
    static int _idx;

    printf("%d: %d %c %d %s %lf %lf \n", _idx++, stu->id,
        stu->sex, stu->age, stu->name, stu->high, stu->weight);
}

/*
 * 處理 window 上生成的內存文件, 看是否跨平台
 */
int main(int argc, char* argv[]) {
    // 這裡就簡單讀取 _STR_TXT
    FILE* txt = fopen(_STR_TXT, "rt");
    if (NULL == txt) {
        fprintf(stderr, "fopen " _STR_TXT " error!\n");
        return -1;
    }

    // 開始讀取數據
    struct student ts;
    _student_deserialize(&ts, txt);

    // 打印讀取數據測試
    _student_print(&ts);

    fclose(txt);
    return 0;
}
編譯 命令的是
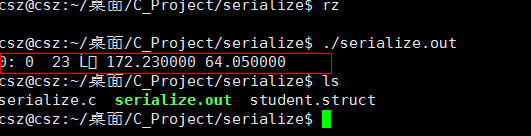
gcc -g -Wall -o serialize.out serialize.c
將 window生成的 student.struct 文件傳輸到linux測試機上, 運行結果 如下:
期間進行了各種折騰
a. 考慮轉碼
b. 考慮 fopen 創建utf8 文件
c. 考慮代碼轉碼
.......
還是以失敗告終, 估計fread, fwrite是不同平台的直接內存文件. 差異大, 不適合跨平台, 但是同樣平台是比較快的考慮方式.
擴展一下, 怎麼得到文件字符長度
linux得到文件長度擴展 http://blog.csdn.net/yutianzuijin/article/details/27205121
2. 采用 protobuf - c google一種協議.
pbc 傳輸協議, 很多公司都在采用, 我看了一下, 網上實現版本比較多, 現在可能有官方版本了. 推薦一個
cloudwn pbc https://github.com/cloudwu/pbc
可能是最精簡的一種實現, 源碼寫的很好, 但是覺得有點復雜了. 為了這麼功能這麼搞, 沒意思.
最關鍵的是 pbc 需要生成中間協議文件, 占用內存也不少.
這也是一種解決方案.
3. 采用json協議
這個意思很明了, 大家都通過json來處理問題 這裡推薦自己寫的一個json引擎
C json實戰引擎 一 , 實現解析部分
C json實戰引擎 二 , 實現構造部分
C json實戰引擎 三 , 最後實現部分輔助函數
源碼在1000行左右,歡迎使用. 這也是一種解決方案. 最近和朋友在討論問題, 越發覺得, 計算機軟件開發無非
圍繞 空間和時間來回搞, 通用還是針對.
真實生產環境中可能會更直白些, 快些, 沒bug就行, 怎麼爽怎麼隨便, 怎麼快怎麼來. 哈哈.
但是對於C, 還是有一套自己的哲學, 用最簡單完成一場意外. C/C++ 老了, 但卻是美的.
這種解決方案講到這裡了.
4. 開始就是結束. 還是從最簡單的開始. 實現一個C 序列換流程
後面繼續講解通過 fscanf 和 fprintf 構建 C的序列化. 先看一種實現體, serialize_student.h
#ifndef _H_SERIALIZE_THREE_SERIALIZE_STUDENT
#define _H_SERIALIZE_THREE_SERIALIZE_STUDENT

#include <assert.h>
#include <stdio.h>
#include <limits.h>

// 1.0 定義序列換結構體
#define _INT_NAME        (64)
struct student {
    int id;
    char sex;
    int age;
    char name[_INT_NAME + 1];
    double high;
    double weight;
};

// 2.0 定義保存文件交換文件名 當前文件名去掉 .h
#define    _STR_SERIALIZE_TXT_student    "serialize_student"

//3.0 定義轉換讀取協議, printf協議後面跟' ', printf後面跟的, scanf跟的
#define    _STR_SERIALIZE_PBC_student    "%d %c %d %s %lf %lf "
#define _F_SERIALIZE_PRINTF_student(p) \
    p->id, p->sex, p->age, p->name, p->high, p->weight
#define _F_SERIALIZE_SCANF_student(p) \
    &p->id, &p->sex, &p->age, p->name, &p->high, &p->weight

// 3.0 定義序列換數據寫入方法
static int serialize_student_printfs(void* data, int len) {
    assert(data && len > 0);

    FILE* txt = fopen(_STR_SERIALIZE_TXT_student, "wb");
    if (!txt) return -1;

    struct student* p = data;
    for (int i = 0; i < len; ++i) {
        fprintf(txt, _STR_SERIALIZE_PBC_student, _F_SERIALIZE_PRINTF_student(p));
        ++p;
    }

    fclose(txt);
    return 0;
}

// 4.0 定義序列化數據讀取方法
static int serialize_student_scanfs(void* data, int len) {
    assert(data);

    FILE* txt = fopen(_STR_SERIALIZE_TXT_student, "rb");
    if (!txt) return -1;

    int ns = 0;
    struct student* p = data;
    int nz = 0;
    const char* s = _STR_SERIALIZE_PBC_student;
    while (*s) {
        if (*s == '%')
            ++nz;
        ++s;
    }

    while (ns < len && fscanf(txt, _STR_SERIALIZE_PBC_student, _F_SERIALIZE_SCANF_student(p)) == nz) {
        ++ns;
        ++p;
    }

    fclose(txt);
    return ns;
}


#endif // !_H_SERIALIZE_THREE_SERIALIZE_STUDENT
這裡看看注釋容易明白, 這裡講解一下 頭文件導入宏規則.
_H 開頭 + _項目名 + _文件名(去掉後綴) 主要為了解決項目特別多的時候聯編造成宏碰撞.
測試代碼 main.c
#include <stdlib.h>
#include "serialize_student.h"
/*
* 實現C的序列流程操作
*/
int main(int argc, char* argv[]) {
struct student stu[] = {
{ 0, 0, 23, "鳴人", 172.23, 64.05 },
{ 0, 0, 34, "殺生丸", 178.23, 74.00 }
};
// 先序列化到文件
serialize_student_printfs(stu, sizeof(stu) / sizeof(*stu));
// 開始讀取序列化內容
struct student sts[2];
serialize_student_scanfs(sts, 2);
for (int i = 0; i < 2; ++i) {
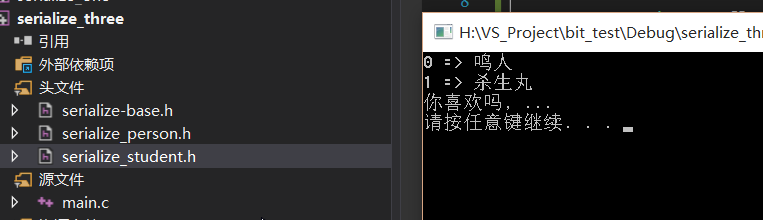
printf("%d => %s\n", i, sts[i].name);
}
puts("你喜歡嗎, ... ");
system("pause");
return 0;
}
運行結果是
最後可能來點 封裝, 減少以後的工作量. 可能有點復雜, 直接看代碼, 能懂得就呵呵一笑而過.
再表述後面封裝之前講一個小知識, linux 上宏調試有個小技巧 通過 gcc -E 導出 *.i 文件, 查看宏命令.
同樣 window 上 vs 需要這麼 設置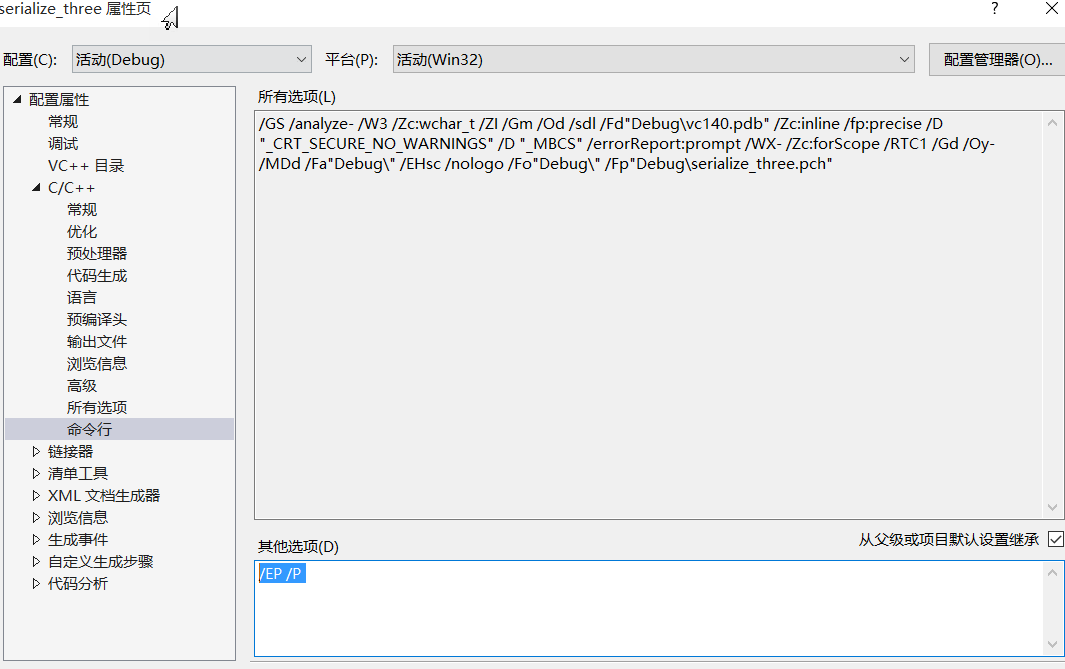
加上 /EP /P 運行時候會生成 main.i
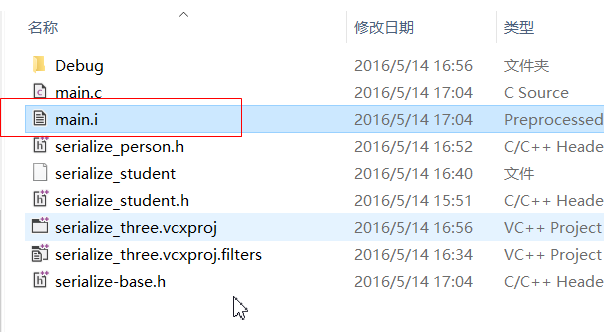
找到問題後再將其去掉. 編譯運行.
我們先看一個 C宏模板 序列化注冊頭文件 serialize-base.h
#ifndef _H_SERIALIZE_THREE_SERIALIZE_BASE
#define _H_SERIALIZE_THREE_SERIALIZE_BASE

#include <assert.h>
#include <stdio.h>
#include <limits.h>

/*
 * 宏模板, 為想實現序列化的結構注冊函數
 * name    : 結構名稱,                例如 student
 * pbc    : 定義的協議,                例如 "%d %c %d %s %lf %lf "
 * ptf    : printf 打印數據參數集,    例如 _->id, _->sex, _->age, _->name, _->high, _->weight | SERIALIZE_PTF
 * scf    : scanf 得到數據的參數集,    例如 &_->id, &_->sex, &_->age, _->name, &_->high, &_->weight | SERIALIZE_SCF
 */
#define SERIALIZE_BASE_REGISTER(name, pbc, ptf, scf)                                \
static int serialize_printfs_##name(void* data, int len) {                            \
    assert(data && len > 0);                                                        \
                                                                                    \
    FILE* txt = fopen("serialize_"#name, "wb");                                        \
    if (!txt) return -1;                                                            \
                                                                                    \
    struct name* _ = (struct name*)data;                                            \
    for (int i = 0; i < len; ++i) {                                                    \
        fprintf(txt, pbc, ptf);                                                    \
        ++_;                                                                        \
    }                                                                                \
                                                                                    \
    fclose(txt);                                                                    \
    return 0;                                                                        \
}                                                                                    \
                                                                                    \
static int serialize_scanfs_##name(void* data, int len) {                            \
    assert(data);                                                                    \
                                                                                    \
    FILE* txt = fopen("serialize_"#name, "rb");                                        \
    if (!txt) return -1;                                                            \
                                                                                    \
    int ns = 0, nz = 0;                                                                \
    struct name* _ = (struct name*)data;                                            \
    const char* s = pbc;                                                            \
    while (*s) {                                                                    \
        if (*s == '%')                                                                \
            ++nz;                                                                    \
        ++s;                                                                        \
    }                                                                                \
                                                                                    \
    while (ns < len && fscanf(txt, pbc, scf) == nz) {                            \
        ++ns;                                                                        \
        ++_;                                                                        \
    }                                                                                \
                                                                                    \
    fclose(txt);                                                                    \
    return ns;                                                                        \
}                                                                                    \


#endif // !_H_SERIALIZE_THREE_SERIALIZE_BASE
後面寫一個結構 來實現序列化 serialize_person.h
#ifndef _H_SERIALIZE_THREE_SERIALIZE_PERSON
#define _H_SERIALIZE_THREE_SERIALIZE_PERSON

// 必須導入(繼承) 序列化基礎實現模板
#include "serialize-base.h"

// 1.0 定義序列換結構體
struct person {
    int id;
    char sex;
    int age;
    char name[65];
    double high;
    double weight;
};

// 2.0 注冊得到 ptf 結構
#undef    SERIALIZE_PTF
#define SERIALIZE_PBC(id, sex, age, name, high, weight) \
    _->id, _->sex, _->age, _->name, _->high, _->weight

// 3.0 注冊得到 sct 結構
#undef    SERIALIZE_SCF
#define SERIALIZE_SCF(id, sex, age, name, high, weight) \
    &_->id, &_->sex, &_->age, _->name, &_->high, &_->weight

// 4.0 最後開始注冊實現體
SERIALIZE_BASE_REGISTER(
    person,
    "%d %c %d %s %lf %lf ",
    SERIALIZE_PBC(id, sex, age, name, high, weight),
    SERIALIZE_SCF(id, sex, age, name, high, weight)
)

#endif // !_H_SERIALIZE_THREE_SERIALIZE_PERSON
是不是很酷炫, 好測試一下 main.c
#include <stdlib.h>
#include "serialize_student.h"
#include "serialize_person.h"

/*
 * 實現C的序列流程操作
 */
int main(int argc, char* argv[]) {

    struct student stu[] = {
        { 0, 0, 23, "鳴人", 172.23, 64.05 },
        { 1, 0, 34, "殺生丸", 178.23, 74.00 }
    };

    // 先序列化到文件
    serialize_student_printfs(stu, sizeof(stu) / sizeof(*stu));

    // 開始讀取序列化內容
    struct student sts[2];
    serialize_student_scanfs(sts, 2);

    for (int i = 0; i < 2; ++i) {
        printf("%d => %s\n", i, sts[i].name);
    }

    puts("你喜歡嗎, ... ");


    struct person ps[] = {
        { 2, 1, 23, "日向雛田", 162.23, 51.05 },
        { 3, 1, 14, "玲", 158.23, 45.00 }
    };

    // 序列化數據
    serialize_printfs_person(ps, sizeof(ps) / sizeof(*ps));
    // 得到序列化數據

    struct person tps[2];
    serialize_scanfs_person(tps, 2);

    for (int i = 0; i < 2; ++i) {
        printf("%d => %s\n", i, sts[i].name);
    }

    system("pause");
    return 0;
}
測試結果如下, 一切正常
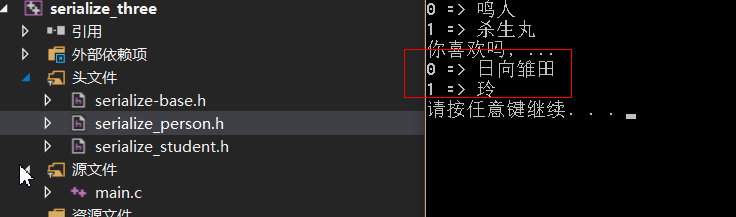
到這裡基本都結束了. 主要核心就是上面注冊的函數模板.
後記
這次後記我們在linux上測試一下 將剛生成的 serialize_person 上傳到 linux平台
測試文件 main.c
#include <stdlib.h>
#include "serialize_person.h"

/*
 * 實現C的序列流程操作
 */
int main(int argc, char* argv[]) {

    puts("Play time game, writing code");

    struct person tps[2];
    serialize_scanfs_person(tps, 2);

    for (int i = 0; i < 2; ++i) {
        printf("%d => %s\n", i, tps[i].name);
    }

    return 0;
}
最終測試結果
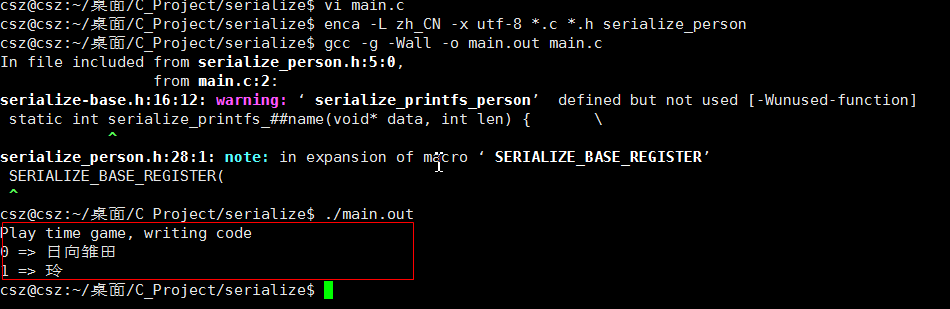
源碼成功, 到這裡基本上可以離開了.
關於C數據序列化的簡單操作就到這裡了. 錯誤是難免的, 拜~~~