前面的例子已經比較清楚的給出了自定義model的方法,就是要覆蓋我們所需要的那幾個函數就可以了。但是,前面的例子僅僅是簡單的展示數據,也就是說數據時只讀的。那麼,如何能做到讀寫數據呢?那就要來看進來的例子了。這個例子也是來自C++GUI Programming with Qt 4, 2nd Edition這本書的。
還是先來看代碼吧:
citymodel.h
 class CityModel : public QAbstractTableModel { Q_OBJECT public: CityModel(QObject *parent = 0); void setCities(const QStringList &cityNames); int rowCount(const QModelIndex &parent) const; int columnCount(const QModelIndex &parent) const; QVariant data(const QModelIndex &index, int role) const; bool setData(const QModelIndex &index, const QVariant &value, int role); QVariant headerData(int section, Qt::Orientation orientation, int role) const; Qt::ItemFlags flags(const QModelIndex &index) const; private: int offsetOf(int row, int column) const; QStringList cities; QVector<int> distances; };
citymodel.cpp
CityModel::CityModel(QObject *parent) : QAbstractTableModel(parent) { } int CityModel::rowCount(const QModelIndex & parent) const { return cities.count(); } int CityModel::columnCount(const QModelIndex & parent) const { return cities.count(); } QVariant CityModel::data(const QModelIndex &index, int role) const { if (!index.isValid()) { return QVariant(); } if (role == Qt::TextAlignmentRole) { return int(Qt::AlignRight | Qt::AlignVCenter); } else if (role == Qt::DisplayRole) { if (index.row() == index.column()) { return 0; } int offset = offsetOf(index.row(), index.column()); return distances[offset]; } return QVariant(); } QVariant CityModel::headerData(int section, Qt::Orientation orientation, int role) const { if (role == Qt::DisplayRole) { return cities[section]; } return QVariant(); } bool CityModel::setData(const QModelIndex &index, const QVariant &value, int role) { if (index.isValid() && index.row() != index.column() && role == Qt::EditRole) { int offset = offsetOf(index.row(), index.column()); distances[offset] = value.toInt(); QModelIndex transposedIndex = createIndex(index.column(), index.row()); emit dataChanged(index, index); emit dataChanged(transposedIndex, transposedIndex); return true; } return false; } Qt::ItemFlags CityModel::flags(const QModelIndex &index) const { Qt::ItemFlags flags = QAbstractItemModel::flags(index); if (index.row() != index.column()) { flags |= Qt::ItemIsEditable; } return flags; } void CityModel::setCities(const QStringList &cityNames) { cities = cityNames; distances.resize(cities.count() * (cities.count() - 1) / 2); distances.fill(0); reset(); } int CityModel::offsetOf(int row, int column) const { if (row < column) { qSwap(row, column); } return (row * (row - 1) / 2) + column; }
class CityModel : public QAbstractTableModel { Q_OBJECT public: CityModel(QObject *parent = 0); void setCities(const QStringList &cityNames); int rowCount(const QModelIndex &parent) const; int columnCount(const QModelIndex &parent) const; QVariant data(const QModelIndex &index, int role) const; bool setData(const QModelIndex &index, const QVariant &value, int role); QVariant headerData(int section, Qt::Orientation orientation, int role) const; Qt::ItemFlags flags(const QModelIndex &index) const; private: int offsetOf(int row, int column) const; QStringList cities; QVector<int> distances; };
citymodel.cpp
CityModel::CityModel(QObject *parent) : QAbstractTableModel(parent) { } int CityModel::rowCount(const QModelIndex & parent) const { return cities.count(); } int CityModel::columnCount(const QModelIndex & parent) const { return cities.count(); } QVariant CityModel::data(const QModelIndex &index, int role) const { if (!index.isValid()) { return QVariant(); } if (role == Qt::TextAlignmentRole) { return int(Qt::AlignRight | Qt::AlignVCenter); } else if (role == Qt::DisplayRole) { if (index.row() == index.column()) { return 0; } int offset = offsetOf(index.row(), index.column()); return distances[offset]; } return QVariant(); } QVariant CityModel::headerData(int section, Qt::Orientation orientation, int role) const { if (role == Qt::DisplayRole) { return cities[section]; } return QVariant(); } bool CityModel::setData(const QModelIndex &index, const QVariant &value, int role) { if (index.isValid() && index.row() != index.column() && role == Qt::EditRole) { int offset = offsetOf(index.row(), index.column()); distances[offset] = value.toInt(); QModelIndex transposedIndex = createIndex(index.column(), index.row()); emit dataChanged(index, index); emit dataChanged(transposedIndex, transposedIndex); return true; } return false; } Qt::ItemFlags CityModel::flags(const QModelIndex &index) const { Qt::ItemFlags flags = QAbstractItemModel::flags(index); if (index.row() != index.column()) { flags |= Qt::ItemIsEditable; } return flags; } void CityModel::setCities(const QStringList &cityNames) { cities = cityNames; distances.resize(cities.count() * (cities.count() - 1) / 2); distances.fill(0); reset(); } int CityModel::offsetOf(int row, int column) const { if (row < column) { qSwap(row, column); } return (row * (row - 1) / 2) + column; }
代碼很長,但實際上和前面我們的那個例子非常相似。這個model也是用於table的,因此還是繼承了QAbstractTableModel。CityModel內部有兩個數據源:一個QStringList類型的對象,一個QVector<int>類型的對象。前者用於保存城市的名字,需要用戶顯示的給出;後者是model內部維護的一個存放int的向量。這個CityModel就是要在table中顯示兩個城市之間的距離。同前面的例子一樣,如果我們要把所有的數據都保存下來,顯然會造成數據的冗余:城市A到城市B的距離同城市B到城市A的距離是一樣的!因此我們還是自定義一個model。同樣這個CityModel有個簡單的空構造函數,rowCount()和columnCount()函數也是返回list的長度。data()函數根據role的不同返回不同的值。由於在table中坐標是由row和column給出的,因此需要有一個二維坐標到一維坐標的轉換,這就是offsetOf()函數的作用。我們把主要精力放在setData()函數上面。
bool CityModel::setData(const QModelIndex &index, const QVariant &value, int role) { if (index.isValid() && index.row() != index.column() && role == Qt::EditRole) { int offset = offsetOf(index.row(), index.column()); distances[offset] = value.toInt(); QModelIndex transposedIndex = createIndex(index.column(), index.row()); emit dataChanged(index, index); emit dataChanged(transposedIndex, transposedIndex); return true; } return false; }
這個函數在用戶編輯數據時會自動調用。也就是說,這時我們的數據已經不是只讀的了。函數開始是一個長長的判斷:index要是合法的;index的row和column不相等,也就是說兩個城市是不同的;數據想的role是Qt::EditRole。如果滿足了這三個條件,才會執行下面的操作。首先,由row和column坐標定位到表中的數據項在vector中的位置。然後用戶新修改的數據被作為參數value傳入,所以我們要把這個參數賦值給distances。createIndex()函數根據column和row值生成一個QModelIndex對象。請注意這裡的順序:row和column是顛倒的!這就把坐標為(row, column)的點關於主對角線對稱的那個點(column, row)的index找到了。還記得我們的需求嗎?當我們修改了一個數據時,對應的數據也要被修改,這就是這個功能的實現。我們需要emit dataChanged()信號,這個信號接收兩個參數:一個是被修改的數據的左上角的坐標,一個是被修改的數據的右下角的坐標。為什麼會有兩個坐標呢?因此我們修改的數據不一定只是一個。像這裡,我們只修改了一個數據,因此這兩個值是相同的。數據更新了,我們用這個信號通知view刷新,這樣就可以顯示新的數據了。最後,如果函數數據修改成功就返回true,否則返回false。
最後,我們在main()函數中顯示出來這個model:
int main(int argc, char *argv[]) { QApplication a(argc, argv); QStringList cities; cities << "Arvika" << "Boden" << "Eskilstuna" << "Falun"; CityModel cityModel; cityModel.setCities(cities); QTableView tableView; tableView.setModel(&cityModel); tableView.setAlternatingRowColors(true); tableView.setWindowTitle(QObject::tr("Cities")); tableView.show(); return a.exec(); }
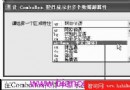
這樣,我們就把這個model做完了。最後來看看效果吧!

本文出自 “豆子空間” 博客,請務必保留此出處http://devbean.blog.51cto.com/448512/267972