Angular2是對Angular1的一次徹底的,破壞性的更新。
相對於Angular1.x,借用某果的廣告語,唯一的不同,就是處處都不同。
•首先,推薦的語言已經不再是Javascript,取而代之的TypeScript,(TypeScript = ES6 + 類型系統 + 類型注解), TypeScriipt的類型系統對於開發復雜的單頁Web app大有幫助,同時編譯成javascript後的執行效率也比大多數手寫javascript要快。有興趣的同學可以查閱官方文檔:英文傳送門 |中文傳送門。
•得益於徹底重構,性能相對於Angular1.x有了大幅提升,也更適合再全平台部署。
•Angular2是基於Component的,Component可以理解為是1.x時代的Controller + $Scope + view
•View的很多語法也做了更新,比如<li ng-repeat="movie in vm.movies"></li> 變成了 <li *ngFor="let movie of movies"></li>
關於Angular2,強烈建議查閱官方文檔:英文傳送門| 中文傳送門
注意:本文章屬於Step by step + Code Sample教程,且篇幅較長,建議下載本Sample並跟著本文進度自己重做一遍本例,下載完整代碼並分析代碼結構才有意義,下載地址:How to authorization Angular 2 app with asp.net core web api
1.前期准備
•推薦使用VS2015 Update3或更新的版本完成本示例,下載地址:http://www.jb51.net/softjc/446184.html
•你需要安裝.NET Core開發環境,這裡提供VS版: http://www.jb51.net/softs/472362.html
•安裝Node.js 版本5.0.0或以上,(在本例中,這個主要是編譯TypeScript用的)下載地址:Node.js and NPM
•NPM 3.0.0或以上,默認NPM會隨著Node.js一並安裝完畢。(在本例中,這個主要是下載各種Angular的各個包用的,參考VS中的Nuget)
2.創建項目
在VS中新建項目,項目類型選擇 ASP.NET Core Web Application(.Net Core),輸入項目名稱為:CSAuthorAngular2InASPNetCore,Template選擇為Empty.
3.在項目中整合Angular2
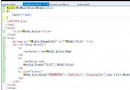
3.1.配置Startup.cs
注:添加下面的代碼時IDE會報代碼錯誤,這是因為還沒有引用對用的包,進入報錯的這一行,點擊燈泡,加載對應的包就可以了。

(圖文無關)
在ConfigureServices中添加如下代碼
services.AddMvc();
這裡是添加MVC服務
在Configure中添加如下代碼
app.UseStaticFiles();

app.UseMvc(routes =>
{
  routes.MapRoute(
    name: "default",
    template: "{controller=Home}/{action=Index}");
});
第一句是啟用靜態文件,第二句是應用MVC模式並添加路由配置。
完整的代碼應該是這個樣子
public class Startup
{
  // This method gets called by the runtime. Use this method to add services to the container.
  // For more information on how to configure your application, visit http://go.microsoft.com/fwlink/?LinkID=398940
  public void ConfigureServices(IServiceCollection services)
  {
    services.AddMvc();
  }

  // This method gets called by the runtime. Use this method to configure the HTTP request pipeline.
  public void Configure(IApplicationBuilder app, IHostingEnvironment env, ILoggerFactory loggerFactory)
  {
    app.UseStaticFiles();

    app.UseMvc(routes =>
    {
      routes.MapRoute(
        name: "default",
        template: "{controller=Home}/{action=Index}");
    });
  }
}
3.2.添加控制器以及視圖
3.2.1.在項目根目錄下添加Controllers目錄,並在其中添加一個控制器HomeController.cs,默認代碼即可。
3.2.2.在項目跟目錄下創建Views目錄,在Views目錄中新建目錄Home, 最後在Home目錄中新建視圖Index.cshtml,內容應該是這樣:
<html>
<head>
  <title>Angular QuickStart</title>
  <base href="/">
  <meta charset="UTF-8">
  <meta name="viewport" content="width=device-width, initial-scale=1">
  <!-- 1. Load libraries -->
  <!-- Polyfill(s) for older browsers -->
  <script src="node_modules/core-js/client/shim.min.js"></script>
  <script src="node_modules/zone.js/dist/zone.js"></script>
  <script src="node_modules/reflect-metadata/Reflect.js"></script>
  <script src="node_modules/systemjs/dist/system.src.js"></script>
  <!-- 2. Configure SystemJS -->
  <script src="systemjs.config.js"></script>
  <script>
   System.import('app').catch(function(err){ console.error(err); });
  </script>
</head>
<!-- 3. Display the application -->
<body>
  <my-app>Loading...</my-app>
</body>
</html>
現在運行項目的話你僅僅能看到一個Loading,再控制台中你還能看到錯誤,這是因為我們還沒有配置Angular。讓我們前往wwwroot目錄。
3.3.在項目的wwwroot目錄中添加如下結構:
3.3.1搭建Angular2基礎環境
•package.json
{
 "name": "angular-quickstart",
 "version": "1.0.0",
 "scripts": {
  "start": "tsc && concurrently \"tsc -w\" \"lite-server\" ",
  "lite": "lite-server",
  "postinstall": "typings install",
  "tsc": "tsc",
  "tsc:w": "tsc -w",
  "typings": "typings"
 },
 "licenses": [
  {
   "type": "MIT",
   "url": "https://github.com/angular/angular.io/blob/master/LICENSE"
  }
 ],
 "dependencies": {
  "@angular/common": "2.0.2",
  "@angular/compiler": "2.0.2",
  "@angular/core": "2.0.2",
  "@angular/forms": "2.0.2",
  "@angular/http": "2.0.2",
  "@angular/platform-browser": "2.0.2",
  "@angular/platform-browser-dynamic": "2.0.2",
  "@angular/router": "3.0.2",
  "@angular/upgrade": "2.0.2",
  "angular-in-memory-web-api": "0.1.5",
  "bootstrap": "3.3.7",
  "core-js": "2.4.1",
  "reflect-metadata": "0.1.8",
  "rxjs": "5.0.0-beta.12",
  "systemjs": "0.19.39",
  "zone.js": "0.6.25"
 },
 "devDependencies": {
  "concurrently": "3.0.0",
  "gulp": "^3.9.1",
  "lite-server": "2.2.2",
  "typescript": "2.0.3",
  "typings": "1.4.0"
 }
}
•systemjs.config.js
(function (global) {
  System.config({
    paths: {
      // paths serve as alias
      'npm:': 'node_modules/'
    },
    // map tells the System loader where to look for things
    map: {
      // our app is within the app folder
      app: 'app',
      // angular bundles
      '@angular/core': 'npm:@angular/core/bundles/core.umd.js',
      '@angular/common': 'npm:@angular/common/bundles/common.umd.js',
      '@angular/compiler': 'npm:@angular/compiler/bundles/compiler.umd.js',
      '@angular/platform-browser': 'npm:@angular/platform-browser/bundles/platform-browser.umd.js',
      '@angular/platform-browser-dynamic': 'npm:@angular/platform-browser-dynamic/bundles/platform-browser-dynamic.umd.js',
      '@angular/http': 'npm:@angular/http/bundles/http.umd.js',
      '@angular/router': 'npm:@angular/router/bundles/router.umd.js',
      '@angular/forms': 'npm:@angular/forms/bundles/forms.umd.js',
      '@angular/upgrade': 'npm:@angular/upgrade/bundles/upgrade.umd.js',
      // other libraries
      'rxjs': 'npm:rxjs',
      'angular-in-memory-web-api': 'npm:angular-in-memory-web-api/bundles/in-memory-web-api.umd.js'
    },
    // packages tells the System loader how to load when no filename and/or no extension
    packages: {
      app: {
        main: './main.js',
        defaultExtension: 'js'
      },
      rxjs: {
        defaultExtension: 'js'
      }
    }
  });
})(this);
•tsconfig.js
{
 "compileOnSave": true,
 "compilerOptions": {
  "target": "es5",
  "module": "commonjs",
  "moduleResolution": "node",
  "sourceMap": true,
  "emitDecoratorMetadata": true,
  "experimentalDecorators": true,
  "removeComments": false,
  "noImplicitAny": false
 },
 "exclude": [
  "node_modules"
 ]
}
•typings.json(注,在最新文檔中typings已被npm的@types替代,參見官方文檔:文檔變更日志)
{
 "globalDependencies": {
  "core-js": "registry:dt/core-js#0.0.0+20160725163759",
  "jasmine": "registry:dt/jasmine#2.2.0+20160621224255",
  "node": "registry:dt/node#6.0.0+20160909174046"
 }
}
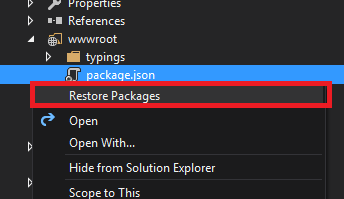
右擊wwwroot中的Package.json,選擇Restore Packages(或者在CMD下進入wwwroot目錄,並執行命令 npm install),npm會去下載需要的包,並存儲於node_modules目錄中。
3.3.2.配置啟動文件以啟用Angular2
在wwwroot下新建目錄app,app擁有如下文件:
•app.component.ts
import { Component } from '@angular/core';

@Component({
  moduleId: module.id,
  selector: 'my-app',
  template: "this is in angular2",
})
export class AppComponent {
}
可以發現被@Component裝飾屬性裝飾了AppComponent,selector指代你Component的占位符,比如本例中你可以再Home/index.cshtml中發現一段這樣的標記
<my-app>Loading...</my-app>
template既為該Component的View,不要忘記moduleId,不添加它會出現很多奇怪的問題。
•app.module.ts
import { NgModule } from "@angular/core";
import { BrowserModule } from "@angular/platform-browser";

import { AppComponent } from "./app.component";

@NgModule({
  bootstrap: [AppComponent],
  imports: [
    BrowserModule
  ],
  declarations: [
    AppComponent
  ]
})
export class AppModule { }
•main.ts
import { platformBrowserDynamic } from '@angular/platform-browser-dynamic';
import { AppModule } from './app.module';
const platform = platformBrowserDynamic();
platform.bootstrapModule(AppModule);
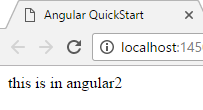
基礎整合完畢。
按F5 Debug一下,現在你能再浏覽器中看到一句話:this is in angular 2
4.實現身份認證
廢了半天勁,看著很傻,沒有任何成就感。怎麼辦,讓我們再深入一點,接下來我們來為Angular2完成一個Token base的身份驗證,我會把Angular2的routing,data bind,service,http,等等你工作中最常用到的挨個演示一遍。
4.1.Server端
4.1.1.創建一些輔助類
4.1.1.1.在項目根目錄下創建一個文件夾Auth,並添加RSAKeyHelper.cs以及TokenAuthOption.cs兩個文件
•在RSAKeyHelper.cs中
using System.Security.Cryptography;

namespace CSTokenBaseAuth.Auth
{
  public class RSAKeyHelper
  {
    public static RSAParameters GenerateKey()
    {
      using (var key = new RSACryptoServiceProvider(2048))
      {
        return key.ExportParameters(true);
      }
    }
  }
}
•在TokenAuthOption.cs中
using System;
using Microsoft.IdentityModel.Tokens;

namespace CSTokenBaseAuth.Auth
{
  public class TokenAuthOption
  {
    public static string Audience { get; } = "ExampleAudience";
    public static string Issuer { get; } = "ExampleIssuer";
    public static RsaSecurityKey Key { get; } = new RsaSecurityKey(RSAKeyHelper.GenerateKey());
    public static SigningCredentials SigningCredentials { get; } = new SigningCredentials(Key, SecurityAlgorithms.RsaSha256Signature);

    public static TimeSpan ExpiresSpan { get; } = TimeSpan.FromMinutes(20);
  }
}
4.1.1.2.在項目根目錄下創建目錄Model,並在其中添加RequestResult.cs,代碼應該是這樣。
public class RequestResult
{
  public RequestState State { get; set; }
  public string Msg { get; set; }
  public Object Data { get; set; }
}

public enum RequestState
{
  Failed = -1,
  NotAuth = 0,
  Success = 1
}
4.1.2更新Startup.cs
在ConfigureServices中添加如下代碼:
services.AddAuthorization(auth =>
{
auth.AddPolicy("Bearer", new AuthorizationPolicyBuilder()
.AddAuthenticationSchemes(JwtBearerDefaults.AuthenticationScheme)
.RequireAuthenticatedUser().Build());
});
這裡是添加身份認證服務
在Configure方法中添加如下代碼:
app.UseExceptionHandler(appBuilder =>
{
  appBuilder.Use(async (context, next) =>
  {
    var error = context.Features[typeof(IExceptionHandlerFeature)] as IExceptionHandlerFeature;

    //when authorization has failed, should retrun a json message to client
    if (error != null && error.Error is SecurityTokenExpiredException)
    {
      context.Response.StatusCode = 401;
      context.Response.ContentType = "application/json";

      await context.Response.WriteAsync(JsonConvert.SerializeObject(new RequestResult
      {
        State = RequestState.NotAuth,
        Msg = "token expired"
      }));
    }
    //when orther error, retrun a error message json to client
    else if (error != null && error.Error != null)
    {
      context.Response.StatusCode = 500;
      context.Response.ContentType = "application/json";
      await context.Response.WriteAsync(JsonConvert.SerializeObject(new RequestResult
      {
        State = RequestState.Failed,
        Msg = error.Error.Message
      }));
    }
    //when no error, do next.
    else await next();
  });
});
本段是Handle當身份認證失敗時拋出的異常,並返回合適的json
在相同的方法中添加另外一段代碼:
app.UseJwtBearerAuthentication(new JwtBearerOptions()
{
  TokenValidationParameters = new TokenValidationParameters()
  {
    IssuerSigningKey = TokenAuthOption.Key,
    ValidAudience = TokenAuthOption.Audience,
    ValidIssuer = TokenAuthOption.Issuer,
    // When receiving a token, check that we've signed it.
    ValidateIssuerSigningKey = true,
    // When receiving a token, check that it is still valid.
    ValidateLifetime = true,
    // This defines the maximum allowable clock skew - i.e. provides a tolerance on the token expiry time
    // when validating the lifetime. As we're creating the tokens locally and validating them on the same
     // machines which should have synchronised time, this can be set to zero. Where external tokens are
    // used, some leeway here could be useful.
    ClockSkew = TimeSpan.FromMinutes(0)
  }
});
本段代碼是應用JWTBearerAuthentication身份認證。
4.1.3.TokenAuthController.cs
在Controllers中新建一個Web API Controller Class,命名為TokenAuthController.cs。我們將在這裡完成登錄授權,
在同文件下添加兩個類,分別用來模擬用戶模型,以及用戶存儲,代碼應該是這樣:
public class User
{
  public Guid ID { get; set; }
  public string Username { get; set; }
  public string Password { get; set; }
}

public static class UserStorage
{
  public static List<User> Users { get; set; } = new List<User> {
    new User {ID=Guid.NewGuid(),Username="user1",Password = "user1psd" },
    new User {ID=Guid.NewGuid(),Username="user2",Password = "user2psd" },
    new User {ID=Guid.NewGuid(),Username="user3",Password = "user3psd" }
  };
}
接下來在TokenAuthController.cs中添加如下方法
private string GenerateToken(User user, DateTime expires)
{
  var handler = new JwtSecurityTokenHandler();

  ClaimsIdentity identity = new ClaimsIdentity(
    new GenericIdentity(user.Username, "TokenAuth"),
    new[] {
      new Claim("ID", user.ID.ToString())
    }
  );

  var securityToken = handler.CreateToken(new SecurityTokenDescriptor
  {
    Issuer = TokenAuthOption.Issuer,
    Audience = TokenAuthOption.Audience,
    SigningCredentials = TokenAuthOption.SigningCredentials,
    Subject = identity,
    Expires = expires
  });
  return handler.WriteToken(securityToken);
}
該方法僅僅只是生成一個Auth Token,接下來我們來添加另外一個方法來調用它
在相同文件中添加如下代碼
[HttpPost]
public string GetAuthToken(User user)
{
  var existUser = UserStorage.Users.FirstOrDefault(u => u.Username == user.Username && u.Password == user.Password);

  if (existUser != null)
  {
    var requestAt = DateTime.Now;
    var expiresIn = requestAt + TokenAuthOption.ExpiresSpan;
    var token = GenerateToken(existUser, expiresIn);

    return JsonConvert.SerializeObject(new {
      stateCode = 1,
      requertAt = requestAt,
      expiresIn = TokenAuthOption.ExpiresSpan.TotalSeconds,
      accessToken = token
    });
  }
  else
  {
    return JsonConvert.SerializeObject(new { stateCode = -1, errors = "Username or password is invalid" });
  }
}
接下來我們來完成授權部分,在相同的文件中添加如下代碼:
public string GetUserInfo()
{
  var claimsIdentity = User.Identity as ClaimsIdentity;

  return JsonConvert.SerializeObject(new RequestResult
  {
    State = RequestState.Success,
    Data = new
    {
      UserName = claimsIdentity.Name
    }
  });
}
為方法添加裝飾屬性
[HttpGet]
[Authorize("Bearer")]
第二行代碼說明這個action需要身份驗證。
該文件完整的代碼應該是這個樣子:
using System;
using System.Collections.Generic;
using System.Linq;using Microsoft.AspNetCore.Mvc;
using CSAuthorAngular2InASPNetCore.Auth;
using System.IdentityModel.Tokens.Jwt;
using Newtonsoft.Json;
using System.Security.Claims;
using System.Security.Principal;
using Microsoft.IdentityModel.Tokens;
using CSAuthorAngular2InASPNetCore.Model;
using Microsoft.AspNetCore.Authorization;


namespace CSAuthorAngular2InASPNetCore.Controllers
{
  [Route("api/[controller]")]
  public class TokenAuthController : Controller
  {
    [HttpPost]
    public string GetAuthToken([FromBody]User user)
    {
      var existUser = UserStorage.Users.FirstOrDefault(u => u.Username == user.Username && u.Password == user.Password);

      if (existUser != null)
      {
        var requestAt = DateTime.Now;
        var expiresIn = requestAt + TokenAuthOption.ExpiresSpan;
        var token = GenerateToken(existUser, expiresIn);

        return JsonConvert.SerializeObject(new RequestResult
        {
          State = RequestState.Success,
          Data = new
          {
            requertAt = requestAt,
            expiresIn = TokenAuthOption.ExpiresSpan.TotalSeconds,
            tokeyType = TokenAuthOption.TokenType,
            accessToken = token
          }
        });
      }
      else
      {
        return JsonConvert.SerializeObject(new RequestResult
        {
          State = RequestState.Failed,
          Msg = "Username or password is invalid"
        });
      }
    }

    private string GenerateToken(User user, DateTime expires)
    {
      var handler = new JwtSecurityTokenHandler();

      ClaimsIdentity identity = new ClaimsIdentity(
        new GenericIdentity(user.Username, "TokenAuth"),
        new[] {
          new Claim("ID", user.ID.ToString())
        }
      );

      var securityToken = handler.CreateToken(new SecurityTokenDescriptor
      {
        Issuer = TokenAuthOption.Issuer,
        Audience = TokenAuthOption.Audience,
        SigningCredentials = TokenAuthOption.SigningCredentials,
        Subject = identity,
        Expires = expires
      });
      return handler.WriteToken(securityToken);
    }

    [HttpGet]
    [Authorize("Bearer")]
    public string GetUserInfo()
    {
      var claimsIdentity = User.Identity as ClaimsIdentity;

      return JsonConvert.SerializeObject(new RequestResult
      {
        State = RequestState.Success,
        Data = new
        {
          UserName = claimsIdentity.Name
        }
      });
    }
  }

  public class User
  {
    public Guid ID { get; set; }

    public string Username { get; set; }

    public string Password { get; set; }
  }

  public static class UserStorage
  {
    public static List<User> Users { get; set; } = new List<User> {
      new User {ID=Guid.NewGuid(),Username="user1",Password = "user1psd" },
      new User {ID=Guid.NewGuid(),Username="user2",Password = "user2psd" },
      new User {ID=Guid.NewGuid(),Username="user3",Password = "user3psd" }
    };
  }
}
4.2Angular2端
4.2.1創建View Model
在wwwroot/app下創建一個目錄:_model, 並添加一個Typescript文件RequestResult.ts,內容應該是這樣。
export class RequestResult {
  State: number;
  Msg: string;
  Data: Object;
}
4.2.2創建Service
在wwwroot/app下創建一個目錄:_services,並添加一個Typescript文件auth.service.ts,內容應該是這樣。
import { Injectable } from "@angular/core";
import { Headers, Http } from "@angular/http";
import "rxjs/add/operator/toPromise";

import { RequestResult } from "../_model/RequestResult";

@Injectable()
export class AuthService {
  private tokeyKey = "token";
  private token: string;

  constructor(
    private http: Http
  ) { }

  login(userName: string, password: string): Promise<RequestResult> {
    return this.http.post("/api/TokenAuth", { Username: userName, Password: password }).toPromise()
      .then(response => {
        let result = response.json() as RequestResult;
        if (result.State == 1) {
          let json = result.Data as any;

          sessionStorage.setItem("token", json.accessToken);
        }
        return result;
      })
      .catch(this.handleError);
  }

  checkLogin(): boolean {
    var token = sessionStorage.getItem(this.tokeyKey);
    return token != null;
  }

  getUserInfo(): Promise<RequestResult> {
    return this.authGet("/api/TokenAuth");
  }

  authPost(url: string, body: any): Promise<RequestResult> {
    let headers = this.initAuthHeaders();
    return this.http.post(url, body, { headers: headers }).toPromise()
      .then(response => response.json() as RequestResult)
      .catch(this.handleError);
  }

  authGet(url): Promise<RequestResult> {
    let headers = this.initAuthHeaders();
    return this.http.get(url, { headers: headers }).toPromise()
      .then(response => response.json() as RequestResult)
      .catch(this.handleError);
  }

  private getLocalToken(): string {
    if (!this.token) {
      this.token = sessionStorage.getItem(this.tokeyKey);
    }
    return this.token;
  }

  private initAuthHeaders(): Headers {
    let token = this.getLocalToken();
    if (token == null) throw "No token";

    var headers = new Headers();
    headers.append("Authorization", "Bearer " + token);

    return headers;
  }

  private handleError(error: any): Promise<any> {
    console.error('An error occurred', error);
    return Promise.reject(error.message || error);
  }
}
本文件主要用來完成登錄以及登錄驗證工作,之後該service將可以被注入到Component中以便被Component調用。
注:主要的邏輯都應該寫到service中
4.2.3.創建Component
4.2.3.1.在wwwroot/app下創建一個目錄home,該目錄用來存放HomeComponent,home應擁有如下文件:
•home.component.ts
import { Component, OnInit } from "@angular/core";

import { AuthService } from "../_services/auth.service";

@Component({
  moduleId: module.id,
  selector: "my-home",
  templateUrl: "view.html",
  styleUrls: ["style.css"]
})
export class HomeComponent implements OnInit {
  isLogin = false;
  userName: string;

  constructor(
    private authService: AuthService
  ) { }

  ngOnInit(): void {
    this.isLogin = this.authService.checkLogin();
    if (this.isLogin) {
      this.authService.getUserInfo().then(res => {
        this.userName = (res.Data as any).UserName;
      });
    }

  }
}
查閱代碼,在@Component中指定了View以及style。
AuthService被在構造方法中被注入了本Component,ngOnInit是接口OnInit的一個方法,他在Component初始化時會被調用。
•style.css
/*styles of this view*/
本例中沒有添加任何樣式,如有需要可以寫在這裡。
•view.html
<div *ngIf="isLogin">
  <h1>Hi <span>{{userName}}</span></h1>
</div>

<div *ngIf="!isLogin">
  <h1>please login</h1>
  <a routerLink="/login">Login</a>
</div>
*ngIf=""是Angular2 的其中一種標記語法,作用是當返回真時渲染該節點,完整教程請參閱官方文檔。
4.2.3.2.在wwwroot/app下創建目錄Login,該目錄用來存放LoginComponent,文件結構類似於上一節。
•login.component.ts
import { Component } from "@angular/core";
import { Router } from '@angular/router';

import { AuthService } from "../_services/auth.service";

@Component({
  moduleId: module.id,
  selector: "my-login",
  templateUrl: "view.html",
  styleUrls: ["style.css"]
})
export class LoginComponent {

  private userName: string;
  private password: string;

  constructor(
    private authService: AuthService,
    private router: Router
  ) { }

  login() {
    this.authService.login(this.userName, this.password)
      .then(result => {
        if (result.State == 1) {
          this.router.navigate(["./home"]);
        }
        else {
          alert(result.Msg);
        }
      });
  }
}
•style.css
/*styles of this view*/
•view.html
<table>
  <tr>
    <td>userName:</td>
    <td><input [(ngModel)]="userName" placeholder="useName:try type user1" /></td>
  </tr>
  <tr>
    <td>userName:</td>
    <td><input [(ngModel)]="password" placeholder="password:try type user1psd" /></td>
  </tr>
  <tr>
    <td></td>
    <td><input type="button" (click)="login()" value="Login" /></td>
  </tr>
</table>
4.2.4.應用路由
路由是切換多頁面用的。
在wwwroot/app下新建一個Typescript文件,命名為app-routing.module.ts,內容應該是這個樣子。
import { NgModule } from "@angular/core";
import { RouterModule, Routes } from "@angular/router";

import { HomeComponent } from "./home/home.component";
import { LoginComponent } from "./login/login.component"

const routes: Routes = [
  { path: "", redirectTo: "/home", pathMatch: "full" },
  { path: "home", component: HomeComponent },
  { path: "login", component: LoginComponent }
];

@NgModule({
  imports: [RouterModule.forRoot(routes)],
  exports: [RouterModule]
})
export class AppRoutingModule { }
接下來我們來應用這個路由,
打開app.module.ts,更新代碼如下:
import { NgModule } from "@angular/core";
import { BrowserModule } from "@angular/platform-browser";
import { HttpModule } from "@angular/http";
import { FormsModule } from "@angular/forms";

import { AppRoutingModule } from "./app-routing.module";

import { AuthService } from "./_services/auth.service";

import { AppComponent } from "./app.component";
import { HomeComponent } from "./home/home.component";
import { LoginComponent } from "./login/login.component";

@NgModule({
  bootstrap: [AppComponent],
  imports: [
    BrowserModule,
    HttpModule,
    AppRoutingModule,
    FormsModule
  ],
  declarations: [
    AppComponent,
    HomeComponent,
    LoginComponent
  ],
  providers: [AuthService]
})
export class AppModule { }
NgModule和BrowserModule你可以理解為基礎模塊,必加的。
HttpModule是做http請求用的。
FormsModule是做雙向數據綁定用的,比如下面這樣的,如果想把數據從view更新到component,就必須加這個。
<input [(ngModel)]="userName" placeholder="useName:try type user1" />
AppRoutingModule即為我們剛才添加的路由文件。
AuthService是我們最早添加的service文件。
AppComponent是我們最初添加的那個app.component.ts裡的那個component.
HomeComponent,LoginComponent同上。
最後我們再app.component.ts中添加路由錨點,
把template的值為 "<router-outlet></router-outlet>"
完整的代碼應該是這樣:
import { Component } from '@angular/core';

@Component({
  moduleId: module.id,
  selector: 'my-app',
  template: "<router-outlet></router-outlet>",
})
export class AppComponent {
}
router-outlet是路由錨點的關鍵詞。
至此,所有代碼完成,F5調試吧。
以上就是本文的全部內容,希望對大家的學習有所幫助,也希望大家多多支持腳本之家。