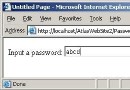
<P><IMG height=477 alt="Sample Image" src="multiuploads/multipleuploads1.jpg"
width=453></P>
<H2>Introduction</H2>
<P>I will brIEfly demonstrate how to upload multiple files using one
HttpInputFile control - Hotmail style! Many developers have been asking how to
upload multiple files at once. The <CODE lang=cs><Input type=file/></CODE>
allows a user to select only one file at a time thereby forcing a developer to
use multiple <CODE lang=cs><Input type=file/></CODE> on a page.</P>
<H2>Background</H2>
<P>This article is a repost of an article that I posted here about a week ago.
There was a bug in the first article so I took it down after explaining the bug.
If you missed the explanation here is a summary. The <CODE
lang=cs>HttpInputControl</CODE> control does not allow for the <CODE
lang=cs>PostedFile</CODE> value to be set at runtime. If that were the case then
anyone could set a <CODE lang=cs><Input type=file/></CODE> value with the
name of a file that is on the clIEnt and download it. So this is by design that
the value can not be set. I attempted to store the values of the selected files
in a listbox and then pass those values to the <CODE
lang=cs>HttpInputControl</CODE>. In my rush to post I did not notice that empty
files were being saved to the web server. So here is my second and I hope final
attempt at demonstrating how to upload multiple files to a web server while
using only one <CODE lang=cs>HttpInputControl</CODE> control.
<H2>Using the code</H2>
<P>Using this code could not get any simpler. It''s almost to easy thanks to
.Net! First there is my style sheet, <I>StyleSheet.CSS</I>. I am fond of the
colored flat buttons so I created a style called ''bluebutton''. Next is the
<I>.aspx</I> page, <I>attachme.ASPx</I> followed by the code-behind
<I>attachme.ASPx.cs</I>.</P>
<P>My style sheet code for <I>StyleSheet.CSS</I>:</$False$
P><PRE lang=cs>.bluebutton
{
background-color:LightSteelBlue;
border-style:solid;
border-width: 1px;
border-color: LightSkyBlue;
}</PRE>
<P>Now here is the code for <I>attachme.ASPx</I>.</P>
<DIV class=precollapse id=premain1 ><IMG id=preimg1
height=9
src="/School/UploadFiles_7810/201104/20110420151239121.gif" width=9 preid="1">
Collapse</DIV><PRE lang=aspnet id=pre1 ><%@ Page language="c#" Codebehind="attachme.ASPx.cs" AutoEventWireup="false"
Inherits="webchange.attachme" %>
<!DOCTYPE HTML PUBLIC "-//W3C//DTD Html 4.0 Transitional//EN" >
<Html>
<HEAD>
<title>attachme</title>
<meta content="Microsoft Visual Studio 7.0" name="GENERATOR">
<meta content="C#" name="CODE_LANGUAGE">
<meta content="JavaScript" name="vs_defaultClIEntScript">
<meta content="http://schemas.microsoft.com/intellisense/IE5"
name="vs_targetSchema">
<LINK href="StyleSheet.CSS" rel="stylesheet">
</HEAD>
<body MS_POSITIONING="GridLayout">
<form id="attachme" method="post" encType="multipart/form-data" runat="server">
<INPUT class="bluebutton" id="FindFile" style="Z-INDEX: 101; LEFT: 36px;
WIDTH: 274px; POSITIO
namespace webchange
{
/// <summary>
/// attachme allows for multiple files to be uploaded to your web server while using
/// only one HttpInputFile control and a listbox.
/// </summary>
public class attachme : System.Web.UI.Page
{
protected System.Web.UI.WebControls.ListBox ListBox1;
protected System.Web.UI.WebControls.Button AddFile;
protected System.Web.UI.WebControls.Button RemvFile;
protected System.Web.UI.HtmlControls.HtmlInputFile FindFile;
protected System.Web.UI.HtmlControls.HtmlInputButton Upload;
protected System.Web.UI.WebControls.Label Label1;
protected System.Web.UI.HtmlControls.HtmlGenericControl txtOutput;
public ArrayList files = new ArrayList();
static public ArrayList hif = new ArrayList();
public int filesUploaded = 0;
private void Page_Load(object sender, System.EventArgs e)
{
// Put user code to initialize the page here
}
#region Web Form Designer generated code
override protected void OnInit(EventArgs e)
{
//
// CODEGEN: This call is requ ired by the ASP.Net Web Form Designer.
//
InitializeComponent();
base.OnInit(e);
}
/// <summary>
/// Required method for Designer support - do not modify
/// the contents of this method with the code editor.
/// </summary>
private void InitializeComponent()
{
this.RemvFile.Click += new System.EventHandler(this.RemvFile_Click);
this.AddFile.Click += new System.EventHandler(this.AddFile_Click);
this.Upload.ServerClick += new System.EventHandler(this.Upload_ServerClick);
this.Load += new System.EventHandler(this.Page_Load);
}
#endregion
/// <summary>
/// AddFile will add the path of the clIEnt side file that is currently in the
/// PostedFile
/// property of the HttpInputFile control to the listbox.
/// </summary>
/// <param name="sender"></param>
/// <param name="e"></param>
private void AddFile_Click(object sender,System.EventArgs e)
{
if (Page.IsPostBack == true)
{
hif.Add(FindFile);
ListBox1.Items.Add(FindFile.PostedFile.FileName);
}
else
{
}
}
/// <summary>
/// RemvFile will remove the currently selected file from the listbox.
/// </summary>
/// <param name="sender"></param>
/// <param name="e"></param>
private void RemvFile_Click(object sender, System.EventArgs e)
{
if(ListBox1.Items.Count != 0)
{
hif.RemoveAt(ListBox1.SelectedIndex);
ListBox1.Items.Remove(ListBox1.SelectedItem.Text);
}
}
/// <summary>
/// Upload_ServerClick is the server side script that will upload the files to
/// the web server
/// by looping through the files in the listbox.
/// </summary>
/// <param name="sender"></param>
/// <param name="e"></param>
public void Upload_ServerClick(object sender, System.EventArgs e)
{
string baseLocation = "C:\\temp\\";
string status = "";
if((ListBox1.Items.Count == 0) && (filesUploaded == 0))
{
Label1.Text = "Error - a file name must be specifIEd.";
return;
}
else
{
foreach(System.Web.UI.HtmlControls.HtmlInputFile HIF in hif)
{
try
{
nbsp; string fn = System.IO.Path.GetFileName(HIF.PostedFile.FileName);
HIF.PostedFile.SaveAs(baseLocation + fn);
filesUploaded++;
status += fn + "<br>";
}
catch(Exception err)
{
Label1.Text = "Error saving file " + baseLocation
+ "<br>" + err.ToString();
}
}
if(filesUploaded == hif.Count)
{
Label1.Text = "These " + filesUploaded + " file(s) were "
+ "uploaded:<br>" + status;
}
hif.Clear();
ListBox1.Items.Clear();
}
}
}
}</PRE>
<P><CODE lang=cs>AddFile_Click</CODE> first checks to see if we are posting back
to the page. If we are then it simply adds a copy of <CODE lang=cs>HttpInputFile
FindFile</CODE> to the <CODE lang=cs>hifArrayList</CODE>. We are using the <CODE
lang=cs>ArrayList</CODE> to hold <CODE lang=cs>HttpInputFile</CODE> objects. By
holding them, as I will show shortly, we will have Access to all of that
object''s methods and propertIEs. The final line of <CODE
lang=cs>AddFile_Click</CODE> adds the fully qualifIEd path of the file to the
listbox. <PRE lang=cs>private void AddFile_Click(object sender, System.EventArgs e)
{
if (Page.IsPostBack == true)
{
hif.Add(FindFile);
ListBox1.Items.Add(FindFile.PostedFile.FileName);
}
else
{
}
}</PRE><CODE lang=cs>RemvFile_Click</CODE> first ensures that there are items in
the listbox to remove, then removes the selected item from the <CODE
lang=cs>ArrayList</CODE> and the <CODE lang=cs>ListBox</CODE>. <PRE lang=cs>private void RemvFile_Click(object sender,System.EventArgs e)
{
if(ListBox1.Items.Count != 0)
{
hif.RemoveAt(ListBox1.SelectedIndex);
ListBox1.Items.Remove(ListBox1.SelectedItem.Text);
}
}</PRE><CODE lang=cs>Upload_ServerClick</CODE> is the heart of the form. First
we set the destination variable''s, <CODE lang=cs>baseLocation</CODE>, path. This
is the location on the web server where the file will be uploaded to. Next we
ensure that there are files to be uploaded. Assuming that there are loop through
the items in the <CODE lang=cs>ArrayList hif</CODE> extracting the filename from
each path and appending it to the <CODE lang=cs>baseLocation</CODE> variable.
Call the <CODE lang=cs>SaveAs</CODE> method of the <CODE
lang=cs>HttpInputFile</CODE> control and pass it the path and filename to upload
to the server. Of course we will check for errors and will handle them
accordingly. Lastly explicitly clear the <CODE lang=cs>ArrayList hif</CODE>.
Since this is a static variable we want to ensure that its contents have been
removed from memory so as not to duplicate and overwrite files on the server.
Clear the listbox. You are done. Check the server to make sure the files are
there and are of the proper size.
<P></P>
<DIV class=precollapse id=premain5 ><IMG id=preimg5
height=9
src="/School/UploadFiles_7810/201104/20110420151239121.gif" width=9 preid="5">
Collapse</DIV><PRE lang=cs id=pre5 >public void Upload_ServerClick(object sender, System.EventArgs e)
{
string baseLocation = "C:\\temp\\";
string status = "";
if((ListBox1.Items.Count == 0) && (filesUploaded == 0))
{
Label1.Text = "Error - a file name must be specifIEd.";
return;
}
else
{
foreach(System.Web.UI.HtmlControls.HtmlInputFile HIF in hif)
{
try
{
string fn = System.IO.Path.GetFileName(HIF.PostedFile.FileName);
HIF.PostedFile.SaveAs(baseLocation + fn);
filesUploaded++;
status += fn + "<br>";
}
catch(Exception err)
{
Label1.Text = "Error saving file " + baseLocation + "<br>"
+ err.ToString();
}
}
if(filesUploaded == hif.Count)
{
Label1.Text = "These " + filesUploaded + " file(s) were uploaded:<br>"
ventArgs e)
{
if (Page.IsPostBack == true)
{
hif.Add(FindFile);
ListBox1.Items.Add(FindFile.PostedFile.FileName);
}
else
{
}
}</PRE><CODE lang=cs>RemvFile_Click</CODE> first ensures that there are items in
the listbox to remove, then removes the selected item from the <CODE
lang=cs>ArrayList</CODE> and the <CODE lang=cs>ListBox</CODE>. <PRE lang=cs>private void RemvFile_Click(object sender,System.EventArgs e)
{
if(ListBox1.Items.Count != 0)
{
hif.RemoveAt(ListBox1.SelectedIndex);
ListBox1.Items.Remove(ListBox1.SelectedItem.Text);
}
}</PRE><CODE lang=cs>Upload_ServerClick</CODE> is the heart of the form. First
we set the destination variable''s, <CODE lang=cs>baseLocation</CODE>, path. This
is the location on the web server where the file will be uploaded to. Next we
ensure that there are files to be uploaded. Assuming that there are loop through
the items in the <CODE lang=cs>ArrayList hif</CODE> extracting the filename from
each path and appending it to the <CODE lang=cs>baseLocation</CODE> variable.
Call the <CODE lang=cs>SaveAs</CODE> method of the <CODE
lang=cs>HttpInputFile</CODE> control and pass it the path and filename to upload
to the server. Of course we will check for errors and will handle them
accordingly. Lastly explicitly clear the <CODE lang=cs>ArrayList hif</CODE>.
Since this is a static variable we want to ensure that its contents have been
removed from memory so as not to duplicate and overwrite files on the server.
Clear the listbox. You are done. Check the server to make sure the files are
there and are of the proper size.
<P></P>
<DIV class=precollapse id=premain5 ><IMG id=preimg5
height=9
src="/School/UploadFiles_7810/201104/20110420151239121.gif" width=9 preid="5">
Collapse</DIV><PRE lang=cs id=pre5 >public void Upload_ServerClick(object sender, System.EventArgs e)
{
string baseLocation = "C:\\temp\\";
string status = "";
if((ListBox1.Items.Count == 0) && (filesUploaded == 0))
{
Label1.Text = "Error - a file name must be specifIEd.";
return;
}
else
{
foreach(System.Web.UI.HtmlControls.HtmlInputFile HIF in hif)
{
try
{
string fn = System.IO.Path.GetFileName(HIF.PostedFile.FileName);
HIF.PostedFile.SaveAs(baseLocation + fn);
filesUploaded++;
status += fn + "<br>";
}
catch(Exception err)
{
Label1.Text = "Error saving file " + baseLocation + "<br>"
+ err.ToString();
}
}
if(filesUploaded == hif.Count)
{
Label1.Text = "These " + filesUploaded + " file(s) were uploaded:<br>"
+ status;
}
hif.Clear();
ListBox1.Items.Clear();
}
}</PRE>