通常IOC實現的步驟為-->建立容器-->加入組件-->獲取組件-->使用組件.這篇文章還是以這四個環節來闡述。
一.建立容器
這裡我拿手上的一個現成項目來做分析,首先我們得建立IOC容器.項目中是建立了一個容器類Container來專門負責IOC容器的搭建及組件的加入.代碼如下:
 1using System;
 2using System.Collections.Generic;
 3using System.Text;
 4
 5using Castle.Windsor;
 6using Castle.MicroKernel;
 7using Castle.Windsor.Configuration.Interpreters;
 8using TMS.Framework.Exceptions;
 9
10namespace TMS.Framework
11{
12  /**//// <summary>
13  /// The IoC container which provides interface to find Service.
14  /// </summary>
15  public sealed class Container
16  {
17    /**//// <summary>
18    /// WindsorContainer object
19    /// </summary>
20    private WindsorContainer windsor;
21    //public WindsorContainer Windsor
22    //{
23    //  get { return windsor; }
24    //}
25
26    private IKernel kernel;
27    public IKernel Kernel
28    {
29      get { return kernel; }
30    }
31
32    /**//// <summary>
33    /// this
34    /// </summary>
35    private static readonly Container instance = new Container();
36    public static Container Instance
37    {
38      get { return Container.instance; }
39    }
40
41    /**//// <summary>
42    /// Construction Method.
43    /// Initialization IOC.
44    /// </summary>
45    public Container()
46    {
47      try
48      {
49        //IOC containers establishment, and through the most dynamic configuration file by adding components.
50        Castle.Core.Resource.ConfigResource source = new Castle.Core.Resource.ConfigResource();
51        XmlInterpreter interpreter = new XmlInterpreter(source);
52        windsor = new WindsorContainer(interpreter);
53        kernel = windsor.Kernel;
54      }
55      catch (BizSystemException bSE)
56      {
57        TMSExcetionBase.ProcessBizException(bSE);
58      }
59    }
60
61    /**//// <summary>
62    /// Returns a component instance by the type of service.
63    /// </summary>
64    /// <typeparam name="T"></typeparam>
65    /// <returns></returns>
66    public T Resolve<T>()
67    {
68      return (T)kernel[typeof(T)];
69    }
70
71    /**//// <summary>
72    /// Returns a component instance by the service name.
73    /// </summary>
74    /// <param name="service"></param>
75    /// <returns></returns>
76    private object Resolve(Type service)
77    {
78      return kernel[service];
79    }
80
81    /**//// <summary>
82    /// Returns a component instance by the service name.
83    /// </summary>
84    /// <param name="key"></param>
85    /// <returns></returns>
86    private object Resolve(String key)
87    {
88      return kernel[key];
89    }
90
91    /**//// <summary>
92    /// Release resource that be container used.
93    /// </summary>
94    public void Dispose()
95    {
96      kernel.Dispose();
97    }
98  }
99}
100
注意:上面代碼種的ProcessBizException()是一個自定義異常處理TMSExcetionBase類的靜態方法。
二 . 加入組件
加入組件的過程在上一部建立容器的時候我們已經指定讓他去配置文件中查找。看看下面代碼:
1Castle.Core.Resource.ConfigResource source = new Castle.Core.Resource.ConfigResource();
2XmlInterpreter interpreter = new XmlInterpreter(source);
3windsor = new WindsorContainer(interpreter);
在配置文件的<configSections>配置節裡首先加入下面的配置,關於這點的作用在此就不多解釋,詳細可以看看我之前寫的文章:
<configSections>
  <!-- Specify the castle section handler -->
  <section name="castle" type="Castle.Windsor.Configuration.AppDomain.CastleSectionHandler, Castle.Windsor"/>
上面我門定義了castle配置節點,那castle的配置節點該怎麼去配置呢,看看下面的配置代碼:
1 <castle>
2  <include uri=http://www.cnblogs.com/beniao/admin/file://configuration//TMS.Role.config />
3  <include uri=http://www.cnblogs.com/beniao/admin/file://configuration//TMS.UserInfo.config />
4 </castle>
這樣的配置到底是什麼意思呢?在Container類裡建立容器的同時就指定了他到配置文件中去找需要加入到容器的組件,組件我們又通過配置文件中配置了castle配置節點,在castle的詳細配置中,我們可以看到,使用了include語句加載了指定的組件配置器,<include uri=file://Configuration//TMS.UserInfo.config/>,代表根目錄下的Configuration文件下的TMS.UserInfo.config是一個詳細的組件配置器。下面我們看看組件配置器的具體配置:
1<?xml version="1.0" encoding="utf-8" ?>
2<configuration>
3 <components>
4  <component id="UserInfo" service="TMS.Service.IUserInfoService,TMS.Service"
5        type="TMS.Component.UserInfoComponent,TMS.Component" />
6 </components>
7</configuration>
8
上面這樣的組件配置到底是什麼意思呢?在這裡我給大家分析下。
service="TMS.Service.IUserInfoService,TMS.Service"----代表服務(既接口,在TMS.Service這個程序集下)
type="TMS.Component.UserInfoComponent,TMS.Component" --代表組件(既實現服務的類,TMS.Component下)
現在大家應該很清楚的知道上面的配置是什麼意思了吧,也就是說TMS.Component程序集下的UserInfoComponent這個組件類實現了TMS.Servie程序集下的UserInfoService這個服務(接口).
三 .獲取組件及使用組件
說了半天終於到了最後階段了。前面的都是為這一步做准備工作,真是享福的在後面,下面來看看怎麼獲取一個組件並使用這個組件。
通過傳入的接口,讓容器自動去找實現接口的組件。
IUserInfoService user = Container.Instance.Resolve<IUserInfoService>();
下面是調用代碼:
1protected void Page_Load(object sender, EventArgs e)
2{
3  this.GridView1.DataSource = user.InquireAll();
4  this.GridView1.DataBind();
5}
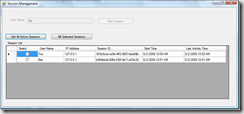
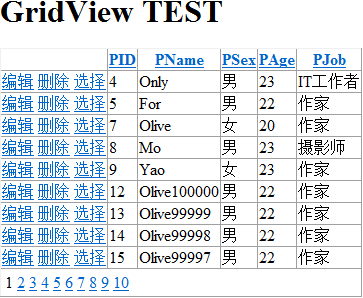
運行結果如下:
本文配套源碼