第一步:創建WCF服務
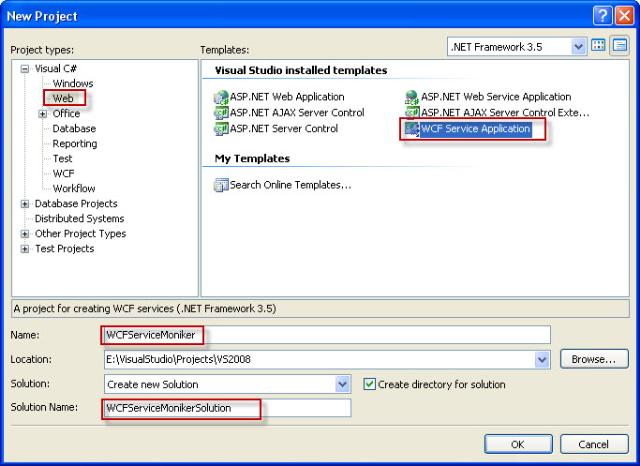
1 打開Visual Studio 2008, 新建一項目,我們這裡建立一個Web站點,采用WCF Service Application模板,新項目名稱為WCFServiceMoniker,如下圖所示:
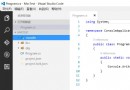
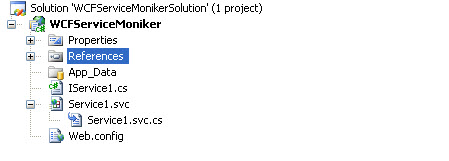
2 單擊“Ok”之後,VS2008將為我們生成相應的目錄結構和文件,如下:
3 為了簡單,我們不對生成的目錄結構做任何改動。接下來,我們打開IService1.cs文件,刪除系統生成的操作契約,然後增加我們自己的契約如下:
1namespace WCFServiceMoniker
2
3{
4
5  [ServiceContract]
6
7  public interface IService1
8
9  {
10
11    [OperationContract]
12
13    string SayHello(string yourwords);
14
15  }
16
17}
18
19
4 接著我們打開Service1.cs文件,刪除自動生成的內容,增加對SayHello方法的實現:
1namespace WCFServiceMoniker
2
3{
4
5  public class Service1 : IService1
6
7  {
8
9    public string SayHello(string yourwords)
10
11    {
12
13      return string.Format("Hello World! You entered: {0}", yourwords);
14
15    }
16
17  }
18
19}
20
21
5 針對Web.config我們不做任何改動,其關於WCF部分的設置如下:
1<system.serviceModel>
2
3     <services>
4
5       <service name="WCFServiceMoniker.Service1"

behaviorConfiguration="WCFServiceMoniker.Service1Behavior">
6
7          <!-- Service Endpoints -->
8
9          <endpoint address="" binding="wsHttpBinding"

contract="WCFServiceMoniker.IService1">
10
11            <!--
12
13       Upon deployment, the following identity element should be removed or

replaced to reflect the
14
15       identity under which the deployed service runs. If removed, WCF will infer

an appropriate identity
16
17       automatically.
18
19     -->
20
21            <identity>
22
23              <dns value="localhost"/>
24
25            </identity>
26
27          </endpoint>
28
29          <endpoint address="mex" binding="mexHttpBinding"

contract="IMetadataExchange"/>
30
31       </service>
32
33     </services>
34
35     <behaviors>
36
37       <serviceBehaviors>
38
39          <behavior name="WCFServiceMoniker.Service1Behavior">
40
41            <!-- To avoid disclosing metadata information, set the value

below to false and remove the metadata endpoint above before deployment -->
42
43            <serviceMetadata httpGetEnabled="true"/>
44
45            <!-- To receive exception details in faults for debugging

purposes, set the value below to true. Set to false before deployment to avoid disclosing

exception information -->
46
47            <serviceDebug includeExceptionDetailInFaults="false"/>
48
49          </behavior>
50
51       </serviceBehaviors>
52
53     </behaviors>
54
55   </system.serviceModel>
56
57
6 好了,我們的WCF服務已經建好了,編譯一下,一切Ok. 接下來我們需要在IIS中創建一個虛擬目錄 了,我們叫WCFServiceMoniker,讓其指向WCF服務所在的目錄。
7 好了,我們在IE中輸入http://localhost/WCFServiceMoniker/Service1.svc看看,是否能看到我們 熟悉的WCF Service的界面,正常情況下應該沒有問題。
第二步:創建客戶端庫文件
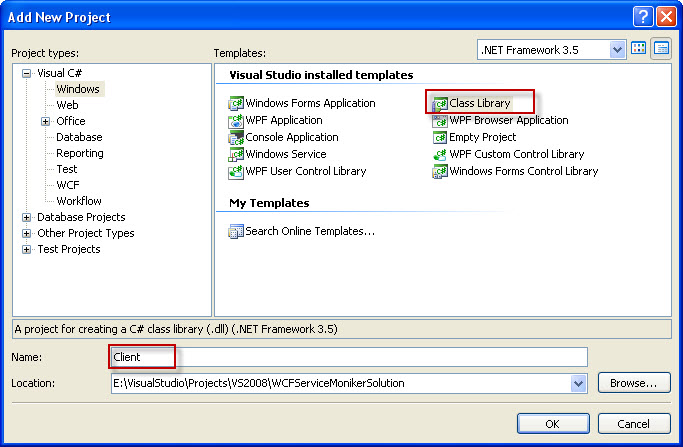
1 在解決方案中增加Client項目。這裡我們選中的是Class Library模板,項目名稱為Client.
2 單擊”Ok”按鈕之後,VS2008將為我們生成一個包含Class1.cs文件的項目,我們先刪除Class1.cs 文件,然後打開Client的項目屬性頁。在Build Events的Pre-build event command line中增加產生WCF Service客戶端的命令:
Call "D:\Program Files\Microsoft Visual Studio 9.0\VC\vcvarsall.bat"

x86
svcutil /language:cs /config:$(ProjectDir)App.config /out:$(ProjectDir)

generatedClient.cs http://localhost/WCFServiceMoniker/service1.svc?wsdl
如下圖所示:
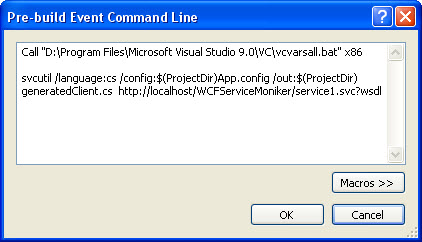
注意:在這裡我的VS2008是安裝在D盤,如果你的VS2008安裝在其他位置,你需要將第一個命令行改成 相應的安裝目錄。
3 單擊”Ok”按鈕。好了,現在讓我們編譯一下Client項目,系統將在Client項目的目錄中自動產生 一個名為generatedClient.cs的文件,我們把這個文件增加的Client項目中。
4 打開Client項目的AssemblyInfo.cs文件,然後找到[assembly: ComVisible(false)],將其改成 [assembly: ComVisible(true)],更改這個屬性的目的是為了後面將類型庫注冊成COM。
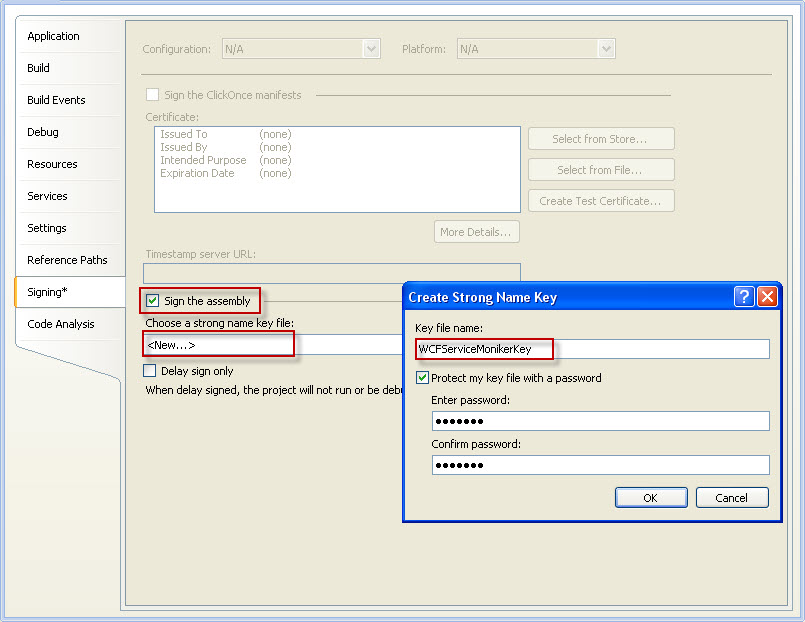
5 再次打開Client的項目屬性,選中Signing(簽名)標簽,然後在sign the assembly前面的Checkbox 打上勾。這時下面的Choose a strong name key file將從disable變成enable,我們選擇<New…>, 然後將彈出一個創建強命名Key文件的對話框,我們輸入WCFServiceMonikerKey,然後輸入你所希望的密碼 ,例如:http://lazybee.cnblogs.com/,然後點擊“OK”我們的Key文件就創建好了。(這一步主要是為 了將生成的程序集放入全局程序集緩存中。)
6 再次編譯一下Client,發現系統找不到ServiceModel命名空間,我們將System.ServiceModel添加到 Reference(應用)中,再次編譯,一切搞定。
第三步:注冊Client程序集
1 將Client.dll添加的全局程序集緩存中
Gacutil /i Client.dll
2 向COM注冊Client.dll程序集中的類型
Regasm Client.dll /t
運行此命令之後,將會注冊程序集中的類型,同時生成Client.tlb文件。
3 現在如果我們打開OLEView,我們就可以在Type Libraries(類型庫)中看到剛才注冊的Client類型了 。
4 由於我們可能需要多次進行注冊反注冊工作,所以我為此寫了兩個批處理文件。以下是這兩個批處 理文件的內容:
注冊的批處理文件Reg.bat的內容如下:
@echo off

"D:\Program Files\Microsoft Visual Studio 8\SDK\v2.0\Bin\gacutil" /i Client.dll

%systemroot%\Microsoft.NET\Framework\v2.0.50727\Regasm Client.dll /t

Pause
反注冊的批處理文件UnReg.bat的內容如下:
@echo off

"D:\Program Files\Microsoft Visual Studio 8\SDK\v2.0\Bin\gacutil" /u Client

%systemroot%\Microsoft.NET\Framework\v2.0.50727\Regasm Client.dll /t /u

rem del .\bin\debug\Client.dll

del Client.tlb

Pause
第四步:在Script中調用WCF服務
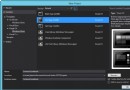
1 在我們寫Script文件之前,首先讓我們用OLE打開剛才注冊的Client.dll的COM類型信息看看,打開 之後如下圖所示:
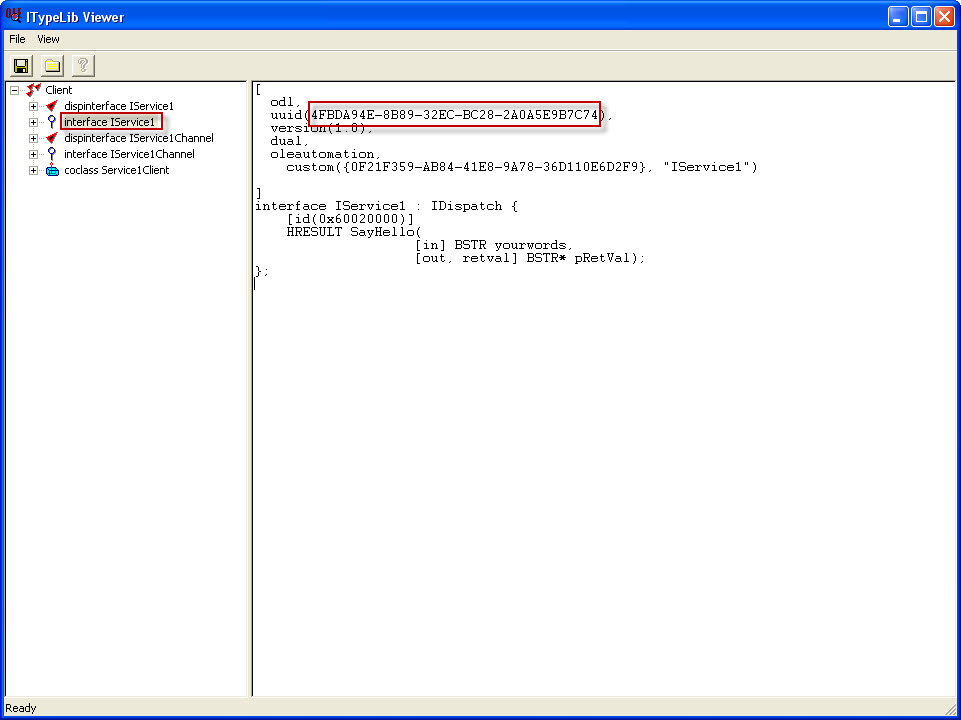
2 大家注意紅色框框中的內容,左邊紅框中是我們的服務契約IService1接口,右邊紅框是注冊之後的 UUID,在我們的Script中將要使用這個UUID.
3 下面就是創建我們的Script文件了,我們起名為CallWCFService_TypedContract.vbs,內容如下:
1'---------------------------------------------------------------
2
3' Typed Contract service moniker example
4
5'---------------------------------------------------------------
6
7' Create a service moniker object using a strongly typed contract
8
9' This references the address, a standard binding type and the
10
11' locally registered COM-visible contract ID
12
13
14
15 monikerString = "service:address='http://localhost/WCFServiceMoniker/Service1.svc'"
16
17 monikerString = monikerString + ", binding=wsHttpBinding"
18
19 monikerString = monikerString + ", contract={4FBDA94E-8B89-32EC-BC28-2A0A5E9B7C74}"
20
21
22
23 ' Create the service moniker object
24
25 Set serviceMoniker = GetObject(monikerString)
26
27
28
29 ' Call the service operations using the moniker object
30
31 WScript.Echo serviceMoniker.SayHello("I am LazyBee, My blog is

http://lazybee.cnblogs.com/ ")
32
33
34
35 Set serviceMoniker= nothing
36
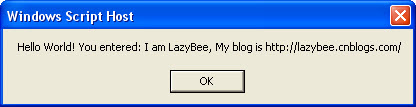
4 保存之後,直接雙擊運行,你就可以看到運行結果了:
第五步:在Word的宏中調用WCF服務
1 打開Word, 添加一個宏(宏-)Visal Basic編輯器或者通過錄制宏的方式添加),增加下面的代碼 :
Sub CallWCFService_TypedContract()

Dim strMonikerString As String

Dim serviceMoniker As Object

'---------------------------------------------------------------

' Typed Contract service moniker example

'---------------------------------------------------------------

' Create a service moniker object using a strongly typed contract

' This references the address, a standard binding type and the

' locally registered COM-visible contract ID

monikerString = "service:address='http://localhost/WCFServiceMoniker/Service1.svc'"

monikerString = monikerString + ", binding=wsHttpBinding"

monikerString = monikerString + ", contract={4FBDA94E-8B89-32EC-BC28-2A0A5E9B7C74} "

' Create the service moniker object

Set serviceMoniker = GetObject(monikerString)

' Call the service operations using the moniker object

MsgBox serviceMoniker.SayHello("I am LazyBee, My blog is http://lazybee.cnblogs.com/ ")

Set serviceMoniker = Nothing

End Sub
2 直接運行,同樣能得到上圖類似的結果。
注:在VB6中調用和Word中調用是一樣的。
本文配套源碼:http://www.bianceng.net/dotnet/201212/755.htm