《我的WCF之旅》系列自開篇以來,得到了園子裡很多朋友的厚愛,並榮登了博客園2007年度系列博文Top 10。由於工作原因,沉寂了幾個月,今天開始WCF新的旅程。如果說《我的WCF之旅》主要是對WCF基本原理概括性介紹,而對於這個新的系列,我將和大家分享我對WCF的一些實現機制、設計原理的理解,以及我在實際的項目開發中的一些實踐經驗(比如在後續的一些文章中,我將介紹通過WCF Extension實現一些在真正的分布式項目開發中很有現實意義的功能)。
Windows Communication Foundation,顧名思義,就是一個在Windows平台下進行如何進行Communication的基礎構造(Infrastructure)。由於WCF的核心還是Communication,這個新的系列就先來討論WCF如何進行Communication的。通過本篇文章,你將對WCF的通信機制有一個總體的認識,了解到一些和通信相關的概念,比如:Communication、Channel、Channel Listener、Channel Factory、BindingElement,Channel Shape等等。
我們已經很清楚了,WCF的通信是通過Endpoint來完成的:Service Provider將WCF service通過Endpoint暴露出來供Service consumer調用,而Service consumer通過與之相匹配的Endpoint來調用service。"Endpoint=ABC”,大家一定也牢記於心。就Endpoint包含的這3個元素而言,Address解決了尋址的問題,代表如何定位和標識對應的Endpoint,而Contract在對Service提供的功能、操作(Service Contract)以及數據(Data contract、Message contract和Fault contract)的抽象表示。而真正實現了通信功能的則是Binding。
1、Binding實現了所有的通信細節
總體上講,WCF主要有兩個層次構成:Channel Layer和Service Layer. 前者通過Channel Stack實現Message的傳輸,而後者對開發人員提供了一個Programming Mode。對於一般的WCF開發人員,不會接觸到Channel Layer,而只會調用Service Layer提供的API而以。
但是,如果你需要真正地認識WCF 整個通信框架,對Channel Layer的了解絕對是有必要的。在我看來,WCF最吸引我的地方不是它自己為我們提供了完備的通信相關的實現,而在於WCF是一個極具可擴展性的通信框架,無論是Channel Layer還是Service Layer,我們都可以通過WCF Extension對WCF進行自由的擴展以適應我們的具體需求,在本系列後續的文章中我將向大家介紹一系列有用的擴展。如何你想充分利用WCF提供給我們的擴展性,對Channel Layer的了解基本上是必須的。
嚴格地講,Binding是Service Layer層面上的概念,不過它是由Service Layer轉入Channel的入口,也是從Channel Layer到Service Layer的中介。我們說Binding實現了所有通信細節,是站在Service Layer角度來講的。至於Binding如何實現通信細節,則是通過Channel Layer來實現的。
為了讓大家對Binding如何實現通過現有一個感性的認識,我們來看一個簡單的例子。
2. Demo: 直接通過Binding進行通信
這個例子通過簡簡單單的幾行代碼,通過BasicHttpBinding實現了通信的全過程。該程序很想我們傳統的基於Socket的程序:Server端Listen request=>Accept request=>Process request=>Send reply;Client端Send request=>Receive reply。此外通過這個這個簡單的程序,將引出Channel Layer一系列重要的對象,比如Channel、RequestChannel、ReplyChannel、Channel Listener和Channel Factory等等。
整個應用有兩個Console application構成,分別模擬Server和Client.
我們先來看看Server端的代碼:
namespace Artech.MessagingViaBinding.Server
{
class Program
{
static void Main(string[] args)
{
Uri address = new Uri("");
BasicHttpBinding binding = new BasicHttpBinding();
IChannelListener<IReplyChannel> channelListener = binding.BuildChannelListener<IReplyChannel>(address);
channelListener.Open();
IReplyChannel channel = channelListener.AcceptChannel();
channel.Open();
Console.WriteLine("Begin to listen ");
while (true)
{
RequestContext context=channel.ReceiveRequest(new TimeSpan(1,0,0));
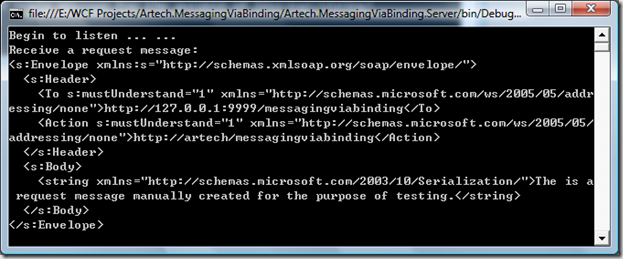
Console.WriteLine("Receive a request message:\n{0}", context.RequestMessage);
Message replyMessage = Message.CreateMessage(MessageVersion.Soap11, "", "This is a mannualy created reply message for the purpose of testing");
context.Reply(replyMessage);
}
}
}
}
我來簡單介紹一些上面這段代碼的邏輯:
創建Uri對象,代表監聽的URI:
EndpointAddress address = new EndpointAddress("");
創建BasicHttpBinding對象,我們正是通過它來使用所有的通信功能:
BasicHttpBinding binding = new BasicHttpBinding();
通過binding對象創建IChannelListener對象,並調用Open方法打開它:
IChannelListener<IReplyChannel> channelListener = binding.BuildChannelListener<IReplyChannel>(address);

channelListener.Open();
通過IChannelListener對象創建IReplyChannel 並調用Open方法打開它:
IReplyChannel channel = channelListener.AcceptChannel();

channel.Open();
在While循環中監聽來自client端的request,一旦request抵達, 調用IReplyChannel 的ReceiveRequest方法,並得到一個RequestContext 對象,通過RequestContext 對象可以得到request message並打印出來:
RequestContext context=channel.ReceiveRequest(new  TimeSpan(1,0,0));

Console.WriteLine("Receive a request message:\n{0}", context.RequestMessage);
創建一個Reply message,借助得到的RequestContext 對象發送回client端:
Message replyMessage = Message.CreateMessage(MessageVersion.Soap11, "", "This is a mannualy created reply message for the purpose of testing");

context.Reply(replyMessage);
再來看看Client端的代碼:
namespace Artech.MessagingViaBinding.Client
{
class Program
{
static void Main(string[] args)
{
EndpointAddress address = new EndpointAddress("");
BasicHttpBinding binding = new BasicHttpBinding();
IChannelFactory<IRequestChannel> chananelFactory= binding.BuildChannelFactory<IRequestChannel>();
chananelFactory.Open();
IRequestChannel channel = chananelFactory.CreateChannel(address);
channel.Open();
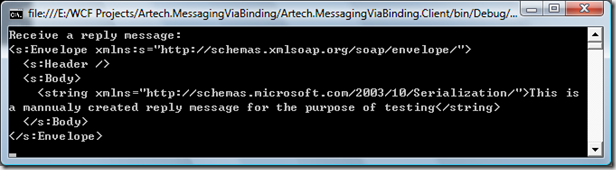
Message requestMessage = Message.CreateMessage(MessageVersion.Soap11, "", "The is a request message manually created for the purpose of testing.");
Message replyMessage = channel.Request(requestMessage);
Console.WriteLine("Receive a reply message:\n{0}", replyMessage);
channel.Close();
chananelFactory.Close();
Console.Read();
}
}
}
我們也來簡單分析一下上面這段代碼的邏輯:
創建EndpointAddress 對象,這和Server的Uri一致,代表請求的地址:
EndpointAddress address = new EndpointAddress("http://127.0.0.1:9999/messagingviabinding");
創建BasicHttpBinding對象,通過實現向Server端的發送Request,並接收Reply:
BasicHttpBinding binding = new BasicHttpBinding();
通過Binding對象創建IChannelFactory對象並調用Open方法打開它:IChannelFactory<IRequestChannel> chananelFactory= binding.BuildChannelFactory<IRequestChannel>();
chananelFactory.Open();
通過IChannelFactory對象創建IRequestChannel 對象並調用Open方法打開它:
IRequestChannel channel = chananelFactory.CreateChannel(address);
channel.Open();
創建Request message通過Channel對象發送到Server端,Request方法調用會返回一個Message對象代表從Server端發送回來的Reply message:
Message requestMessage = Message.CreateMessage(MessageVersion.Soap11, "http://artech/messagingviabinding", "The is a request message manually created for the purpose of testing.");
Message replyMessage = channel.Request(requestMessage);
Console.WriteLine("Receive a reply message:\n{0}", replyMessage);
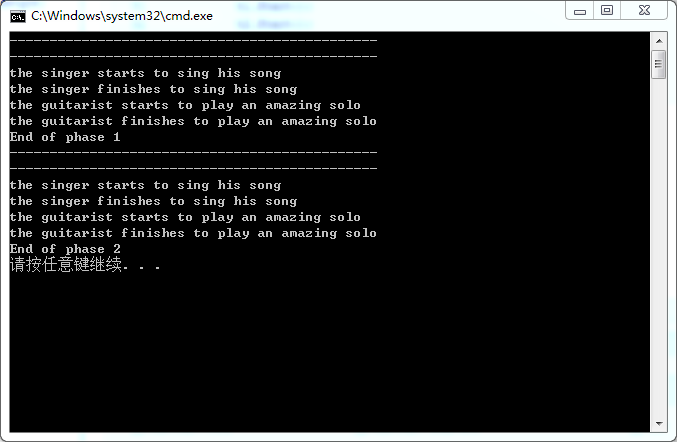
我們來看看程序運行的結果,下面是Client端的截圖:
這是Server端的截圖:
3. Channel
同傳統的通信框架一樣,比如.NET Remoting,最終的通信功能通過Communication Channel來實現。同.NET Remoting一樣,在Messaging過程中需要實現不同功能實現, 比如Transport、Encoding、Security、Transaction Enlist、Reliable Messaging、Compression、Logging等等,這些功能不可能有一個單一的Channel來實現。從可擴展性考慮,我們也沒有必要、也沒有可能創建一個萬能Channel,我們希望的情況是這樣的:一個Channel專注於Messaging過程中某個單一的功能實現,當我們需要某個具體的功能的時候,可以通過插件的形式自由地將對應的Channel加進來就可以了。 而WCF本身也是這樣設計的:整個Messaging過程通過一連串Channel來實現,這些Channel按照一定的順序組成一個Channel stack。由於Messaging首先是基於某種Protocol的Transport,比如http、TCP、MSMQ、ICP等等,Transport channel在Channel stack中一定是必須的。而且對Transport channel在整個channel stack的位置也有固定的要求:在Sender方的最後一個,Receiver方的第一個。
不管Channel具體完成怎樣的功能,他們都可以看成是一個個Message處理器,這包括為了某種需求添加、修改Soap header;壓縮整個Message、或者Message body; 對Message進行簽名或者加密等等。
在WCF中,所有的Channel都直接或者間接實現一個Interface:System.ServiceModel.Channels.IChannel。通過一個WCF還定義了一個base class:ChannelBase。ChannelBase實現了一些Channel基本的功能,所以我們在自定義Channel的時候一般繼承ChannelBase。
4. Channel Shape
由於WCF在進行Messaging的時候可以采用不同的消息交換模式(MEP-Message Exchange Pattern)。 在不同的MEP中,發送方Channel和接收方Channel在Messaging中所扮演的角色是不相同的。比如我們最常見的Request/Reply MEP中,發送方負責向接收方發送請求並接受回復,而接收方則負責向發送方回復請求,所以發送方的Channel是一個Request Channel,接收方Channel是一個Reply Channel。而對於One-way MEP中,發送方只需要向接收方而不需要接收來自接受方的回復,而對於接收方來說,僅僅需要接受來自發送方的消息而不需要向發送放回復消息,所以One-way發送方的Channel是一種Output Channel,而接收方的Channel是Input Channel。而對於Duplex 方式進行Messaging雙方具有相同角色,即負責相對方發送消息,又需要接受對方發送過來的消息,所以此種MEP對應的Channel是Duplex Channel。實際上Duplex Channel = Output Channel + Input Channel。
WCF專門用一個專門的術語來表述這種不能得MEP對消息交互雙方Channel的不同要求:Channel Shape。我們常見的Channel Shape有以下四種:
Datagram:數據報方式,采用One-way的消息交換模式。
Request/Reply:請求/恢復方式,采用傳統的Request/Reply 消息交換模式。
Duplex:雙向通信,采用Duplex消息交換模式。
P2P :點對點方式通信,采用Duplex消息交換模式。
由於在不同的MEP中,消息交互雙方Channel在整個消息交換過程所扮演的角色時不同的。同理,對於不同Channel shape, 消息的發送放和接受方需要不同的Channel。System.ServiceModel.Channels namespace定義了相應的Channel interface來表示這些Channel:IRequestChannel,IReplyChannel,IOutputChannel,IInputChannel,IDuplexChannel。這些channel interface與Channel shape之間的對應關系如下表所示:
MEP Sender Receiver Datagram IOutputChannel IInputChannel Request/Reply IRequestChannel IReplyChannel Duplex IDuplexChannel IDuplexChannel P2P IDuplexChannel IDuplexChannel
我們回顧一下我們上面的Sample,是否還記得在Client端代碼中,我們通過IChannelFactory對象的CreateChannel方法創建了一個IRequestChannel,而在Server端的代碼中通過IChannelListener對象的AcceptChannel方法創建了一個IReplyChannel。那就是應該我們模擬的是傳統的Request/Reply MEP。
5. Channel Manager: Channel Listener & Channel Factory
通過上面的介紹,我們知道了所有的Messaging功能最終都是通過Channel stack來完成的。但是我們在什麼時候創建這些Channel,通過什麼方式創建它們呢?
在WCF中,這些Channel對象,無論是處於發送方還是接受方,都不會直接創建他們。所有創建channel的功能都是通過一組特殊的對象來實現的。我們把這類對象叫做Channel Manager。不過Channel Manager這個名字不是很常用。你可以經常通道的是它的兩個別名:Channel Listener和Channel Factory.
對於Channel的創建,創建方式在發送方和接收方是完全不一樣的。對於方法來將,channel的創建方式和簡單,也很直接,就是單純的創建Channel並使用它向接受方發送消息,並接受恢復(如果不是Datagram channel shape),說發送方的Channel manager本質上就是一個Channel factory。
而對於接受方來講,Channel manager實際上起著監聽者的作用。它和一個固定的Uri綁定,不斷監聽來自不同發送方的請求,一旦某個請求被監聽到,channel manager創建一個Channel來接受該請求,所以接受方的Channel manager被稱作Channel listener。
一個一個channel連接形成一個Stack,通過一個個的Channel factory或者Channel listener也形成一個Stack。所以我們經常所說的Channel stack往往只的是Channel stack & Channel factory/listener stack.
我們在回到我們上面的Sample,對於Client端的IRequestChannel對象是通過我們創建的IChannelFactory的CreateChannel方法創建,而Server端的IReplyChannel則是通過IChannelListener的AcceptChannel方法創建。
6. Binding & Binding Element
通過以上的敘述,我們實際上對WCF channel layer進行了大致的介紹。我們說channel layer處於Service layer以下,而且一般的WCF開發人員一般不會直接和Channel layer進行交互,而僅僅會通過Service layer提供的API來實現WCF提供的功能。channel layer和Service layer是通過什麼方式實現無縫的連接呢?答案是Binding.
上面我們說了所有的消息交互功能都是通過Channel stack來實現,而組成Channel stack的一個個的Channel又是通過Channel factory和Channel listener來創建的。Channel factory和Channel listener又是通過什麼創建的呢?答案也是Binding。這點通過我們上面的Sample也可以看出來:我們通過BasicHttpBinding的BuildChannelFactory方法和BuildChannelListener方法創建了IChannelFactory對象和IChannelListener對象。
IChannelFactory<IRequestChannel> chananelFactory= binding.BuildChannelFactory<IRequestChannel>();

IChannelListener<IReplyChannel> channelListener = binding.BuildChannelListener<IReplyChannel>(address);
我們在進一步深究Binding是如何創建IChannelFactory對象和IChannelListener對象。一個Binding由BindingElement collection組成,構成BindingElement collection的元素是一個個的BindingElement。BindingElement的最重要的功能就是創建IChannelFactory和IChannelListener對象。每個BindingElement繼承自BindingElement abstract class 。下面是BindingElement的定義:
public abstract class BindingElement7. 如何對Channel Layer進行擴展
{
// Methods
protected BindingElement();
protected BindingElement(BindingElement elementToBeCloned);
public virtual IChannelFactory<TChannel> BuildChannelFactory<TChannel>(BindingContext context);
public virtual IChannelListener<TChannel> BuildChannelListener<TChannel>(BindingContext context) where TChannel : class, IChannel;
public virtual bool CanBuildChannelFactory<TChannel>(BindingContext context);
public virtual bool CanBuildChannelListener<TChannel>(BindingContext context) where TChannel : class, IChannel;
public abstract BindingElement Clone();
internal T GetIndividualProperty<T>() where T : class;
public abstract T GetProperty<T>(BindingContext context) where T : class;
internal virtual bool IsMatch(BindingElement b);
}
在上面已經說了,WCF的一個最大的特性在於具有很強的擴展性。無論是Channel Layer還是Service,你都可以很自由地進行擴展,而這些擴展在具體的項目中往往具有很強的使用性。在我當前的項目中,我就使用了很多這方面的擴展,在後續的章節中,我將會將這些與大家分享。
對於Channel Layer的擴展,一般集中在通過創建一些自定義的Channel來完成現有Channel不能完成的功能,比如你可以需要創建一個channel來完成對Message Body的壓縮功能。單獨創建channel往往是不夠的,我們需要創建與之配套的其他的一些對象,不如Channel factory、Channel listerner、Binding element等等。
在下一篇文章中,將為大家介紹如何創建這些對象。