以前我們用WebService做分布式系統的時候,認證是個麻煩的問題,通常的做法是繼承一個SoapHeader,把用戶名和密碼放到裡面,每調用一個方法都要把用戶名和密碼傳遞給服務器端來驗證 ,效率相當低,代碼編寫相當的麻煩,而且還不安全!
WCF支持多種認證技術,例如Windowns認證、X509證書、Issued Tokens、用戶名密碼認證等,在跨Windows域分布的系統中,用戶名密碼認證還是比較常用的,要實現用戶名密碼認證,就必須需要X509證書,為什麼呢?因為我們需要X509證書這種非對稱密鑰技術來實現WCF在Message傳遞過程中的加密和解密,要不然用戶名和密碼就得在網絡上明文傳遞!詳細說明就是客戶端把用戶名和密碼用公鑰加密後傳遞給服務器端,服務器端再用自己的私鑰來解密,然後傳遞給相應的驗證程序來實現身份驗證。
當然,做個測試程序就沒有必要去申請一個X509數字簽名證書了,微軟提供了一個makecert.exe的命令專門用來生成測試使用的X509證書的,那我們就來建立一個測試用的證書,在cmd下輸入以下命令:
makecert.exe -sr LocalMachine -ss My -a sha1 -n CN=MyServerCert -sky exchange –pe
這個命令的意思就是創建一個測試的X509證書,這個證書放在存儲位置為'Localmachine'的'My'這個文件夾下,證書主題名字叫'MyServerCert',需要更多關於makecert命令的信息請參考MSDN。
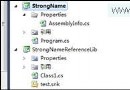
證書建立好了,我們就可以編寫代碼了,在VS2008下建立一個解決方案並在上面建立兩個Web項目,一個是'Asp.net Web 應用程序'(客戶端),一個是'WCF服務應用程序'(服務器端),我們先來編寫服務器端代碼,首先我們要編寫自己的用戶名密碼認證邏輯,先要在WCF項目上添加引用'System.IdentityModel'然後我們建立一個新的類文件並繼承自'System.IdentityModel.Selectors.UserNamePasswordValidator',然後我們重寫裡面的'Validate'方法來實現用戶名密碼認證邏輯。代碼如下;
using System;

using System.Collections.Generic;

using System.Linq;

using System.Text;

using System.IdentityModel.Selectors;

using System.IdentityModel.Tokens;


namespace ServerWcfService.CustomValidators

{

public class MyCustomValidator : UserNamePasswordValidator

{

/// <summary>

/// Validates the user name and password combination.

/// </summary>

/// <param name="userName">The user name.</param>

/// <param name="password">The password.</param>

public override void Validate(string userName, string password)

{

// validate arguments

if (string.IsNullOrEmpty(userName))

throw new ArgumentNullException("userName");

if (string.IsNullOrEmpty(password))

throw new ArgumentNullException("password");


// check if the user is not xiaozhuang

if (userName != "xiaozhuang" || password != "123456")

throw new SecurityTokenException("用戶名或者密碼錯誤!");

}

}


}
上面只是一個簡單的驗證,實際應用中用戶名和密碼一般都保存在數據庫中,如果驗證不通過就拋出一個'SecurityTokenException'類型的異常;下一步我們需要配置一下服務端的webConfig文件,我的WebConfig文件Servicemodel配置節如下:
<system.serviceModel>

    <bindings>

      <wsHttpBinding>

        <binding name="mySecureBinding">

          <security mode="Message">

            <message clientCredentialType="UserName"/>

          </security>

        </binding>

      </wsHttpBinding>

    </bindings>

    <services>

      <service behaviorConfiguration="ServerWcfService.Services.MySimpleServiceBehavior" name="ServerWcfService.Services.MySimpleService">

        <endpoint address="" binding="wsHttpBinding" contract="ServerWcfService.ServiceContracts.IMySimpleService" bindingConfiguration="mySecureBinding">

          <identity>

            <dns value="MyServerCert"/>

          </identity>

        </endpoint>

        <endpoint address="mex" binding="mexHttpBinding" contract="IMetadataExchange"/>

      </service>

    </services>

    <behaviors>

      <serviceBehaviors>

        <behavior name="ServerWcfService.Services.MySimpleServiceBehavior">

          <serviceMetadata httpGetEnabled="true"/>

          <serviceDebug includeExceptionDetailInFaults="false"/>

          <serviceCredentials>

            <serviceCertificate findValue="MyServerCert" x509FindType="FindBySubjectName" storeLocation="LocalMachine" storeName="My"/>

            <userNameAuthentication userNamePasswordValidationMode="Custom" customUserNamePasswordValidatorType="ServerWcfService.CustomValidators.MyCustomValidator,ServerWcfService"/>

          </serviceCredentials>

        </behavior>

      </serviceBehaviors>

    </behaviors>

  </system.serviceModel>
加粗的那些是我加上去的或者在默認上修改了的。Bindings節指定了客戶端提供的認證類型為'username'並在endpoint節中指定bianding配置。在dns節中修改原來的localmachine為MyServerCert,當然你也可以修改為別的,這取決於你的證書主題名稱是什麼。也就是上面命令中的CN=MyServerCert,接下來我們加入在serviceCredentials配置節,並在裡面配置兩個小節,ServiceCertificate節中指定了我們的X509證書的位置,以用來加解密message,usernameAuthentication節中指定了我們自己的用戶名密碼驗證邏輯。
Sorry,忘了一件事情,就是寫一個測試的服務契約並實現,寫法上和無認證的寫法一樣,如下ServerWcfService.ServiceContracts.IMySimpleService:
[OperationContract]

string PrintMessage(string message);
這樣,服務端的代碼編寫和配置就完成了,生成項目測試一下,頁面顯示服務已生成成功。
接下來我們開始編寫客戶端代碼,先在客戶端引用剛才生成的WCF服務,然後編寫客戶端代碼如下:
protected void btnPrint_Click(object sender, EventArgs e)

{

TestWCFService.MySimpleServiceClient client = new ClientWeb.TestWCFService.MySimpleServiceClient();

client.ClientCredentials.UserName.UserName = "xiaozhuang";

client.ClientCredentials.UserName.Password = "123456";

lbMessage.Text = client.PrintMessage(txtMessage.Text);

}
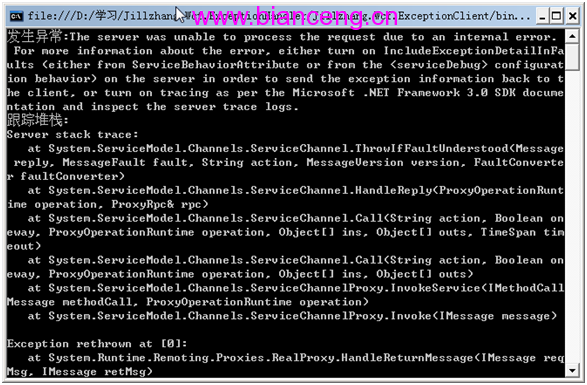
如果你有一個真正的X509證書,那麼現在的代碼就可以正常運行了。但是很不幸,我們的證書是測試用的,我們運行的時候出錯:'X.509 certificate CN=MyServerCert 鏈生成失敗。所使用的證書具有無法驗證的信任鏈。請替換該證書或更改 certificateValidationMode。已處理證書鏈,但是在不受信任提供程序信任的根證書中終止',WCF無法驗證測試證書的信任鏈,那我們要做的就是繞過這個信任驗證,具體做法如下:
先要在Asp.net Web應用程序項目上添加引用'System.IdentityModel'然後我們建立一個新的類文件並繼承自'System.IdentityModel.Selectors.X509CertificateValidator',然後我們重寫裡面的'Validate'方法來實現我們自己的X509認證邏輯,代碼如下:
using System;

using System.Configuration;

using System.IdentityModel.Selectors;

using System.IdentityModel.Tokens;

using System.Security.Cryptography.X509Certificates;


namespace ClientWeb.CustomX509Validator

{

  /// <summary>

  /// Implements the validator for X509 certificates.

  /// </summary>

  public class MyX509Validator: X509CertificateValidator

  {

    /// <summary>

    /// Validates a certificate.

    /// </summary>

    /// <param name="certificate">The certificate the validate.</param>

    public override void Validate(X509Certificate2 certificate)

    {

      // validate argument

      if (certificate == null)

        throw new ArgumentNullException("X509認證證書為空!");


      // check if the name of the certifcate matches

      if (certificate.SubjectName.Name != ConfigurationManager.AppSettings["CertName"])

        throw new SecurityTokenValidationException("Certificated was not issued by thrusted issuer");

    }

  }

}
你可以把Validate方法裡面留空讓所有的認證都通過,也可以自己定義認證邏輯,如果認證失敗,就拋出'SecurityTokenValidationException'的異常,然後我們配置一下客戶端的webconfig讓它使用我們自己的X509認證,增加以下的配置節,並在'endpoint'節中指定behaviorConfiguration="myClientBehavior"。
<behaviors>

      <endpointBehaviors>

        <behavior name="myClientBehavior">

          <clientCredentials>

            <serviceCertificate>

              <authentication certificateValidationMode="Custom" customCertificateValidatorType="ClientWeb.CustomX509Validator.MyX509Validator,ClientWeb" />

            </serviceCertificate>

          </clientCredentials>

        </behavior>

      </endpointBehaviors>

    </behaviors>
OK,客戶端代碼和配置完成,現在你可以運行自己的程序了,運行界面如下:

本文配套源碼