對 Microsoft® Windows® Presentation Foundation 中動畫的支持大部分收集在 System.Windows.Media.Animation 命名空間中。這是一個大型命名空間,其中定義了 164 個類專用於設置 22 種特定數據類型的動畫屬性。這 22 種數據類型包括基本數據類型(如 byte、int 和 double),也包括更特殊的類型(如 Matrix、Point3D 和 Quaternion)。
Windows Presentation Foundation 中的動畫資源毫無疑問是引人入勝的作品,但恐怕只有非編程人員才會認為這 22 種數據類型就足夠滿足各種應用程序。我個人經常開發希望對整個對象集合實現動畫效果的應用程序,尤其是坐標點的集合。現有的 API 為我們提供了類(如 PointAnimation 和 Point3DAnimation)來制作單獨的 2D 或 3D 坐標的動畫,但我希望 PointCollectionAnimation 和 Point3DCollectionAnimation 類通過在兩個集合的相應成員之間插入來制作整個坐標點集合的動畫。
通常,我們可能會責怪 Microsoft .NET Framework(尤其是 Windows Presentation Foundation)使得定義對象集合如此輕松,使用起來如此便利,就像使用對象本身一樣。Windows Presentation Foundation 已定義了 PointCollection 和 Point3DCollection 類,而且在 XAML 中,這些集合的使用方法非常簡單。在 XAML 中,分配 Point 類型的屬性和分配 PointCollection 類型的屬性之間的差別就像鍵入“100 50”和“100 50, 40 25, 35 80, 50 100”之間的差別一樣。因此,我想為什麼使這些類型的屬性具有動畫效果不能像這般簡單呢?
假定 PointCollectionAnimation 類將會使 PointCollection 類型的屬性具有動畫效果。Windows Presentation Foundation 中內置的五個類具有該類型的屬性:Polyline、Polygon(兩者均源於 Shape)、PolyLineSegment、PolyBezierSegment 和 PolyQuadraticBezierSegment(源於 PathSegment)五個類的屬性均指定為 Points。通過使這些 Points 屬性具有動畫效果,您可以將圖形數字從一個形狀更改到另一個具有單個動畫的形狀。
據我所知,Point3DCollection 僅能在一個類中顯示,即位於 Windows Presentation Foundation 3D 圖形系統中心的 MeshGeometry3D 類。通過制作 Point3DCollection would 動畫,可以非常輕松地實現 3D 對象變形(通常被認為是相當高級的 3D 編程任務)。
正是在計算機屏幕上切換、變形和改變 2D 和 3D 圖的形狀的想象促使我在擴展 Windows Presentation Foundation 動畫類的道路上不斷前進。
插入值
在 Windows Presentation Foundation 中,動畫基本上為插值,通常情況下為線性插值。使新動畫類編碼復雜化的因素並非插值操作本身,而是確定要在其間插入的確切值。
我們來看一個涉及到 Point 值動畫的簡單示例。您可以在 XAML 中畫一個實心圓形,如下所示:
<Path Fill=”Blue”>

  <Path.Data>

    <EllipseGeometry x:Name=”ellipse”

      RadiusX=”10” RadiusY=”10” />

  </Path.Data>

</Path>
在此標記中未指定 EllipseGeometry 的 Center 屬性,這是 Point 類型的屬性。您可以通過 PointAnimation 元素使 Center 屬性具有動畫效果,如下所示:
<PointAnimation Storyboard.TargetName=”ellipse”

        Storyboard.TargetProperty=”Center”

        From=”10 10” To=”100 100”

        Duration=”0:0:3” />
Center 屬性在三秒鐘內從點(10,10)移動到點(100,100),這表示 PointAnimation 類基於這段時間在兩個值之間執行線性插入。
您還可以在 EllipseGeometry 標記中指定 Center 屬性,如下所示:
<EllipseGeometry x:Name=”ellipse” Center=”50 50” ...
此值稱為基值,因為動畫可以基於此值構建。您可以通過省略 PointAnimation 標記中的 From 或 To 屬性來充分利用此基值,如以下標記中所示:
<PointAnimation Storyboard.TargetName=”ellipse”

        Storyboard.TargetProperty=”Center”

        To=”100 100”

        Duration=”0:0:3” />
現在該動畫從 EllipseGeometry 標記中指定的中心點(50,50)開始,到點(100,100)結束。允許使用以下語法:
<PointAnimation Storyboard.TargetName=”ellipse”

        Storyboard.TargetProperty=”Center”

        From=”100 100”

        Duration=”0:0:3” />
現在該動畫從點(100,100)開始,到點(50,50)結束。如果 From 或 To 屬性缺失,而且 EllipseGeometry 標記未指定 Center 屬性,則該動畫將采用 Center 屬性的默認值,即(0,0)。
好像越來越亂了。To 屬性的一個備選項是 By 屬性,即起始點的增量。
<PointAnimation Storyboard.TargetName=”ellipse”

        Storyboard.TargetProperty=”Center”

        From=”100 100” By=”125 125”

        Duration=”0:0:3” />
現在此動畫在(100,100)到(225,225)之間移動。但無需顯示 From 屬性。
<PointAnimation Storyboard.TargetName=”ellipse”

        Storyboard.TargetProperty=”Center”

        By=”125 125”

        Duration=”0:0:3” />
現在該動畫從 EllipseGeometry 標記中指定的點(50,50)開始,到點(175,175)結束。
動畫的基值通常是最初為需要動畫效果的屬性定義的值,但不必一定是該值。請考慮以下兩個順序 PointAnimation 對象:
<PointAnimation Storyboard.TargetName=”ellipse”

        Storyboard.TargetProperty=”Center”

        To=”100 100” Duration=”0:0:3” />

<PointAnimation Storyboard.TargetName=”ellipse”

        Storyboard.TargetProperty=”Center”

        BeginTime=”0:0:5” Duration=”0:0:3” />
在前三秒內,初始動畫將 Center 屬性從其基值(50,50)更改到 To 值(100,100),在此處,該值再停留兩秒鐘,直到第二個動畫到達。此動畫完全沒有 From、To 或 By 屬性!該動畫開始於基值(100,100),結束於 EllipseGeometry 標記中指定的值(50,50)。
您可以看到,一個類(如 PointAnimation)具有兩個默認值用於動畫開始和結束;如果沒有為特定動畫對象定義 From、To 和 By 屬性,則動畫將使用這些默認值。這些類還定義了兩個 Boolean 屬性,分別為 IsAdditive(使動畫值添加到基值)和 IsCumulative(如果動畫不斷重復,則累積動畫值)。這些屬性均無法使動畫在邏輯上更加簡單。
類的結構
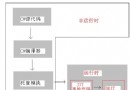
各種動畫類通常通過名稱(如 <Type>AnimationBase,它指示名為 DoubleAnimationBase、PointAnimationBase 等的 22 個類)被集體引用。但不要根據此方便的表示法就認為動畫類將按此泛型實現;事實上它們並非如此,因為每個類要根據具體數據類型執行計算。圖1 顯示了動畫類常見的類層次結構(盡管 22 種動畫類型各有不同)。
圖 1動畫類層次結構 (單擊該圖像獲得較小視圖)
圖 1動畫類層次結構 (單擊該圖像獲得較大視圖)
如果您決定要編寫使自定義類型具有動畫效果的類,則可能要模仿現有的動畫類的結構。通常,您首先定義抽象的 <Type>AnimationBase 類,從該類您可能會生成一個純 <Type>Animation 類以基於線性插值執行動畫操作。我希望使 PointCollection 類型的屬性具有動畫效果,所以我從名為 PointCollectionAnimationBase 的類開始。該類從 AnimationTimeline 派生,並且定義為抽象。您將需要重寫只讀 TargetPropertyType,並返回 typeof(PointCollection)。
在您的新 <Type>AnimationBase 類中,您還需要重寫由 AnimationTimeline 定義的 GetCurrentValue 方法:
public override object GetCurrentValue(

  object defaultOriginValue,

  object defaultDestinationValue,

  AnimationClock animationClock)

{

  ...

}
這就是您的類必須為動畫計算插入值的方法。參數名稱即為文檔中使用的名稱。前兩個參數提供了動畫將開始和結束的默認基值。在缺少明確的 From、To 和 By 設置時,需要使用這些參數。AnimationClock 對象包括名為 CurrentProgress 的 double 類型的屬性,其值范圍為 0 到 1。這是您用於插入的值。
因為您已重寫了 TargetPropertyType 屬性,所以 WPF 知道您要使其具備動畫效果的對象的類型。如果您的類要使 PointCollection 類型的對象具有動畫效果,則 defaultOriginValue 和 defaultDestinationValue 參數將為 PointCollection 類型,並且 WPF 預期此方法會返回一個 PointCollection 類型的對象。
如果您希望模擬現有的動畫類,則 GetCurrentValue 只需將其參數轉換到正確的類型,然後調用此類中定義的另一個 GetCurrentValue 方法即可,此方法接下來將調用名為 GetCurrentValueCore 的方法。為了使 PointCollection 對象具有動畫效果,代碼與以下類似:
public PointCollection GetCurrentValue(

  PointCollection defaultOriginValue,

  PointCollection defaultDestinationValue,

      AnimationClock animationClock)

{

  return GetCurrentValueCore(defaultOriginValue,

    defaultDestinationValue,

    animationClock);

}
然後,GetCurrentValueCore 方法被定義為受保護和抽象:
protected abstract PointCollection GetCurrentValueCore(

  PointCollection defaultOriginValue,

  PointCollection defaultDestinationValue,

  AnimationClock animationClock);
現在從 PointCollectionAnimationBase 派生的任何非抽象類均需要重寫此 GetCurrentValueCore 方法並提供實際代碼以便插入。
此欄的可下載代碼包含一個帶有五個項目的 Visual Studio® 解決方案。其中一個項目是名為 Petzold.AnimationExtensions 的 DLL,包含本文中所述的使 PointCollection 和 Point3DCollection 類型的對象具有動畫效果所需的類。此 Visual Studio 解決方案中的其他四個項目是利用該 DLL 的演示程序。PointCollectionAnimationBase 類是 DLL 的組成部分,並且在名為 PointCollectionAnimationBase.cs 的文件中實現。該 DLL 中的其他所有類和接口也在以該類或接口命名的文件中。
凍結
所有 <Type>AnimationBase 類均從 AnimationTimeline 繼承,AnimationTimeline 通過 Animatable 和 Timeline 從 Freezable 類派生。事實上,在一定程度上,Petzold.AnimationExtensions DLL 中的所有類均從 Freezable 派生而來,此事實將產生非常重要的結果。
從 Freezable 派生的類都具有一些非常特殊的要求。忽略這些要求,後果請自負。如果繼續操作,您可能會遇到某些問題:不能正常工作而且不知道原因,或者遇到奇怪的異常但找不到解決實際問題的線索。
從 Freezable 派生的每個非抽象類必須重寫 CreateInstanceCore 方法。一般來說,此方法需要做的是調用類的構造函數。Freezable 將此方法定義為抽象,因此如果您未包括該方法,編譯器將提醒您。但是,僅在您的非抽象類是 Freezable 層次結構中的第一個非抽象類時,編譯器才會提醒您未包括該方法。如果您要從非抽象類派生,則很容易會忘記 CreateInstanceCore。
此外,從 Freezable 派生的類應支持其所有具有相關屬性的屬性。這不是一項要求,但如果不這樣做,則還需要重寫其他五種方法並了解有關克隆和凍結的所有信息。
要執行常見的線性插入動畫,您應創建一個從 <Type>AnimationBase 派生的 <Type>Animation 形式的類。(對於此示例,該類是 PointCollectionAnimation,並且它在兩個 PointCollection 對象之間插入相應點。)此類必須重寫 CreateInstanceCore 方法,並且應定義相關屬性支持的名為 From、To 和 By 的屬性。您還應定義 IsAdditive 和 IsCumulative 屬性,這兩個屬性的相關屬性已由 AnimationTimeline 定義。
<Type>Animation 的最大任務在於重寫 GetCurrentValueCore。最後一個參數是 AnimationClock 類型的對象,並且 CurrentProgress 屬性是一個介於 0 到 1 之間的數字,指示動畫的進度。此值將涉及到許多屬性,如由 Timeline 類定義和 <Type>Animation 繼承的 AccelerationRatio、DecelerationRatio、AutoReverse 和 SpeedRatio。不過,GetCurrentValueCore 必須首先確定要在哪些屬性之間插入值。例如,如果已設置 From 屬性,但尚未設置 To 和 By 屬性,則插入將發生在該方法的 From 和 defaultDestinationValue 參數之間。
因此,了解何時在代碼或標記中設置 From、To 和 By 以及何時未設置這些屬性對 GetCurrentValueCore 來說很重要。大多數現有的 Windows Presentation Foundation 動畫基於值類型,如 Double 或 Point 結構。但是,DoubleAnimation 類如何確定 From 屬性是采用默認值 0,還是已專門將其設置為 0 呢?
簡單方法:在 <Type> 為值類型的所有 <Type>Animation 類中,From、To 和 By 屬性均定義為空類型。(我之前從未注意到這些方面,因為除了設置這些屬性外,我從未想到去做其他事。)相關屬性定義會將默認值設置為空,從而使 GetCurrentValueCore 可以輕松確定是否已設置該屬性。
對於 PointCollectionAnimation 等類,具有動畫效果的對象是引用類型,所以如果尚未設置 From、To 和 By 屬性,它們也將為空。不過,使引用類型具有動畫效果還會涉及到其他更加雜亂的問題。尤其是,在每次調用 GetCurrentValueCore 過程中您要做的最後一件事是進行內存分配。因此,您的類應創建一個具有動畫效果的類型的對象作為字段,並從 GetCurrentValueCore 方法返回該對象。
實際上,我發現處理 PointCollectionAnimation 時,在後續調用 GetCurrentValueCore 過程中僅返回相同的對象是不夠的。無論誰位於 GetCurrentValue wants 的接收端,都希望接收到一個完全不同的對象。因此,我創建了兩個 PointCollection 對象作為字段(命名為 ptsDst1 和 ptsDst2,因為它們都是要插入的目標),並基於名為 flip 的布爾字段在後續調用 GetCurrentValueCore 過程中在兩個字段之間來回切換。此外,我還創建了一個名為 ptsTo 的 PointCollection 對象作為字段,來存儲該方法將插入到的點的集合。由於 By 屬性會導致此集合成為兩個集合的總和,所以此獨立的集合是必要的。
圖2 中顯示了 PointCollectionAnimation 中 GetCurrentValueCore 的實現。
對於任何特定的動畫,對 GetCurrentValueCore 的前兩次調用可能會產生一些內存分配,因為已為 PointCollection 字段分配了足夠的空間來存儲所有的點。不過,一旦它們達到了適當大小,該動畫應會繼續而不再進一步分配內存。
僅使用 PointCollectionAnimation 來轉換、縮放或旋轉一組點毫無意義可言,因為這些操作可通過正常的轉換類來執行。此類在該規則之外的非線性轉換中非常有用。例如,圖3 中的 SquaringTheCircle.xaml 文件使 PointCollection 具有動態效果,以便圖形從正方形轉換為相等面積的圓形,然後再轉換回正方形,因此解決了自歐氏時代以來一直使西方文明感到困惑的幾何問題。
在我的 WPF 書籍中,功能完全相當的程序實際上需要 13 個單獨的 Point 動畫。我當然更喜歡雅致的新版本。
文本變形
TextMorphCheckBox 項目為 CheckBox 控件定義了一個模板,它使用復合線元素引用定義為模板資源的兩個 PointCollection 對象之一覆蓋 CheckBox 內容(如果存在)。單擊 CheckBox 時,它將在兩個 PointCollection 對象之間播放動畫。圖4 中顯示了大量 ControlTemplate 標記。
此動畫中所用的 2 個 PointCollection 對象包含對腳本字體中詞語“否”和“是”的定義。通過在這兩個集合之間實現動畫,文本可在一秒鐘內從一個詞語轉換為另一個詞語,如圖5 所示。

圖 5a變形文本復選框

圖 5b

圖 5c

圖 5d

圖 5e

圖 5f
在文本和動畫變形過程中可以單擊 CheckBox 來逆轉自身,這正好說明 PointCollectionAnimation 類正在正確處理傳送到 GetCurrentValueCore 方法的參數。
下面我來說明 TextMorphCheckBox 模板中的兩條復合線從何而來。在“Rock Me Amadeus”曾火爆的遙遠年代裡使用 Windows 的某些人可能會記得 Windows 中曾使用過最初級的矢量字體。在 Windows Vista™ 中,這些字體依然存在,並可在文件 Modern.fon、Roman.fon 和 Script.fon 中找到。這些字體中的字符僅通過直線段來定義,並且通常與繪圖儀一起使用。就像在 TrueType 字體中一樣,沒有曲線、沒有提示,而且沒有填充。您可以在記事本中選擇這些早期的矢量字體,但 Microsoft Word 可能會拒絕將這些過時的東西插入其精美的文檔中。
如果您對字體文件格式稍有了解,便可以輕松打開這些字體文件,並提取出定義每個字符的復合線。執行該操作後,我手動調整了單個字符的坐標以便為詞語 No 和 Yes 創建單條連續的復合線,然後再加以調整以確保兩個 PointCollection 對象擁有相同數量的點。我曾想通過插入某些控制點將這些坐標轉換為一系列的二次 Bezier 曲線,但無需這樣做。只需合適的粗粗一筆,這些復合線便看起來實現了這個古怪的目的。
關鍵幀動畫
使用 Windows Presentation Foundation 動畫的編程人員都明白,相對於用途更加豐富的 <Type>AnimationUsingKeyFrames 類來說,<Type>Animation 類的確只是一個簡單的備選項。關鍵幀動畫使您能夠將一系列離散的跳轉、線條動畫和基於 Bezier 曲線段減慢或加速的動畫混合在一起。每個關鍵幀均包含時間和值。動畫在基值(通常為上一個關鍵幀的結束值)和關鍵幀值之間插入。
我預想實現一個 PointCollectionAnimationUsingKeyFrames 類將頗富挑戰性,但卻並不會因此沮喪。第一步是派生一個從 Freezable 繼承的抽象 PointCollectionKeyFrame 類,並實現 IKeyFrame 接口。這需要定義您希望相關屬性支持的 KeyTime 和 Value 屬性。我通過在 PointCollectionKeyFrame 中定義名為 InterpolateValue 的公共方法模擬了現有的關鍵幀動畫類:
public PointCollection InterpolateValue(

  PointCollection baseValue,

  double keyFrameProgress)

{

  return InterpolateValueCore(baseValue, keyFrameProgress);

}
此外,還定義了受保護和抽象的 InterpolateValueCore 方法。請注意第二個參數是介於 0 和 1 之間的進度值,但它是特定關鍵幀的進度值,而不是整個動畫的進度值。
下一步是從 PointCollectionKeyFrame 派生三個類,分別為 DiscretePointCollectionKeyFrame、LinearPointCollectionKeyFrame 和 SplinePointCollectionKeyFrame。這些類將重寫 InterpolateValueCore 方法以在基值參數和 Value 屬性之間執行插入。SplinePointCollectionKeyFrame 還定義了名為 KeySpline 的屬性。再一次,我為結果定義了兩個名為 ptsDst1 和 ptsDst2 的字段和一個名為 flip 的布爾字段。我發現如果首先從包含圖6 中所示的 InterpolateValueCore 方法的 PointCollectionKeyFrame 派生一個抽象的 NonDiscretePointCollectionKeyFrame 類,則可以避免某些重復性代碼。
請注意該方法將調用名為 GetProgress 的方法,NonDiscretePointCollectionKeyFrame 將該方法定義為抽象。LinearPointCollectionKeyFrame 和 SplinePointCollectionKeyFrame 均將重寫此方法。LinearPointCollectionKeyFrame 僅返回參數;SplinePointCollectionKeyFrame 返回一個由 KeySpline 結構定義的方法方便提供的值,KeySpline 結構可將線性進度值轉換為基於 Bezier 曲線的進度。
接下來,您需要一個 <Type>KeyFrameCollection 形式的類,它是 <Type>KeyFrame 對象的可凍結集合。在我所舉的示例中,此集合類有一個相當易混淆的名稱 PointCollectionKeyFrameCollection,它是 PointCollectionKeyFrame 對象的集合。通過將此集合類定義為從泛型 FreezableCollection<T> 類繼承,您可以節省大量的工作。不要忘記:從 FreezableCollection<T> 派生時,您必須重寫 CreateInstanceCore。
public class PointCollectionKeyFrameCollection :

  FreezableCollection<PointCollectionKeyFrame>

{

  // CreateInstanceCore override required when

  // deriving from Freezable

  protected override Freezable CreateInstanceCore()

  {

    return new PointCollectionKeyFrameCollection();

  }

}
最後亦即最難的一步是從 <Type>AnimationBase 派生 <Type>AnimationUsingKeyFrames 類,以及通過定義 <Type>KeyFrameCollection 類型的 KeyFrame 屬性(及相關屬性)實現 IKeyFrameAnimation 接口。<Type>AnimationUsingKeyFrames 類將重寫 GetCurrentValueCore 方法,但必須確定實際上關鍵幀集合中的哪些對象應執行插入。
在處理此類時,我發現 IsCumulative 屬性用途不是很大,但在基於單個點累積動畫方面可能具有一定意義的實用性。我定義了一個名為 AccumulationPoint 的新屬性(及其相關屬性),它是在每次迭代過程中添加到該集合的單個點。這樣,我就能夠創建一個稱為 StickFigureWalking 的動畫。該動畫基於 5 個 PointCollection 對象和 5 個具有累積點的關鍵幀,使簡筆畫可以在屏幕上走動,如圖7 所示。

圖 7走動
制作 3D 點動畫
創建您自己的動畫類時,您可以模擬現有的類(就像我制作 PointCollection 動畫一樣),也可以放棄該范例,生成自己的類。這就是我使用 Point3DCollection 類型的對象制作動畫所做的操作,Point3DCollection 類型是 MeshGeometry3D 的 Positions 屬性的數據類型。我定義了一個普通的 Point3DCollectionAnimationBase 類,但接下來還要制定一個使用名為 Point3DCollectionAnimationUsingDeformer 的類的不同策略。Point3DCollectionAnimationUsingDeformer 僅定義一個 IDeformer 類型的名為 Deform 的屬性,它是只定義一種方法的接口:
Point3DCollection Deform(Point3DCollection points, double progress);
Deform 方法接受 3D 點的集合和介於 0 到 1 之間的進度值,並返回一個 3D 點的集合。目的是允許執行標准類無法完成的非線性轉換。Deform 如何精確地對一組點執行轉換僅受限於您的想象,或許還受限於您的數學技能。
我提供了一個示例:使 3D 對象扭曲變形的名為 Twister 的類。扭曲與 3D 編程人員使用的標准 AxisAngleRotation3D 轉換類似,它涉及繞軸旋轉,不過特定點的旋轉角度隨該點到中心點的距離不同而變化。
Twister 類實現 IDeformer 接口,並自己定義若干屬性。Axis 和 Center 屬性指示以矢量表示的旋轉軸以及旋轉中心。MinAngle 和 MaxAngle 屬性分別指定進度值為 0 和 1 時的旋轉角度。這些角度是沿旋轉軸的每單位距離的角度。例如,假設 Axis 矢量穿過中心點。水平點(包括中心點和與軸垂直相交的點)根本不會旋轉。距中心點一個單位距離的水平點在 MinAngle 和 MaxAngle 之間旋轉。距中心點兩個單位距離的水平點在兩倍 MinAngle 和兩倍 MaxAngle 之間旋轉。在中心點的另一方,點將反向旋轉。
圖8 顯示了 Twister 類中的 Deform 方法。請注意,該方法將在目標集合的兩個早期創建的 Point3DCollection 類之間翻轉,還使用早期創建的名為 xform 的 RotateTransform3D 對象以及名為 axisRotate 的 AxisAngleRotation3D 對象。
真正的樂趣在於尋找要扭曲的對象。TeapotTwister 項目包括一個 TeapotMesh.cs 文件,它會為無數 3D 演示中使用的著名 Iowa Teapot 生成一個 MeshGeometry3D 對象。我根據 DirectX® 9.0 中靜態 Mesh.Teapot 方法中提供的數據創建了此文件。圖9 顯示了引用 TeapotMesh 類、Point3DCollectionAnimationUsingDeformer 類和 Twister 的完整 XAML 文件。扭曲的茶壺如圖10 所示。
圖 10扭曲的茶壺
XAML 文件顯示了 Point3DCollectionAnimationUsingDeformer 的屬性元素中引用的 Twister 類,但也可以將 Twister 類定義為資源:
<pae:Twister x:Key=”twister” Axis=”1 0 0” />
然後,可以使用 Point3DCollectionAnimationUsingDeformer 標記中的屬性引用它:
Deformer=”{StaticResource twister}”
雖然動態修改 MeshGeometry3D 的 Positions 集合是一項強大的技術,但理論上並非完全足夠。無論對 MeshGeometry3D 的 Positions 集合中的 Point3D 對象進行哪些非線性轉換,還應將這些轉換應用到 Normals 集合中的 Vector3D 對象。雖然在 Point3D 和 Vector3D 之間定義了顯式轉換,但這些對象組成的集合之間卻不存在轉換。這似乎暗示需要創建類的完整的平行結構才能為 Vector3DCollection 對象實現動畫效果。
即使沒有該增強功能,這些新的動畫類也已滿足了我在編程方面的基本目的之一:在計算機上進行可視化觀看(如變形文本和扭曲茶壺),這些都是我以前從未看到過的。
圖2
igure 2 PointCollectionAnimation 中的 GetCurrentValueCore
protected override PointCollection GetCurrentValueCore(

  PointCollection defaultOriginValue,

  PointCollection defaultDestinationValue,

  AnimationClock animationClock)

{

  // Let’s hope this doesn’t happen too often

  if (animationClock.CurrentProgress == null) return null;

  double progress = animationClock.CurrentProgress.Value;

  int count;

  // Set ptsFrom from From or defaultOriginValue

  PointCollection ptsFrom = From ?? defaultOriginValue;

  // Set ptsTo from To, By, or defaultOriginValue

  ptsTo.Clear();

  if (To != null)

  {

    foreach (Point pt in To) ptsTo.Add(pt);

  }

  else if (By != null)

  {

    count = Math.Min(ptsFrom.Count, By.Count);

    for (int i = 0; i < count; i++)

      ptsTo.Add(new Point(ptsFrom[i].X + By[i].X,

                ptsFrom[i].Y + By[i].Y));

  }

  else

  {

    foreach (Point pt in defaultDestinationValue) ptsTo.Add(pt);

  }

  // Choose which destination collection to use

  PointCollection ptsDst = flip ? ptsDst1 : ptsDst2;

  flip = !flip;

  ptsDst.Clear();

  // Interpolate the points

  count = Math.Min(ptsFrom.Count, ptsTo.Count);

  for (int i = 0; i < count; i++)

  {

    ptsDst.Add(new Point((1 - progress) * ptsFrom[i].X +

                 progress * ptsTo[i].X,

               (1 - progress) * ptsFrom[i].Y +

                 progress * ptsTo[i].Y));

  }

  // If IsAdditive, add the base values to ptsDst

  if (IsAdditive && From != null && (To != null || By != null))

  {

    count = Math.Min(ptsDst.Count, defaultOriginValue.Count);

    for (int i = 0; i < count; i++)

    {

      Point pt = ptsDst[i];

      pt.X += defaultOriginValue[i].X;

      pt.Y += defaultOriginValue[i].Y;

      ptsDst[i] = pt;

    }

  }

  // Take account of IsCumulative

  if (IsCumulative && animationClock.CurrentIteration != null)

  {

    int iter = animationClock.CurrentIteration.Value;


    for (int i = 0; i < ptsDst.Count; i++)

    {

      Point pt = ptsDst[i];

      pt.X += (iter - 1) * (ptsTo[i].X - ptsFrom[i].X);

      pt.Y += (iter - 1) * (ptsTo[i].Y - ptsFrom[i].Y);

      ptsDst[i] = pt;

    }

  }

  // Return the PointCollection

  return ptsDst;

}
圖3
Figure 3 SquaringTheCircle.xaml
<Window xmlns=”http://schemas.microsoft.com/winfx/2006/xaml/presentation”

    xmlns:x=”http://schemas.microsoft.com/winfx/2006/xaml”

    xmlns:pae=”clr-namespace:Petzold.AnimationExtensions;

          assembly=Petzold.AnimationExtensions”

    x:Class=”SquaringTheCircle.SquaringTheCircle”

    Title=”Squaring the Circle”>

 <Canvas RenderTransform=”2 0 0 -2 300 300”>

  <Path StrokeThickness=”3” Stroke=”Blue” Fill=”AliceBlue”>

   <Path.Data>

    <PathGeometry>

     <PathFigure x:Name=”fig” IsClosed=”True”>

      <PolyBezierSegment x:Name=”seg” />

     </PathFigure>

     <PathGeometry.Transform>

      <RotateTransform Angle=”45” />

     </PathGeometry.Transform>

    </PathGeometry>

   </Path.Data>

  </Path>

 </Canvas>

 <Window.Triggers>

  <EventTrigger RoutedEvent=”Window.Loaded”>

   <BeginStoryboard>

    <Storyboard RepeatBehavior=”Forever” AutoReverse=”True”>

     <PointAnimation Storyboard.TargetName=”fig”

             Storyboard.TargetProperty=”StartPoint”

             From=”0 100” To=”0 125” />

     <pae:PointCollectionAnimation

      Storyboard.TargetName=”seg”

      Storyboard.TargetProperty=”Points”

      From=” 55 100, 100  55, 100  0,

          100 -55,  55 -100,  0 -100,

          -55 -100, -100 -55, -100  0,

         -100  55, -55 100,  0 100”

      To=” 62.5 62.5, 62.5 62.5, 125  0,

         62.5 -62.5, 62.5 -62.5,  0 -125,

        -62.5 -62.5, -62.5 -62.5, -125  0,

        -62.5 62.5, -62.5 62.5,  0 125” />

    </Storyboard>

   </BeginStoryboard>

  </EventTrigger>

 </Window.Triggers>

</Window>
圖4
Figure 4 TextMorphCheckBox.xaml 摘錄
<ControlTemplate x:Key=”templateTextMorph”圖6
TargetType=”{x:Type CheckBox}”>
<ControlTemplate.Resources>
<PointCollection x:Key=”textYes”>
5 11, 3 10, 2 8, 2 7, 3 5, 5 4, 6 4, 8 5,
9 7, 9 9, 8 13, 7 16, 6 20, 6 22, 7 24, 8 25,
10 25, 12 24, 14 22, 16 19, 17 17, 19 11, 21 4, 19 11,
16 21, 14 27, 12 32, 10 36, 8 37, 7 36, 7 34, 8 31,
10 28, 13 26, 17 25, 23 23, 25 22, 26 21, 27 19, 27 17,
26 16, 25 16, 23 17, 22 19, 22 22, 23 24, 25 25, 27 25,
29 24, 30 23, 32 20, 34 17, 35 15, 35 17, 37 20, 38 22,
38 24, 36 25, 32 24, 34 25, 38 25, 40 24, 41 23, 43 20
</PointCollection>
<PointCollection x:Key=”textNo”>
5 11, 3 10, 2 8, 2 7, 3 5, 5 4, 6 4, 8 5,
9 7, 9 8, 9 9, 8 14, 7 18, 5 25, 7 18, 10 10,
11 8, 12 6, 13 5, 15 4, 17 4, 19 5, 20 7, 20 8,
20 9, 19 14, 17 21, 17 24, 18 25, 19 25, 21 24, 22 23,
24 20, 25 18, 26 17, 28 16, 29 16, 30 16, 29 16, 28 16,
26 17, 25 18, 24 20, 24 21, 24 22, 25 24, 27 25, 28 25,
29 25, 31 24, 32 23, 33 21, 33 20, 33 19, 32 17, 30 16,
29 17, 29 18, 29 19, 30 21, 32 22, 35 22, 37 21, 38 20
</PointCollection>
</ControlTemplate.Resources>
...
<!-- This Border displays the text -->
<Border>
<Border.Background>
<VisualBrush Stretch=”Uniform”>
<VisualBrush.Visual>
<Polyline Name=”polyline”
Stroke=”{TemplateBinding Foreground}”
StrokeThickness=”2”
StrokeStartLineCap=”Round”
StrokeEndLineCap=”Round”
StrokeLineJoin=”Round”
Points=”{StaticResource textNo}” />
</VisualBrush.Visual>
</VisualBrush>
</Border.Background>
</Border>
...
<!-- Triggers convert text from No to Yes and back -->
<ControlTemplate.Triggers>
<EventTrigger RoutedEvent=”CheckBox.Checked”>
<BeginStoryboard>
<Storyboard TargetName=”polyline”
TargetProperty=”Points”>
<pae:PointCollectionAnimation
To=”{StaticResource textYes}” />
</Storyboard>
</BeginStoryboard>
</EventTrigger>
<EventTrigger RoutedEvent=”CheckBox.Unchecked”>
<BeginStoryboard>
<Storyboard TargetName=”polyline”
TargetProperty=”Points”>
<pae:PointCollectionAnimation
To=”{StaticResource textNo}” />
</Storyboard>
</BeginStoryboard>
</EventTrigger>
...
</ControlTemplate.Triggers>
</ControlTemplate>
Figure 6 InterpolateValueCore 方法
protected override PointCollection InterpolateValueCore(

  PointCollection baseValue, double keyFrameProgress)

{

  // Choose which destination collection to use.

  PointCollection ptsDst = flip ? ptsDst1 : ptsDst2;

  flip = !flip;

  ptsDst.Clear();

  int num = Math.Min(baseValue.Count, Value.Count);

  double progress = GetProgress(keyFrameProgress);

  for (int i = 0; i < num; i++)

    ptsDst.Add(new Point(

      (1 - progress) * baseValue[i].X +

         progress * Value[i].X,

      (1 - progress) * baseValue[i].Y +

         progress * Value[i].Y));

  return ptsDst;

}
圖8
Figure 8 Twister 中的 Deform 方法
public Point3DCollection Deform(Point3DCollection pointsSrc,

  double progress)

{

  // Clear destination collection

  Point3DCollection pointsDst = flip ? pointsDst1 : pointsDst2;

  flip = !flip;

  pointsDst.Clear();

  // Prepare RotateTransform3D object using AxisAngleRotation3D

  xform.CenterX = Center.X;

  xform.CenterY = Center.Y;

  xform.CenterZ = Center.Z;

  // Prepare AxisAngleRotation3D object

  axisRotate.Axis = Axis;

  Vector3D axisNormalized = Axis;

  axisNormalized.Normalize();

  double angleAttenuated = MinAngle + progress * (MaxAngle - MinAngle);

  // Transform each point based on its distance from the center

  foreach (Point3D point in pointsSrc)

  {

    axisRotate.Angle = angleAttenuated *

      Vector3D.DotProduct(axisNormalized, point - Center);

    pointsDst.Add(xform.Transform(point));

  }

  // Return the points

  return pointsDst;

}
圖9
Figure 9 TeapotTwister.xaml
<Window xmlns=”http://schemas.microsoft.com/winfx/2006/xaml/presentation”

    xmlns:x=”http://schemas.microsoft.com/winfx/2006/xaml”

    xmlns:pae=”clr-namespace:Petzold.AnimationExtensions;

          assembly=Petzold.AnimationExtensions”

    xmlns:src=”clr-namespace:TeapotTwister”

    x:Class=”TeapotTwister.TeapotTwister”

    Title=”Teapot Twister (3D Deformation)”>

 <Window.Resources>

  <src:TeapotMesh x:Key=”teapot” />

 </Window.Resources>

 <Viewport3D>

  <ModelVisual3D>

   <ModelVisual3D.Content>

    <Model3DGroup>

     <!-- 3D teapot geometry and materials -->

     <GeometryModel3D x:Name=”geomod”

      Geometry=”{Binding Source={StaticResource teapot},

            Path=Geometry}”>

      <GeometryModel3D.Material>

       <DiffuseMaterial Brush=”Cyan” />

      </GeometryModel3D.Material>

      <GeometryModel3D.BackMaterial>

       <DiffuseMaterial Brush=”Blue” />

      </GeometryModel3D.BackMaterial>

     </GeometryModel3D>

     <!-- Light sources -->

     <AmbientLight Color=”#404040” />

     <DirectionalLight Color=”#C0C0C0” Direction=”2 -3 1” />

    </Model3DGroup>

   </ModelVisual3D.Content>

  </ModelVisual3D>

  <!-- Camera -->

  <Viewport3D.Camera>

   <PerspectiveCamera Position=”0 0 6”

             LookDirection=”0 0 -1”

             UpDirection=”0 1 0”

             FieldOfView=”45” />

  </Viewport3D.Camera>

 </Viewport3D>

 <!-- Animation using Twister class -->

 <Window.Triggers>

  <EventTrigger RoutedEvent=”Window.Loaded”>

   <BeginStoryboard>

    <Storyboard TargetName=”geomod”

          TargetProperty=”Geometry.Positions”>

     <pae:Point3DCollectionAnimationUsingDeformer

          Duration=”0:0:5” AutoReverse=”true”

          RepeatBehavior=”Forever”>

      <pae:Point3DCollectionAnimationUsingDeformer.Deformer>

       <pae:Twister Axis=”1 0 0” />

      </pae:Point3DCollectionAnimationUsingDeformer.Deformer>

     </pae:Point3DCollectionAnimationUsingDeformer>

    </Storyboard>

   </BeginStoryboard>

  </EventTrigger>

 </Window.Triggers>

</Window>