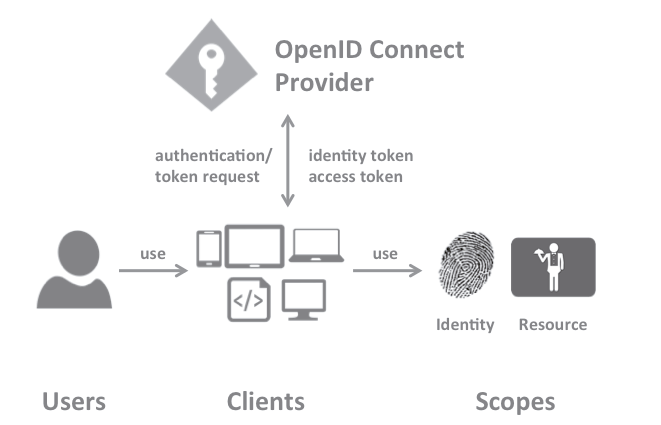
IdentityServer4 ASP.NET Core的OpenID Connect OAuth 2.0框架學習之保護API。
使用IdentityServer4 來實現使用客戶端憑據保護ASP.NET Core Web API 訪問。
IdentityServer4 GitHub: https://github.com/IdentityServer/IdentityServer4
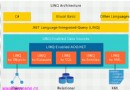
IdentityServer 框架支持以下功能:
身份驗證服務
所有應用程序(Web,本機,移動,服務)的集中登錄邏輯和工作流。
單點登錄/退出
對多種應用程序類型的單點登錄和退出。
API的訪問控制
針對各種類型的客戶發出針對API的訪問令牌,例如服務器到服務器,Web應用程序,SPA和本機/移動應用程序。
聯合登錄
支持外部身份提供程序,如Azure Active Directory,Google,Facebook等。
專注於定制
IdentityServer最重要的部分 - 許多方面可以定制,以滿足你的需要。由於IdentityServer是一個框架,而不是一個封閉產品或SaaS,你可以編寫代碼,使你的系統適應對應的場景。
IdentityServer實現了以下規范:
OpenID Connect Core 1.0
OpenID Connect Discovery 1.0
OpenID Connect Session Management 1.0 - draft 22
OpenID Connect HTTP-based Logout 1.0 - draft 03
OAuth 2.0 (RFC 6749)
OAuth 2.0 Bearer Token Usage (RFC 6750)
OAuth 2.0 Multiple Response Types
OAuth 2.0 Form Post Response Mode
OAuth 2.0 Token Revocation (RFC 7009)
OAuth 2.0 Token Introspection (RFC 7662)
Proof Key for Code Exchange (RFC 7636)
主要講解 使用客戶端憑據保護API 。如何保證的你的API 不被其他人擅自訪問?
下面開始正式的實例。
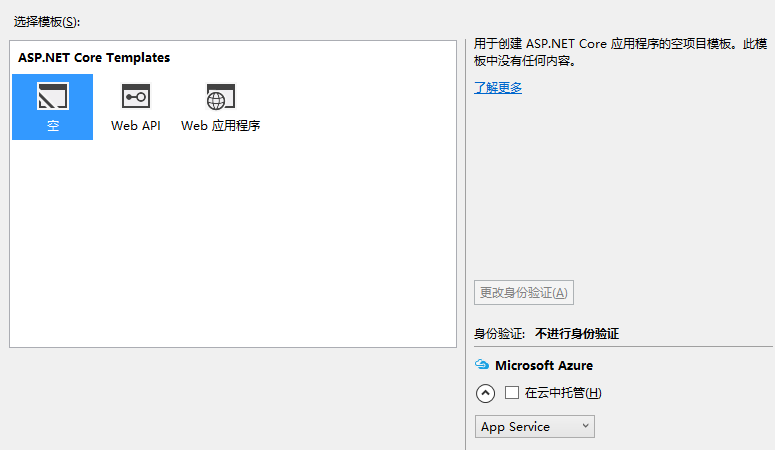
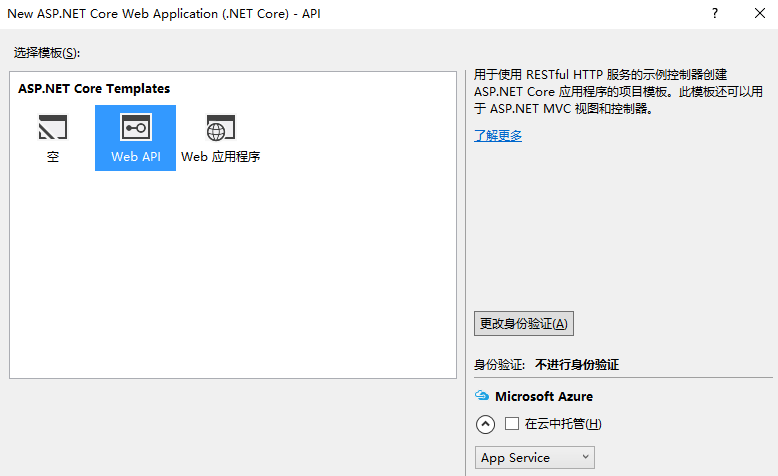
首先新建一個ASP.NET Core項目IdentityServer4Demo,然後選擇 空 模板。
然後添加引用。
NuGet命令行:
Install-Package IdentityServer4 -Pre
添加好引用以後我們就可以來使用了。
首先創建一個 Config.cs 類。
定義范圍:
        public static IEnumerable<Scope> GetScopes()
        {
            return new List<Scope>
            {
                new Scope
                {
                    Name = "zeroapi",
                    Description = "LineZero ASP.NET Core Web API"
                }
            };
        }
定義客戶端:
        public static IEnumerable<Client> GetClients()
        {
            return new List<Client>
            {
                new Client
                {
                    ClientId = "linezeroclient",

                    //使用clientid / secret進行身份驗證
                    AllowedGrantTypes = GrantTypes.ClientCredentials,

                    // 加密驗證
                    ClientSecrets = new List<Secret>
                    {
                        new Secret("secret".Sha256())
                    },

                    // client可以訪問的范圍,在上面定義的。
                    AllowedScopes = new List<string>
                    {
                        "zeroapi"
                    }
                }
            };
        }
定義好以後,在Startup.cs 中 配置IdentityServer4
        public void ConfigureServices(IServiceCollection services)
        {
            services.AddDeveloperIdentityServer()
                .AddInMemoryScopes(Config.GetScopes())
                .AddInMemoryClients(Config.GetClients());
        }
        public void Configure(IApplicationBuilder app, IHostingEnvironment env)
        {
            app.UseIdentityServer();
        }
然後我們啟動IdentityServer4Demo
訪問:http://localhost:5000/.well-known/openid-configuration
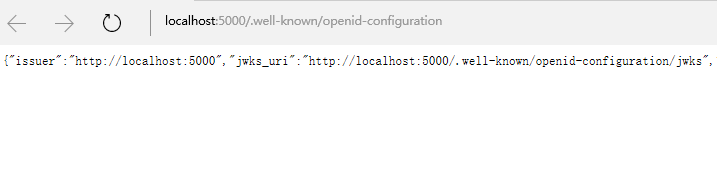
IdentityServer 創建成功。
然後添加引用。
NuGet命令行:
Install-Package IdentityServer4.AccessTokenValidation -Pre
首先更改API 的URL地址,不和Server 重復。
這裡改為 http://localhost:5001
        public static void Main(string[] args)
        {
            var host = new WebHostBuilder()
                .UseKestrel()
                .UseUrls("http://localhost:5001")
                .UseContentRoot(Directory.GetCurrentDirectory())
                .UseIISIntegration()
                .UseStartup<Startup>()
                .Build();

            host.Run();
        }
然後在Startup.cs 中 配置相關信息
        public void Configure(IApplicationBuilder app, IHostingEnvironment env, ILoggerFactory loggerFactory)
        {
            loggerFactory.AddConsole(Configuration.GetSection("Logging"));
            loggerFactory.AddDebug();
            app.UseIdentityServerAuthentication(new IdentityServerAuthenticationOptions
            {
                Authority = "http://localhost:5000",
                ScopeName = "zeroapi",

                RequireHttpsMetadata = false
            });

            app.UseMvc();
        }
注意:這裡定義的授權地址是 http://localhost:5000
下面我們來定義API,添加一個Web API 控制器 ClientController
    [Route("api/[controller]")]
    [Authorize]
    public class ClientController : Controller
    {
        [HttpGet]
        public IActionResult Get()
        {
            return new JsonResult(from c in User.Claims select new { c.Type, c.Value });
        }
    }
上面添加了 Authorize 特性,直接訪問API 是無法訪問的。
程序啟動以後,訪問http://localhost:5001/api/client 會返回401 。
創建一個客戶端調用,添加一個控制台程序 Client。
首先也要添加引用:
NuGet命令行:
Install-Package IdentityModel
客戶端代碼如下:
        public static void Main(string[] args)
        {
            //訪問授權服務器獲取token
            var disco = DiscoveryClient.GetAsync("http://localhost:5000").Result;
            var tokenClient = new TokenClient(disco.TokenEndpoint, "linezeroclient", "secret");
            var tokenResponse = tokenClient.RequestClientCredentialsAsync("zeroapi").Result;
            if (tokenResponse.IsError)
            {
                Console.WriteLine(tokenResponse.Error);
                return;
            }

            Console.WriteLine(tokenResponse.Json);
            Console.WriteLine("==============================");
            //設置token 訪問API
            var client = new HttpClient();
            client.SetBearerToken(tokenResponse.AccessToken);

            var response = client.GetAsync("http://localhost:5001/api/client").Result;
            if (!response.IsSuccessStatusCode)
            {
                Console.WriteLine(response.StatusCode);
            }

            var content = response.Content.ReadAsStringAsync().Result;
            Console.WriteLine(content);
            Console.ReadKey();
        }
然後開始一個個運行。
首先啟動 IdentityServer4Demo,然後API 然後Client。
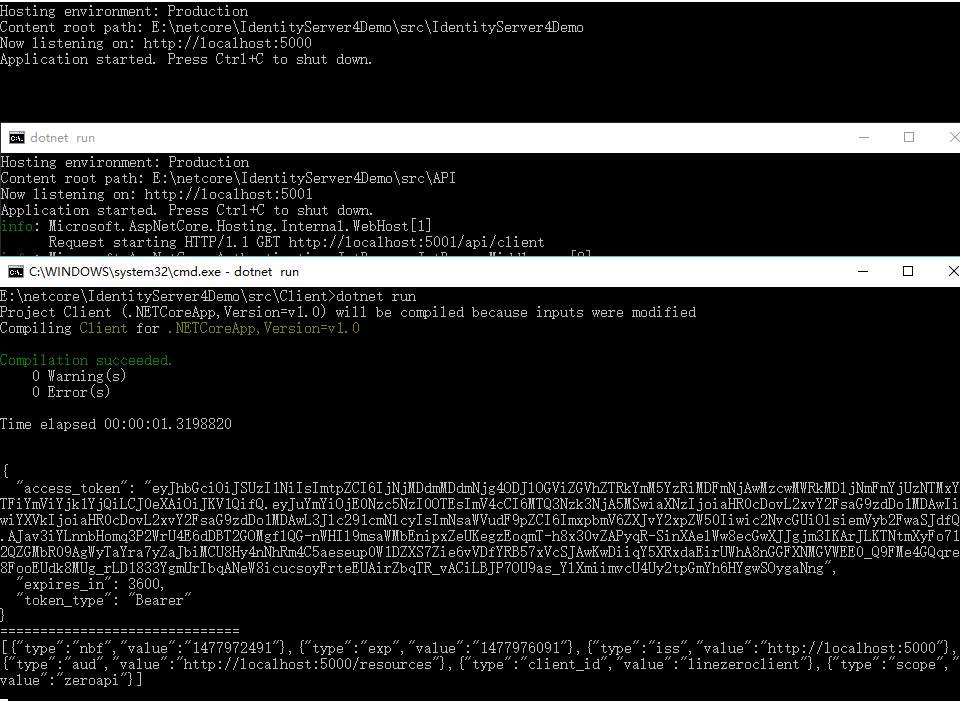
Client 成功訪問 API 。使用客戶端憑據保護API 到這裡就基本完成。
更多IdentityServer4信息:https://identityserver4.readthedocs.io/
如果你覺得本文對你有幫助,請點擊“推薦”,謝謝。