一定有很多人看到過一些奇形怪狀的窗體,例如一些屏幕精靈。其實實現起來非常容易,做到三點就好啦。下面我使用Delphi做了一個VCL控件(TBmpShape),你只需要指定一幅圖片就可以將窗體變成你的圖片的形狀。
1。准備一幅位圖圖片,一定要BMP格式的
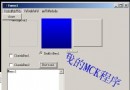
2。將VCL控件放在你的窗體(FORM)上,注意不能是其他的容器,設置PICTURE屬性,指定制作好的圖片。
3。設置圖片的背景顏色,必須是你的圖片的背景顏色准確值
4。在本窗體的FormCreate事件中寫一行代碼
BmpShape1.Apply;
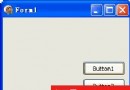
做到上面四點就可以了,編譯運行你的窗體,是不是不一樣啊。
下面是具體的代碼,不是太長吧。
unit BmpShape;
{
2002/08/22 by ultrared
根據BMP文件創建窗口
注意:
1. BMP文件最左上的一個點顏色作為背景色
2. BmpShape控件只能用在TForm容器上
3. BMP文件可以是256色或者24位色
4。大塊背景色必須和背景色絕對相等才能獲得正常效果
}
interface
uses
Forms,Windows, Messages, SysUtils, Classes, Controls, ExtCtrls,Graphics;
type
TBmpShape = class(TImage)
private
{ Private declarations }
BackColor:TColor;//背景顏色
FColorDither:boolean;//是否允許背景顏色有一定的抖動
function GetRegion:HRGN;//前景圖片的區域
procedure setColorDither(cd:Boolean);
protected
{ Protected declarations }
public
{ Public declarations }
constructor Create(AOwner:TComponent);override;
procedure Apply;//使用效果
published
{ Published declarations }
property Dither:Boolean read FColorDither write setColorDither;
end;
procedure Register;
implementation
procedure Register;
begin
RegisterComponents(Samples, [TBmpShape]);
end;
procedure TBmpShape.setColorDither(cd:Boolean);
begin
if cd<>FColorDither then
FColorDither:=cd;
end;
constructor TBmpShape.Create(AOwner:TComponent);
begin
inherited Create(AOwner);
BackColor:=RGB(0,0,0);
FColorDither:=FALSE;
end;
//核心子程序,獲得BMP圖片的前景區域
function TBmpShape.GetRegion:HRGN;
var
i,j:integer;
rgn1,rgn2:HRGN;
StartY:integer;
r,g,b,r1,g1,b1:BYTE;
cc:TColor;
begin
if Picture.Bitmap<>nil then
begin
BackColor:=Picture.Bitmap.Canvas.Pixels[0,0];
rgn1:=CreateRectRgn(0,0,0,0);
for i:=0 to Picture.Bitmap.Width-1 do
begin
StartY:=-1;
for j:=0 to Picture.Bitmap.Height-1 do
begin
cc:=Picture.Bitmap.Canvas.Pixels[i,j];
if FColorDither then
begin
//允許和背景有一定的色差
r:=(cc and $FF0000) shr 16;
g:=(cc and $FF00) shr 8;
b:=cc and $FF;
r1:=(BackColor and $FF0000) shr 16;
g1:=(BackColor and $FF00) shr 8;
b1:=BackColor and $FF;
if (abs(r-r1)<10) and (abs(g-g1)<10) and (abs(b-b1)<10) then
begin
if (StartY>=0) and (j>=StartY) then
begin
rgn2:=CreateRectRgn(i,StartY,i+1,j);
CombineRgn(rgn1,rgn1,rgn2,RGN_OR);
StartY:=-1;
end;
end
else
begin
if Starty<0 then
StartY:=j
else if j=(Picture.Bitmap.Height-1) then //最下面一個點
begin
rgn2:=CreateRectRgn(i,StartY,i+1,j);
CombineRgn(rgn1,rgn1,rgn2,RGN_OR);
end;
end;
end
else //不允許色差
begin
if cc=BackColor then
begin
if (StartY>=0) and (j>=StartY) then
begin
rgn2:=CreateRectRgn(i,StartY,i+1,j);
CombineRgn(rgn1,rgn1,rgn2,RGN_OR);
StartY:=-1;
end;
end
else
begin
if Starty<0 then
StartY:=j
else if j=(Picture.Bitmap.Height-1) then //最下面一個點
begin
rgn2:=CreateRectRgn(i,StartY,i+1,j);
CombineRgn(rgn1,rgn1,rgn2,RGN_OR);
end;
end;
end;
end;
end;
result:=rgn1;
end
else
result:=0;
end;
procedure TBmpShape.Apply;
begin
if Parent is TForm then
begin
Left:=0;
Top:=0;
Width:=Picture.Bitmap.Width;
Height:=Picture.Bitmap.Height;
with (Parent as Tform) do
begin
BorderStyle:=bsNone;
Width:=Self.Width;
Height:=Self.Height;
end;
SetWindowRgn(Parent.Handle,GetRegion,FALSE);
end;
end;
end.