1、普通安裝。
# 進入環境
pip install opencv-python
2、擴展安裝。(針對cv2中缺少部分函數)
module’ object has no attribute ‘xfeatures2d’ (已解決)_小白狐狸的博客-CSDN博客_xfeatures2d
# 如果已經安裝OpenCv2,則需要先卸載pip uninstall opencv-python再安裝
pip install opencv-contrib-python
包下載地址:opencv-contrib-python · PyPI
import cv2
import numpy as np
image1 = cv2.imread('圖片地址')
image1.astype(np.int32)
image2 = cv2.imread('圖片地址')
image2.astype(np.int32)
visual_image = []
image1 = np.lib.pad(image1, ((0, 0), (0, 64), (0, 0)), # ((上方, 下方),(左邊,右邊),(通道上,通道下) )
'constant',constant_values=0)
visual_image.append(image1)
visual_image.append(image2)
rank_image = np.concatenate(visual_image,1)
cv2.imshow('image', rank_image)
cv2.waitKey(0)
結果:
使用 cv2.warpAffine() 函數。參考代碼:Self-Correction-Human-Parsing.
import numpy as np
import cv2
def PadResize(img_path='', reshape_size=[512,512]):
aspect_ratio = reshape_size[1] * 1.0 / reshape_size[0]
reshape_size = np.asarray(reshape_size)
def _box2cs(box):
x, y, w, h = box[:4]
return _xywh2cs(x, y, w, h)
def _xywh2cs(x, y, w, h):
center = np.zeros((2), dtype=np.float32)
center[0] = x + w * 0.5
center[1] = y + h * 0.5
if w > aspect_ratio * h:
h = w * 1.0 / aspect_ratio
elif w < aspect_ratio * h:
w = h * aspect_ratio
scale = np.array([w, h], dtype=np.float32)
return center, scale
def get_3rd_point(a, b):
direct = a - b
return b + np.array([-direct[1], direct[0]], dtype=np.float32)
def get_dir(src_point, rot_rad):
sn, cs = np.sin(rot_rad), np.cos(rot_rad)
src_result = [0, 0]
src_result[0] = src_point[0] * cs - src_point[1] * sn
src_result[1] = src_point[0] * sn + src_point[1] * cs
return src_result
def get_affine_transform(center,
scale,
rot,
output_size,
shift=np.array([0, 0], dtype=np.float32),
inv=0):
if not isinstance(scale, np.ndarray) and not isinstance(scale, list):
print(scale)
scale = np.array([scale, scale])
scale_tmp = scale
src_w = scale_tmp[0]
dst_w = output_size[1]
dst_h = output_size[0]
rot_rad = np.pi * rot / 180
src_dir = get_dir([0, src_w * -0.5], rot_rad)
dst_dir = np.array([0, (dst_w - 1) * -0.5], np.float32)
src = np.zeros((3, 2), dtype=np.float32)
dst = np.zeros((3, 2), dtype=np.float32)
src[0, :] = center + scale_tmp * shift
src[1, :] = center + src_dir + scale_tmp * shift
dst[0, :] = [(dst_w - 1) * 0.5, (dst_h - 1) * 0.5]
dst[1, :] = np.array([(dst_w - 1) * 0.5, (dst_h - 1) * 0.5]) + dst_dir
src[2:, :] = get_3rd_point(src[0, :], src[1, :])
dst[2:, :] = get_3rd_point(dst[0, :], dst[1, :])
if inv:
trans = cv2.getAffineTransform(np.float32(dst), np.float32(src))
else:
trans = cv2.getAffineTransform(np.float32(src), np.float32(dst))
return trans
### 1. Read and Visualize Img ###
img = cv2.imread(img_path, cv2.IMREAD_COLOR)
h, w, _ = img.shape
cv2.imshow('ORI', img)
### 2. Get person center and scale ###
person_center, s = _box2cs([0, 0, w - 1, h - 1])
r = 0
trans = get_affine_transform(person_center, s, r, reshape_size)
### 3. Resizing by adopting Padding. ###
reshaped_img = cv2.warpAffine(
img,
trans,
(int(reshape_size[1]), int(reshape_size[0])),
flags=cv2.INTER_LINEAR,
borderMode=cv2.BORDER_CONSTANT,
borderValue=(255, 150, 100))
return reshaped_img
reshaped_img = PadResize( img_path='./demo/demo.jpg',
reshape_size=[512,512] )
cv2.imshow('RESHAPE', reshaped_img)
cv2.imwrite('demo_resized.png', reshaped_img)
cv2.waitKey(0)
輸入圖片: ./demo/demo.jpg

輸出圖片: ./demo_resized.png
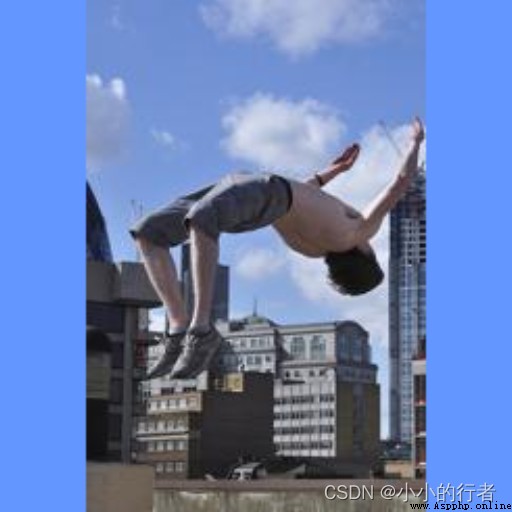
↑藍色就是填充的部分。
1、dst = cv2.divide(m1, m2)函數,當除數m2中有“0”時,dst返回值為0而不是inf。
import cv2
import numpy as np
gradx = np.array([0,0,3])
grady = np.array([1,2,3])
dst1 = cv2.divide(gradx, grady)
dst2 = cv2.divide(grady, gradx)
print(dst1, '\n')
print(dst2, '\n')
【實驗結果】
[[0]
[0]
[1]]
[[0]
[0]
[1]]
1、cv2.cv.Boxpoint() 函數出錯解決方法。—— 改為 cv2.boxPoints()。