1, open PyCharm Create a create Django project
django-admin startproject demo

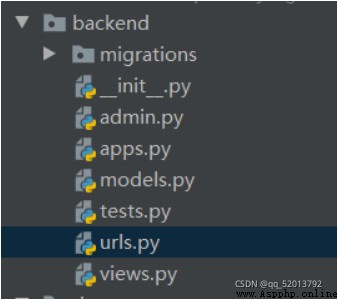
2, Go to the project root directory , Create a App As the backend of the project
cd demo
python manage.py startapp backend       //backend Namely app name
1. In the created app(backend) Create a sub route in (urls.py)
2. Just created in urls.py Configure interface routing
from django.conf.urls import url
from . import views
urlpatterns = [
   url('all/', views.get),#'all/' Is the front get Corresponding route views.get yes views The corresponding function in
]
3. take app Add the route under to demo Under the urls.py in
from django.conf.urls import url,include
urlpatterns = [
url(r'^', include('backend.urls')),
]4. stay demo Under the settings.py Add cross domain access to
INSTALLED_APPS = [ 'backend',#app Name 'corsheaders', # pip install django-cors-headers This is to prevent cross domain , Please check the information separately , I won't go into details here . # 'rest_framework', # pip install djangorestframework It is convenient for us to write back-end interfaces ] MIDDLEWARE = [ 'corsheaders.middleware.CorsMiddleware', ]
CORS_ORIGIN_ALLOW_ALL = True
5. stay app Under the views.py Write interface functions in
from django.http import JsonResponse
def get(request):
return JsonResponse({'name':'python'})6. function django:
python manage.py runserver
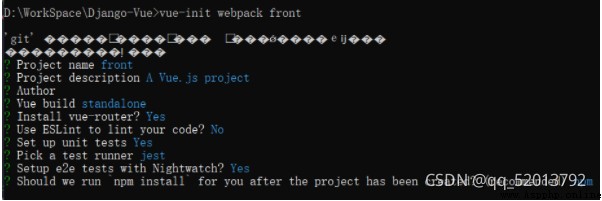
1. Enter the front-end storage directory , function :
vue-init webpack front// Install the middle handle vue-router Choose , We need it to do front-end routing
2. Get into front Catalog , function :
npm install // install vue What is needed node rely on
3. Install the required packages and run vue:
npm install
npm install --save axios vue-axios
npm run dev
4. stay src/ Under the main.js Global import axios:
// The Vue build version to load with the `import` command
// (runtime-only or standalone) has been set in webpack.base.conf with an alias.
import Vue from 'vue'
import App from './App'
import router from './router'
import axios from 'axios'
import VueAxios from 'vue-axios'
Vue.use(VueAxios, axios)
axios.defaults.baseURL = 'http://127.0.0.1:8000'
Vue.prototype.$axios = axios
Vue.config.productionTip = false
/* eslint-disable no-new */
new Vue({
el: '#app',
router,
components: { App },
template: '<App/>'
})
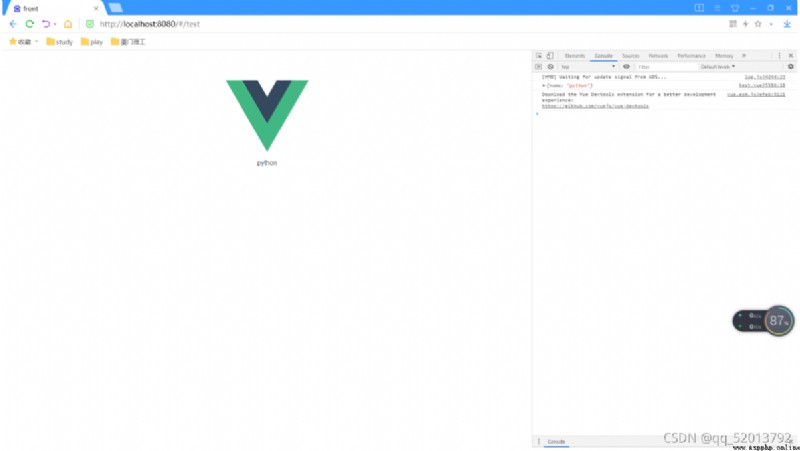
5. stay src/components newly build test.vue, At this time, the front-end interface should be :

6. Send a request to the interface , get data (test.vue writes )
<template>
<div>{
{name}}</div>
</template>
<script>
export default {
data(){
return{
name:''
}
},
methods:{
getData () {
this.$axios
.get('all/')
.then(response=> {
this.name=response.data.name
console.log(response.data)
})
},
},
mounted(){
this.getData()
}
}
</script>
7. stay src/router/index.js Write it down vue Configure the routing :
import Vue from 'vue'
import Router from 'vue-router'
import HelloWorld from '@/components/HelloWorld'
import test from '@/components/test'
Vue.use(Router)
export default new Router({
routes: [
{
path: '/',
name: 'HelloWorld',
component: HelloWorld
},
{
path: '/test',
name: 'test',
component: test
}
]
})