編程語言的出現和演進都是為了直接或者簡潔的改變工作效率,Python的出現並非只能用於數據分析、機器學習。
如果仔細琢磨日常的工作 和生活,可以通過一些Python腳本大大的提升效率,同時還可以繞開很多收費工具,節省不少錢。
今天,我就來給大家介紹大神之前寫過的一些殺手級腳本,真的是幸福感爆棚!
作者:Jackpop
鏈接:https://www.zhihu.com/question/282627359/answer/2521922355
來源:知乎
著作權歸作者所有。商業轉載請聯系作者獲得授權,非商業轉載請注明出處。
使用這個自動化腳本,以編程方式編輯你的圖像。下面是我在編輯圖片的常用功能,如模糊、旋轉、翻轉、合並等。要實現這些功能,往常都需要安裝一些臃腫的軟件,但是,一個簡單的Python腳本就可以輕松解決。
from PIL import Image
from PIL import ImageDraw
# 合並圖像
img1 = Image.open('img101.jpg')
img2 = Image.open('img102.jpg')
combine = Image.blend(img1, img2, 0.5)
# 調整圖像大小
resize = Image.open('img101.jpg')
resize = resize.resize((300, 300))
# 翻轉圖像
flip_image = Image.open('img101.jpg')
flip_image = flip_image.transpose(Image.FLIP_LEFT_RIGHT)
# 模糊圖像
blur_image = Image.open('img101.jpg')
blur_image = blur_image.filter(Image.BLUR)
# 添加陰影
shadow_image = Image.open('img101.jpg')
shadow_image = shadow_image.filter(Image.EDGE_ENHANCE_MORE)
# 裁剪圖片
crop_image = Image.open('img101.jpg')
crop_image = crop_image.crop((50, 50, 300, 200))
# 增加亮度
bright_image = Image.open('img101.jpg')
bright_image = bright_image.point(lambda p: p + 50)
# 添加文字
text_image = Image.open('img101.jpg')
text_image = text_image.convert('RGB')
draw = ImageDraw.Draw(text_image)
draw.text((10, 10), "Hello World", (255, 255, 255))
# 旋轉圖像
rotate_image = Image.open('img101.jpg')
rotate_image = rotate_image.rotate(90)
# 保存圖像
img1.save('img101.jpg')
這個自動化腳本將為你編輯音頻文件,你可以提取聲音、合並聲音、播放聲音、分割/切割聲音等等,通過這個腳本,終於可以扔掉那些付費軟件了。
from pydub import AudioSegment
from pydub.utils import mediainfo
from pydub.playback import play
# 從視頻中提取聲音
sound = AudioSegment.from_file("video.mp4", format="mp4")
sound.export("music.mp3", format="mp3")
# 獲取媒體信息
info = mediainfo("musci.wav")
print(info)
# 播放音頻
play("music.mp3")
# 合並音頻
sound1 = AudioSegment.from_file("music.mp3")
sound2 = AudioSegment.from_file("music.mp3")
combined = sound1 + sound2
combined.export("music_combined.mp3", format="mp3")
# 分割音頻
sound = AudioSegment.from_file("music.mp3", format="mp3")
sound_1 = sound[:10000]
sound_2 = sound[10000:]
sound_1.export("music_1.mp3", format="mp3")
sound_2.export("music_2.mp3", format="mp3")
# 增大或減小音量
sound = AudioSegment.from_file("music.mp3", format="mp3")
sound_volumn = sound + 10
sound_volumn.export("music_volumn.mp3", format="mp3")
# 為音頻添加靜音
sound = AudioSegment.from_file("music.mp3", format="mp3")
sound_silence = sound + AudioSegment.silent(duration=1000)
sound_silence.export("music_silence.mp3", format="mp3")
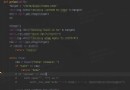
工作中,我們經常會產生一些重要的文件,需要限制閱讀人員,那麼這個腳本就可以提供幫助。這個腳本使用密碼學技術對你的文件進行加密,當你需要打開它們時,你可以使用密碼解密它們。這是一個非常安全的方法來鎖定你的文件,因為在沒有鑰匙的情況下就沒辦法閱讀。
# 加密函數
def Lock_file(file_name, key):
with open(file_name, 'rb') as file:
data = file.read()
f = Fernet(key)
encrypted_data = f.encrypt(data)
with open(file_name, 'wb') as file:
file.write(encrypted_data)
print("File Lock...")
# 解密函數
def Unlock_file(file_name, key):
with open(file_name, 'rb') as file:
data = file.read()
f = Fernet(key)
decrypted_data = f.decrypt(data)
with open(file_name, 'wb') as file:
file.write(decrypted_data)
print("File Unlock...")
key = input("Enter the key: ")
Lock_file('test.txt', key)
Unlock_file('test.txt', key)
是現如今使用非常頻繁的一類工具,但是,目前很多錄屏軟件都收費,有的導出時會在視頻上添加水印。所以,知乎上也經常看到有不少人迫切需求無水印、免費的錄屏軟件。其實,一個Python腳本就可以搞定!
import pyautogui
import numpy as np
import cv2
import keyboard
def Screen_Recording():
while True:
# Press R to Start Recording
if keyboard.is_pressed('r'):
print("Recording Has been Started...")
# resolution
capture_area = (1920, 1080)
codec = cv2.VideoWriter_fourcc(*'mp4v')
filename = "Your_Recording.mp4"
fps = 60.0
output_video = cv2.VideoWriter(filename, codec, fps, capture_area)
while True:
image = pyautogui.screenshot()
Image_frame = np.array(image)
Image_frame = cv2.cvtColor(Image_frame, cv2.COLOR_BGR2RGB)
output_video.write(Image_frame)
cv2.waitKey(1)
# Press Q button to Stop recording
if keyboard.is_pressed('q'):
print("Recording Has been Stopped...")
break
output_video.release()
cv2.destroyAllWindows()
Screen_Recording()

從PDF中提取表格是一項復雜的任務,通過OCR技術效果一般都不太理想,手動重新建個表格工作量又比較大。這個腳本將簡單地從你的PDF中提取表格,它不僅 可以提取單個PDF的表格,還可以從多個PDF中一個一個地提取表格。
import camelot
table = camelot.read_pdf('test.pdf', pages='1-2')
# 獲取表的總數
print("Total tables: ", table.n)
print(table[0].df)
print(table[1].df)
# 把表格導出為CSV
table[0].to_csv('table1.csv')
table[1].to_csv('table2.csv')
# 把表格導出為Excel
table[0].to_excel('table1.xlsx')
# Export Table to HTML
table[0].to_html('table1.html')
# 一次性提取和導出表
table.export('tables.csv', f='csv', compress=True)
table[0].parse(['Date', 'Description', 'Amount'])
你是否想象過你也可以用Python將MS Office軟件自動化?Office三件套Word、PPT、Excel是絕大多數人在工作和學習中都會用到的工具,但是,目前很多人還都是手動處理一些重復的工作,效率非常低。這個腳本就可以解放你的雙手,實現MS Office的自動化。
# Excel自動化
import xlrd
wb = xlrd.open_workbook('test.xlsx')
worksheet = wb.sheet_by_index(0)
# 根據行、列讀取數據
print(worksheet.cell_value(0, 0))
# read whole row
print(worksheet.row_values(0))
# 讀取整列
print(worksheet.col_values(1))
# 寫入Excel
worksheet.write(0, 0, 'Hello')
wb.save('test.xlsx')
# Word自動化
import docx
doc = docx.Document("zen_of_python.docx")
# 逐段讀取
text = [p.text for p in doc.paragraphs]
print(text)
# 逐表讀取
for table in doc.tables:
for row in table.rows:
for cell in row.cells:
print(cell.text)
# 寫入Word文檔
doc.add_paragraph("Hello World")
doc.save("test.docx")
# PowerPoint自動化
from pptx import Presentation
# 浏覽幻燈片
PP = Presentation('file.pptx')
for slide in PP.slides:
for shape in slide.shapes:
for paragraph in shape.text_frame.paragraphs:
for data in paragraph.runs:
print(data.text)
# 寫入PPT
PP = Presentation()
title_slide_layout = PP.slide_layouts[0]
slide = PP.slides.add_slide(title_slide_layout)
title = slide.shapes.title
title.text = "Medium Article"
PP.save('file.pptx')
簡單的自動化腳本幫助你將你的圖像轉換為PDF格式。
from PIL import Image
def Images_Pdf(filename, output):
images = []
for file in filename:
im = Image.open(file)
im = im.convert('RGB')
images.append(im)
images[0].save(output, save_all=True, append_images=images[1:])
Images_Pdf(["test1.jpg", "test2.jpg", "test3.jpg"], "output.pdf")
它使用谷歌文本轉語音API,將你的文本內容轉換為人工智能機器人的聲音。
from pygame import mixer
from gtts import gTTS
def main():
tts = gTTS('Like This Article')
tts.save('output.mp3')
mixer.init()
mixer.music.load('output.mp3')
mixer.music.play()
if __name__ == "__main__":
main()
有些網站會對圖片的大小進行嚴格的限制,比如,一些報考網站。這時候,就需要用到圖片壓縮工具。但是,很多壓縮工具對圖片的質量影響較大。這個腳本把你的照片壓縮成較小的尺寸而質量不變。
import PIL
from PIL import Image
from tkinter.filedialog import *
fl=askopenfilenames()
img = Image.open(fl[0])
img.save("result.jpg", "JPEG", optimize = True, quality = 10)
這個簡單的腳本可以給任何圖片加水印。你可以設置文本、位置和字體。
from PIL import Image
from PIL import ImageFont
from PIL import ImageDraw
def watermark_img(img_path,res_path, text, pos):
img = Image.open(img_path)
wm = ImageDraw.Draw(img)
col= (9, 3, 10)
wm.text(pos, text, fill=col)
img.show()
img.save(res_path)
img = 'initial.jpg'
watermark_img(img, 'result.jpg','IshaanGupta', pos=(1, 0))
上面介紹了10個場景,都是日常工作和生活中經常會遇到的。之前大多數同學都會選擇尋求一些繁瑣的工具,甚至付費,最終效果也不太理想。通過簡單的Python腳本,其實就可以徹底解決我們的問題,還可以解放雙手,大大的提高效率,感興趣的趕緊試一下吧!