Initial environment : Alicloud lightweight application server has reset the system to CentOS7.3-64 position
Specific goals : I want to write about a spider
Our ears are always filled with the sounds of waiting . When I have time , How am I going to ; When I'm rich , What to do again ; When I retire , I'll do it . therefore , All kinds of beauty are infinitely delayed , Some will never wait , Some even if you wait , Is there still the original mood and the original people ?
I had a dream last night , I dreamed that I had a terminal illness , I won't live for a few days . I didn't cry when I woke up , But I can't sleep anymore , Now we have this passage . I woke up thinking a lot , To sum up, it is also very simple , Just not convinced . Why do people who do not cherish life can waste their time at will ; And I'm , Work so hard every day , The cause has not been completed , But I have to leave like this . I'm depressed , I complain about the unfairness of God ; Look at everything in the house , Tears finally came down . I decided to write a piece of good advice for every familiar relative and friend , Write to them the unfulfilled wishes and parting insights , I advise them to cherish life , value highly one's time , Being is happy !
Finally I decided to write about a spider , Its name is little spider . Suppose I could live to be eighty , So in the remaining decades , It will take my place to see the world , Just have a look , Leave nothing behind .
—— Quote my Python The first few paragraphs of the first teacher, little turtle
1. Carry out orders lsb_release -a Check the system version 
You can see , My current system version is CentOS7.3-64 position .
2. To make sure that everything is OK , I'm going to upgrade my system to the latest .
3. use yum updates
Carry out orders yum -y clean all
Carry out orders yum -y update
At last I saw “Complete!” The update is complete .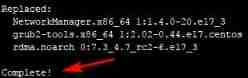
4. After the update is complete , Carry out orders lsb_release -a Check the system version 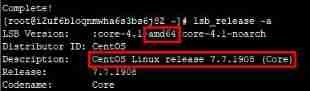
You can see , Now my system version is CentOS7.7-64 position .
1. Carry out orders python --version View the current Python edition 
You can see , Now my Python Version is 2.7.5, So I decided to upgrade Python2 To Python3.
2. Carry out orders yum -y install python3 install Python3
At last I saw “Complete!” The installation is finished .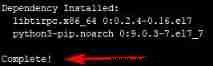
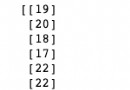
3. After installation , Carry out orders python3 --version see Python3 Is the installation successful , And the current version number .
You can see , Now my Python3 Version is 3.6.8
4. View all existing in the current system Python
Carry out orders cd /usr/bin, Switch to /usr/bin Under the table of contents
Carry out orders ls -l | grep python, Check that the file name in the current directory contains python The file of 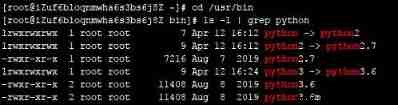
5. In the current directory /usr/bin Under the table of contents , Back up the original default Python route , take python Link to python3
Carry out orders mv python python.bak
Carry out orders ln -sf python3 python
6. After the modification is completed , Test and modify the default Python The success of
Carry out orders python --version
You can see , Of the current system Python The default is Python3.6.8 了
7. because yum To use python2 To run , So the next step is to modify yum The configuration file
Carry out orders vim /usr/bin/yum
Put the top #!/usr/bin/python It is amended as follows #!/usr/bin/python2 that will do ;
Carry out orders vim /usr/libexec/urlgrabber-ext-down
Put the top #!/usr/bin/python It is amended as follows #!/usr/bin/python2 that will do ;
ps: To modify a file, press the... Button on the keyboard i , Enter the editing status of the file , Modify the right content in the right place ; Press... After modification Esc key , Input :wq , enter , You can save and exit .
1. install JDK Method 1( recommend )
Carry out orders yum -y install java Conduct JDK Installation of .
Carry out orders == java -version== see JDK edition 
You can see , My current JDK Version is 1.8.0_242
2. install JDK Method 2(ps: If you download the latest JDK14, May not be able to communicate with Tomcat matching )
(1) open Oracle Official website
https://www.oracle.com/java/technologies/javase-jdk8-downloads.html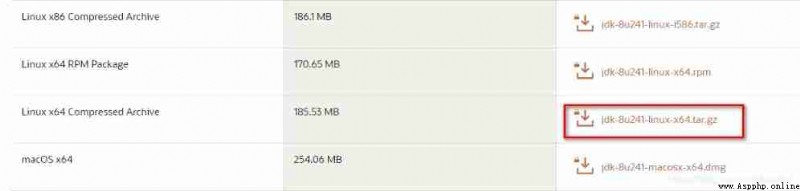
Find the... Of the corresponding system version JDK Download the compressed package .
JDK Compress package file jdk-8u241-linux-x64.tar.gz Also on the Baidu network disk .
link : https://pan.baidu.com/s/1bCUJFcn499SIHGSGJCoNCw Extraction code : leaf
(2) Download it jdk-8u241-linux-x64.tar.gz This file ,
utilize Xftp Tool upload /root Under the table of contents ,
(3) Carry out orders cd Switch to /root Catalog ,
Carry out orders tar -xzvf jdk-8u241-linux-x64.tar.gz Unzip the package ,
Carry out orders cd jdk1.8.0_241/bin Get into JDK In the catalog bin Catalog ,
Carry out orders ./java -version View the current JDK edition ,
You can see , At present JDK Version is 1.8.0_241
(4) Carry out orders cd … Go back to the previous Directory ,
Carry out orders pwd View current directory ,
Copy the path /root/jdk1.8.0_241,
(5) To configure JDK environment variable
Carry out orders vi /etc/profile,
Press caps on the keyboard G Go to the bottom line , Press down i Key to enter editing state , Add the following at the end , Note that the first sentence is replaced by your own JDK route , It is the path just copied ;
JAVA_HOME=/root/jdk1.8.0_241
JAVA_BIN=$JAVA_HOME/bin
JRE_HOME=$JAVA_HOME/jre
JRE_BIN=$JRE_HOME/bin
PATH=$JAVA_BIN:$JRE_BIN:$PATH
CLASSPATH=.:$JAVA_HOME/lib/dt.jar:$JAVA_HOME/lib/tools.jar:$JRE_HOME/lib
export JAVA_HOME JRE_HOME PATH CLASSPATH
Press down Esc key , Input :wq , enter , Save and exit ;
Carry out orders source /etc/profile Give Way JDK The environment variable configuration of takes effect ;
Carry out orders cd Back to root ;
Carry out orders java -version confirm JDK Environment variable configuration succeeded ;
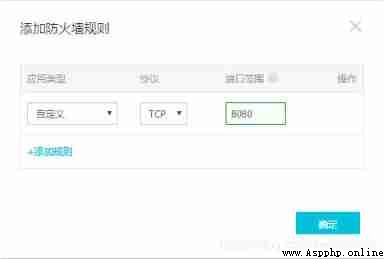
1. Alibaba cloud firewall added 8080 port 
2. download Tomcat(ps: If you download the latest Tomcat10, May not be able to communicate with Jenkins matching )
open Tomcat Official website
https://tomcat.apache.org/download-90.cgi
Find the corresponding Tomcat9 Download the compressed package of ,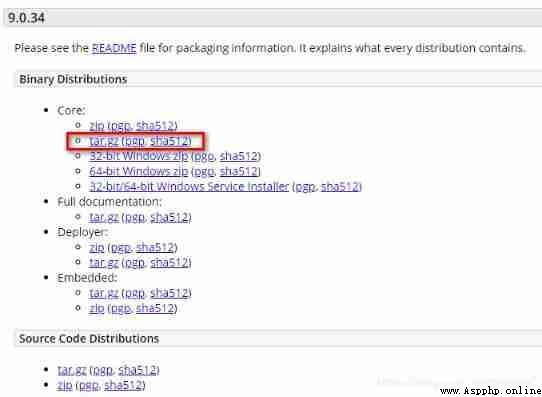
Tomcat9 Compressed package file for apache-tomcat-9.0.34.tar.gz Baidu network disk also provides ,
link : https://pan.baidu.com/s/1bCUJFcn499SIHGSGJCoNCw Extraction code : leaf
3. Download it apache-tomcat-9.0.34.tar.gz This file ,
utilize Xftp Tool upload /root Under the table of contents ,
4. Carry out orders cd Switch to /root Catalog ,
Carry out orders tar -xzvf apache-tomcat-9.0.34.tar.gz Unzip the package ,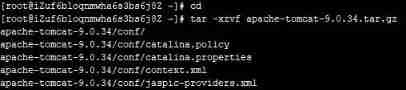
Carry out orders cd apache-tomcat-9.0.34/bin Get into Tomcat In the catalog bin Catalog ,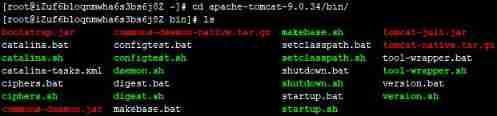
Carry out orders ./startup.sh start-up Tomcat,
Carry out orders ps -ef | grep tomcat Make sure Tomcat The successful running ,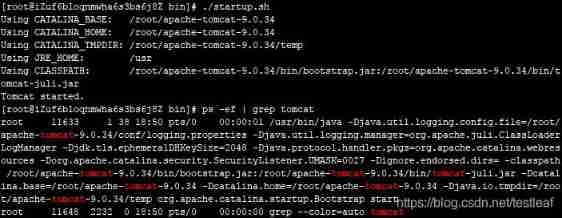
5.Tomcat Your startup may be a little slow , Just wait patiently .
Finally, input your own Internet in the browser IP Address :8080 You can see the following interface , We can know Tomcat It is running normally .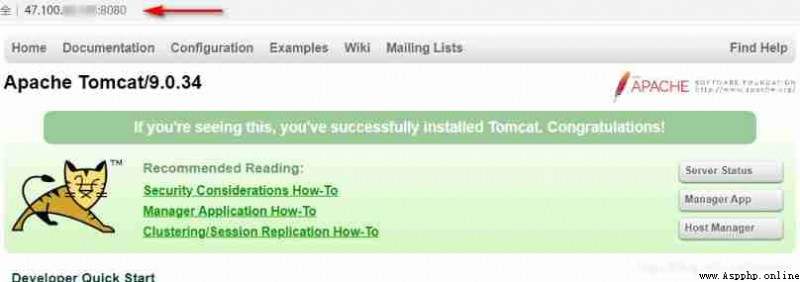
1. from Jenkins Download the latest jenkins.war file ,
https://jenkins.io/zh/download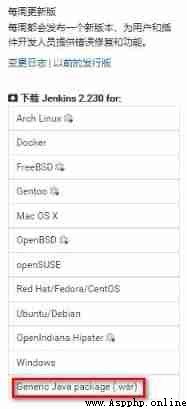
Of course , Baidu network disk also provides ,
link : https://pan.baidu.com/s/1bCUJFcn499SIHGSGJCoNCw Extraction code : leaf
2. take jenkins.war Document utilization Xftp Tool upload /root Under the table of contents ,
Carry out orders cd Switch to /root Catalog ,
Carry out orders cp jenkins.war /root/apache-tomcat-9.0.34/webapps Copy this war Package to tomcat Install under directory webapps Under the table of contents .
3. Enter your own Internet in the browser IP Address :8080/jenkins You can see the following interface , We can know jenkins It is running normally .
Jenkins Your startup may be slow , Please be patient .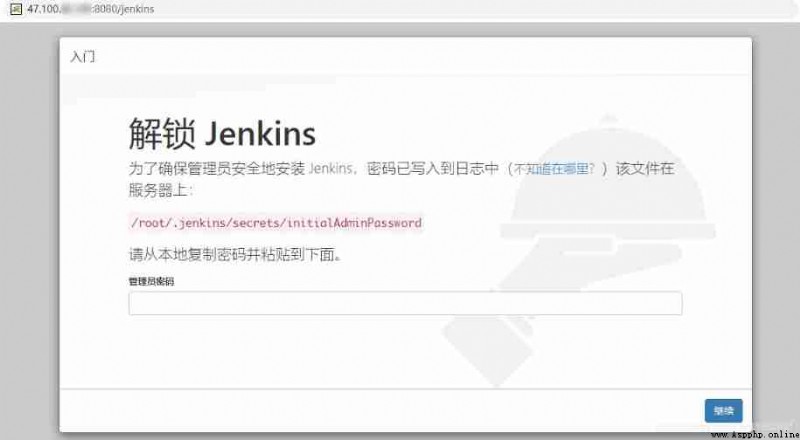
4. stay /root Execute command under directory ls -a View the files in the current directory 
Found a .jenkins Catalog ,
Carry out orders cd .jenkins Get into ==.jenkins== Catalog ,
Carry out orders vi hudson.model.UpdateCenter.xml Modify this xml file ,
Press down i Key to enter editing state ,
take <url>https://updates.jenkins.io/update-center.json</url> Replace with https://mirrors.tuna.tsinghua.edu.cn/jenkins/updates/update-center.json</url>
Press down Esc key , Input :wq , enter , Save and exit ;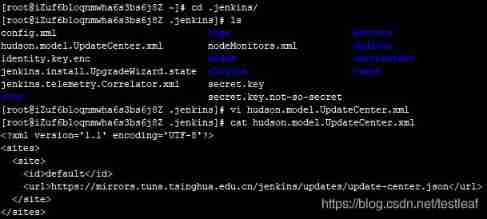
5. stay ==.jenkins== Execute command under directory cd updates Get into updates Folder ,
Carry out orders vi default.json modify default.json file ,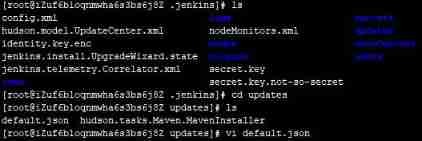
Keyboard entry %s,http://www.google.com,http://www.baidu.com,g, And then go back , All in this file will be http://www.google.com Replace with http://www.baidu.com ;
Keyboard entry :%s,http://updates.jenkins-ci.org/download,https://mirrors.tuna.tsinghua.edu.cn/jenkins,g, And then go back , All in this file will be http://updates.jenkins-ci.org/download Replace with https://mirrors.tuna.tsinghua.edu.cn/jenkins ;
Input :wq , And then go back , Save and exit ;
6. restart Tomcat
Carry out orders cd Switch to /root Catalog ,
Carry out orders cd apache-tomcat-9.0.34/bin Get into Tomcat In the catalog bin Catalog ,
Carry out orders ./shutdown.sh close Tomcat,
Carry out orders ./startup.sh start-up Tomcat,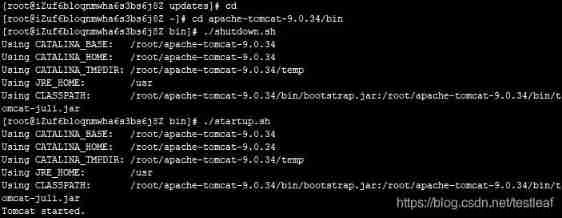
7. Enter your own Internet in the browser again IP Address :8080/jenkins You can see the following interface , We can know jenkins It is running normally . You can see that there is a password path /root/.jenkins/secrets/initialAdminPassword
Jenkins Your startup may be slow , Please be patient .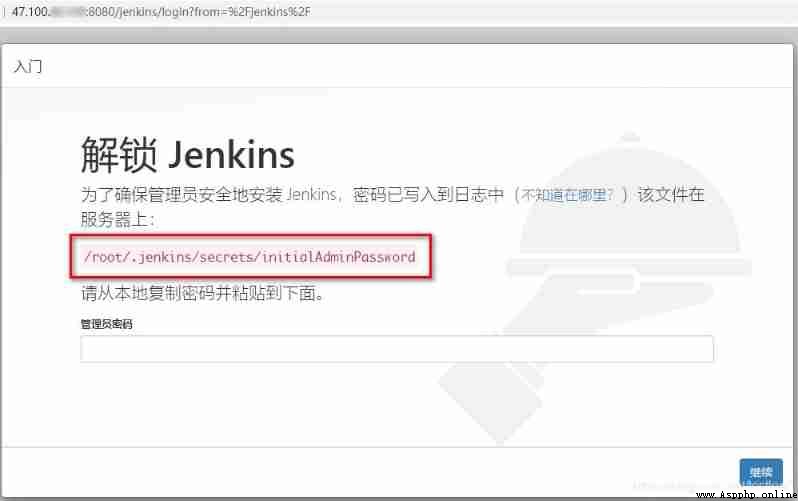
ps: If you really feel Tomcat Start slowly , You can execute the following commands to optimize
yum -y install rng-tools
systemctl start rngd
Restart again Tomcat that will do :
Carry out orders ./shutdown.sh close Tomcat,
Carry out orders ./startup.sh start-up Tomcat,
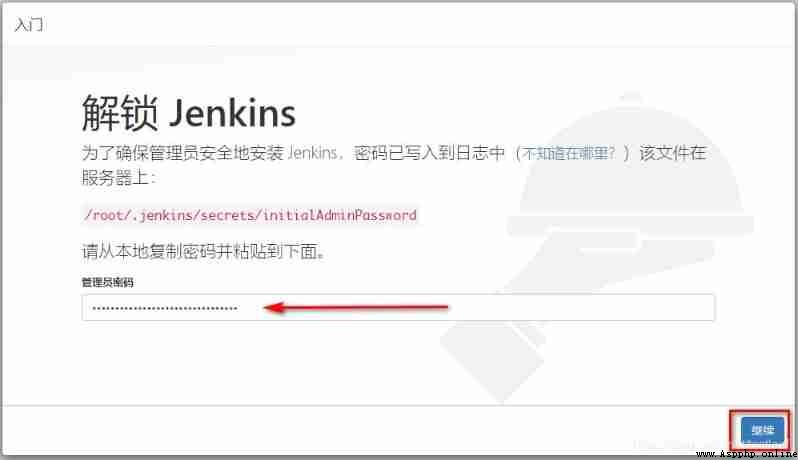
8. According to the password path just shown ,
Carry out orders cat /root/.jenkins/secrets/initialAdminPassword,
Copy the displayed string of characters , Fill in the input box just now , And then click “ continue ”,
If you go straight into admin Interface , I need to go somewhere to find one default.json File to replace ,
Next , Choose to install the recommended plug-ins ,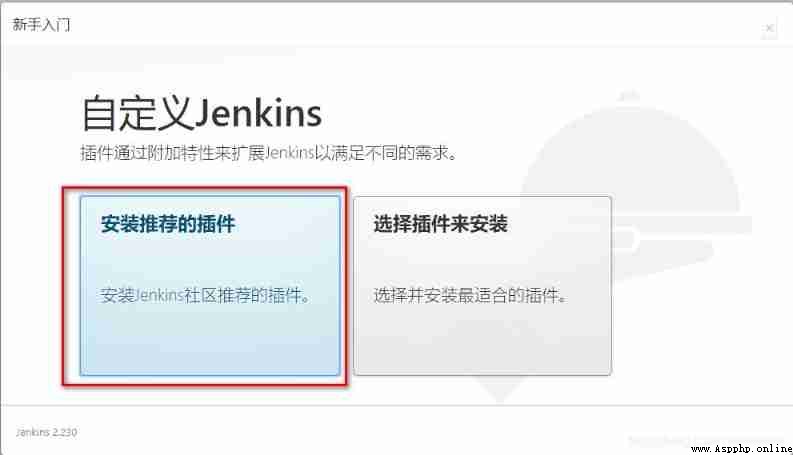
Wait for installation to complete , The installation process can be fast or slow , Just wait patiently .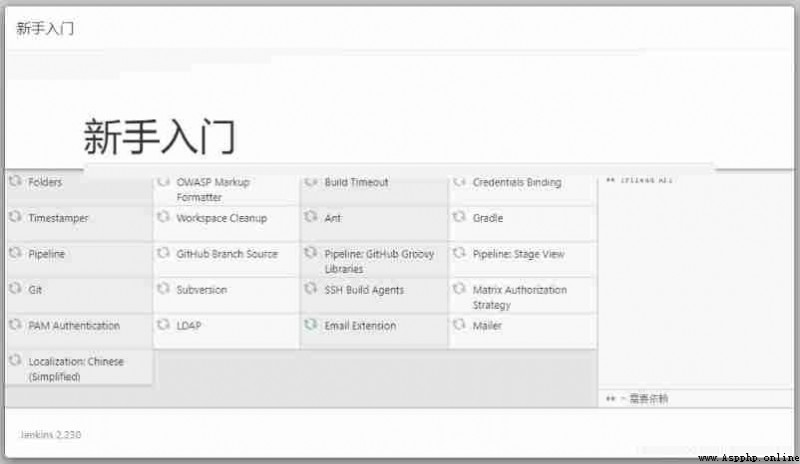
If the installation process is too slow , Remember to try to replace jenkin.war file .
The following interface appears , Fill in the relevant information , Click on “ Save and finish ”,
Another interface , Remember well Jenkins URL, Click on “ Save and finish ”,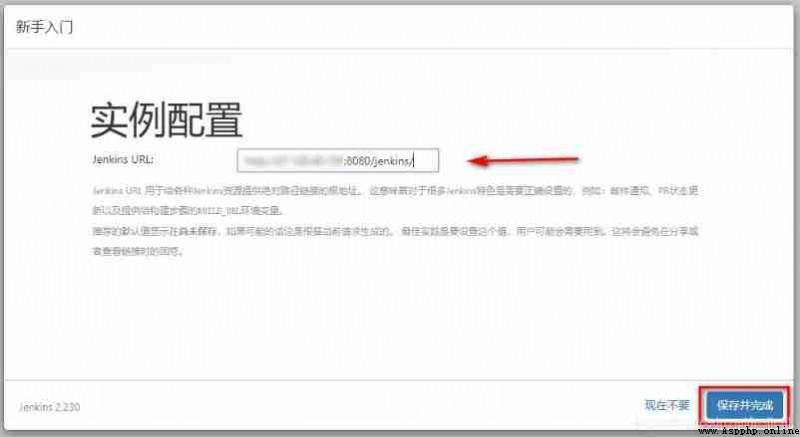
Click on “ Start using Jenkins”,
1. Download from Baidu online disk google-chrome-stable_current_x86_64_80.0.3987.149.rpm and chromedriver These two documents ,
ps: Of course from https://www.google.cn/chrome You can also download to Chrome, But you may download it yourself chromedriver Mismatch , These all need attention .
2. Use the downloaded two files Xftp Tools uploaded to the server /root Catalog ,
3. Carry out orders cd Switch to /root Under the table of contents ,
Carry out orders yum -y install google-chrome-stable_current_x86_64_80.0.3987.149.rpm install Google Chrome,
appear Complete! The installation is successful ,
4. Carry out orders google-chrome-stable --no-sandbox --headless --disable-gpu --screenshot https://www.cnblogs.com/testleaf Check whether it is normal
5. take chromedriver File copy to /usr/bin Catalog ,
Carry out orders cp /root/chromedriver /usr/bin
6. Finally, verify the installation
Carry out orders chromedriver
Wrong report , Say that the authority is not enough ,
Carry out orders chmod 777 /usr/bin/chromedriver
Carry out orders chromedriver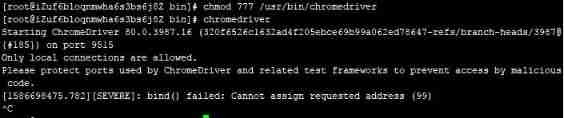
Press Ctrl+C You can quit .
1.pip3 install
Carry out orders wget https://files.pythonhosted.org/packages/69/81/52b68d0a4de760a2f1979b0931ba7889202f302072cc7a0d614211bc7579/pip-18.0.tar.gz
Carry out orders tar -xzvf pip-18.0.tar.gz
Carry out orders cd pip-18.0
Carry out orders python setup.py install
Carry out orders find / -name pip Check it out. pip Whether it is installed in python3 Under the table of contents 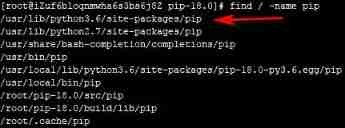
2. Execute the following commands in turn :
pip install selenium
pip install robotframework
pip install robotframework-seleniumlibrary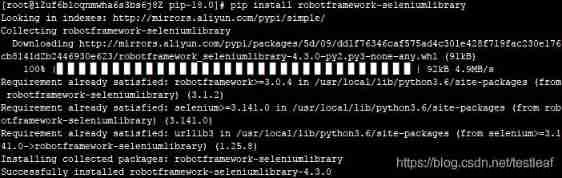
ha-ha , The last order seems superfluous
1. utilize RIDE Prepare a tool robot file , About the following :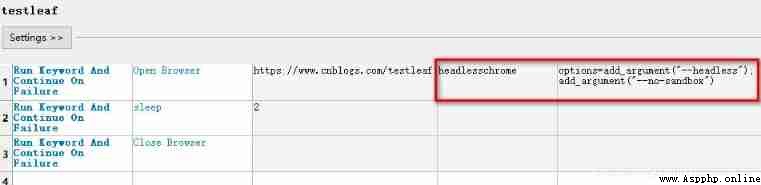
among headlesschrome and ==options=add_argument("–headless"); add_argument("–no-sandbox")== These two must be written correctly .
Baidu network disk download to this testleaf.robot file , utilize Xftp Upload the tool to /root directory .
link : https://pan.baidu.com/s/1bCUJFcn499SIHGSGJCoNCw Extraction code : leaf
2. stay /root Execute command under directory robot testleaf.robot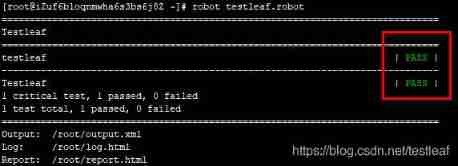
Green PASS, It means that everything has been done , You can start now Jenkins The above operation .
3. Enter your own Internet in the browser IP Address :8080/jenkins That's all right. , To log in, enter the user name and password you just entered .
Jenkins Your startup may be slow , Please be patient .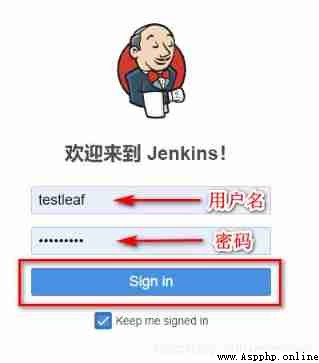
4. Click to create a new task 
5. Enter task name , choice Freestyle project, Click on “ determine ”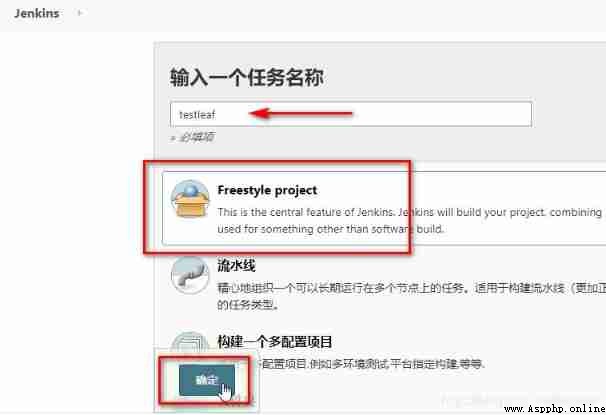
6. Enter another interface , stay “ Add build steps ” Choose... There “ perform shell”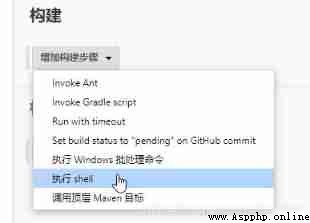
7. In the input box, enter the shell command , But it's better to be an absolute path here .
robot /root/testleaf.robot
First click “ application ”, Click again “ preservation ”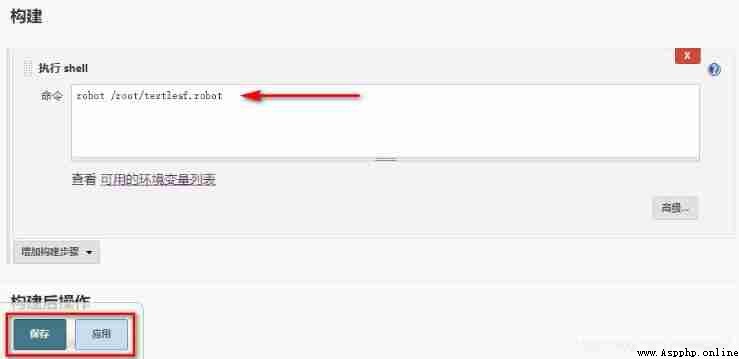
8. Enter another interface , Click on “ Build immediately ”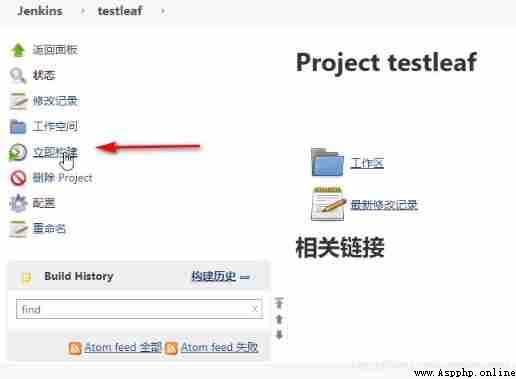
9. stay Build History Click inside to have a look 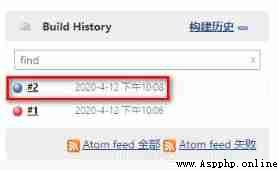
10. Click on “ Console output ”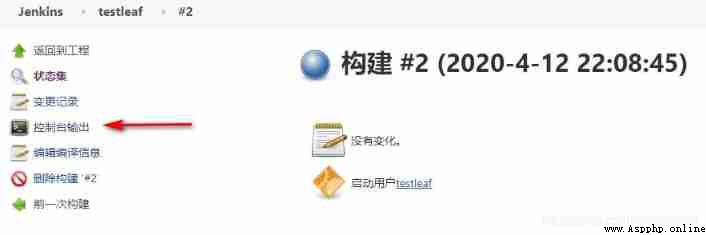
11. notice “PASS” It means the operation is successful .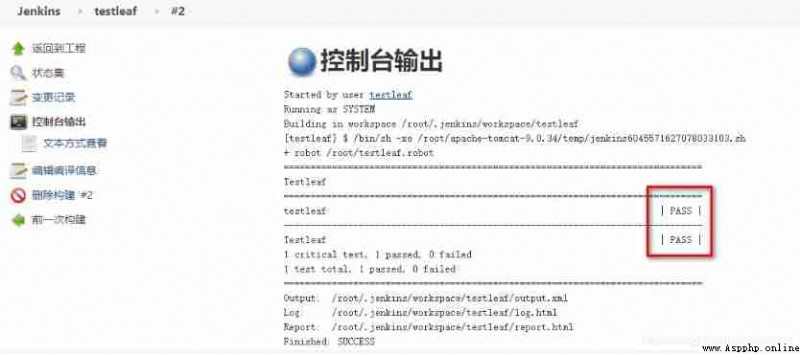
12. In the configuration project , If you add a timer 11 11 * * *, So every day 11 spot 11 branch , This project will run once .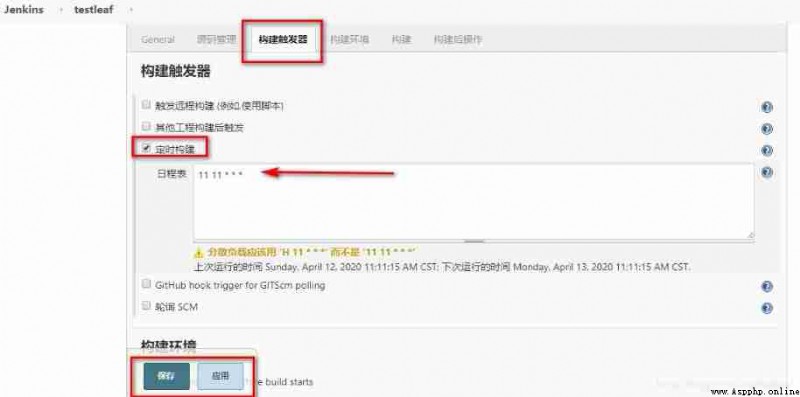
It looks like , As long as the server is being renewed , So this spider is alive , Daily 11 spot 11 I will go to my blog park every minute , What a wonderful thing it is , I'm so happy .
Life is too short , I learned Python.
—— quote Python The conclusion of the wisdom of the community
disclaimer :
1. The purpose of writing this article is to learn better Jenkins Use , If the interests of the people concerned are harmed , Please contact to delete ;
2. If the description is not right , Please correct in the comments ;
3. Writing is not easy , If it feels useful , Like collection will make bloggers happy ;
4. Besides , This article supports any form of reprint , Reprint please indicate the source , Thank you very much !!!
This article comes from :https://blog.csdn.net/testleaf/article/details/105470724
Blog Garden cnblogs Same number .