隨著關系型數據庫在某些方面的力不從心,了解當下流行的各種數據庫模式的特點和性能,無疑會給我們提供更多的選擇和方向。 neo4j是一種圖形數據庫,在遍歷和關聯查詢方面具有突出的優勢。廢話少說,深入了解neo4j之前,先讓我們嘗試一下怎樣在程序中使用neo4j。
neo4j采用java語言開發,如果我們要在java程序中以內嵌方式使用neo4j,只需導入neo4j的對應包即可。
首先,我們來創建一個maven項目並修改pom.xml添加對neo4j的依賴。
<?xml version="1.0" encoding="UTF-8"?>
<project xmlns="http://maven.apache.org/POM/4.0.0"
         xmlns:xsi="http://www.w3.org/2001/XMLSchema-instance"
         xsi:schemaLocation="http://maven.apache.org/POM/4.0.0 http://maven.apache.org/xsd/maven-4.0.0.xsd">
    <modelVersion>4.0.0</modelVersion>

    <groupId>neo4j-learn</groupId>
    <artifactId>neo4j-learn</artifactId>
    <version>1.0-SNAPSHOT</version>

    <dependencies>
        <dependency>
            <groupId>org.neo4j</groupId>
            <artifactId>neo4j</artifactId>
            <version>1.9.4</version>
        </dependency>
    </dependencies>

</project>
然後,我們在項目中創建一個neo4j.properties(數據庫的配置文件)文件和一個java類(調用數據庫)。
neo4j.properties
# Default values for the low-level graph engine
#neostore.nodestore.db.mapped_memory=25M
#neostore.relationshipstore.db.mapped_memory=50M
#neostore.propertystore.db.mapped_memory=90M
#neostore.propertystore.db.strings.mapped_memory=130M
#neostore.propertystore.db.arrays.mapped_memory=130M

# Autoindexing

# Enable auto-indexing for nodes, default is false
#node_auto_indexing=true

# The node property keys to be auto-indexed, if enabled
#node_keys_indexable=name,age


# Enable auto-indexing for relationships, default is false
#relationship_auto_indexing=true

# The relationship property keys to be auto-indexed, if enabled
#relationship_keys_indexable=name,age

# Keep logical logs, needed for online backups to work
keep_logical_logs=true

# Enable online backups to be taken from this database.
online_backup_enabled=true

# Uncomment and specify these lines for running Neo4j in High Availability mode.
# ha.server_id is a unique integer for each instance of the Neo4j database in the cluster.
# (as opposed to the coordinator instance IDs)
# example: ha.server_id=1
#ha.server_id=

# ha.coordinators is a comma-separated list (without spaces) of the host:port of where to
# find one or more of the Neo4j coordinator servers.
# Avoid localhost due to IP resolution issues on some systems.
# example: ha.coordinators=localhost:2181,1.2.3.4:4321
#ha.coordinators=localhost:2181

# You can also, optionally, configure the ha.cluster_name. This is the name of the cluster this
# instance is supposed to join. Accepted characters are alphabetical, numerical, dot and dash.
# This configuration is useful if you have multiple Neo4j HA clusters managed by the same
# Coordinator cluster.
# Example: ha.cluster_name = my.neo4j.ha.cluster
#ha.cluster_name =

# IP and port for this instance to bind to to communicate data with the
# other neo4j instances in the cluster. This is broadcasted to the other
# cluster members, so different members can have different communication ports.
# Optional if the members are on different machines so the IP is different for every member.
#ha.server = localhost:6001

# The interval at which slaves will pull updates from the master. Comment out
# the option to disable periodic pulling of updates. Unit is seconds.
ha.pull_interval = 10

# The session timeout for the zookeeper client. Lower values make new master
# election happen closer to the master loosing connection but also more sensitive
# to zookeeper quorum hiccups. If experiencing master switches without reason
# consider increasing this value. Unit is seconds
#ha.zk_session_timeout = 5

# Amount of slaves the master will try to push a transaction to upon commit (default is 1).
# The master will optimistically continue and not fail the transaction even if it fails to
# reach the push factor. Setting this to 0 will increase write performance when writing
# through master but could potentially lead to branched data (or loss of transaction)
# if the master goes down.
#ha.tx_push_factor=1

# Strategy the master will use when pushing data to slaves (if the push factor is greater than 0).
# There are two options available "fixed" (default) or "round_robin". Fixed will start by
# pushing to slaves ordered by server id (highest first) improving performance since the
# slaves only have to cache up one transaction at a time.
#ha.tx_push_strategy=fixed

# Enable this to be able to upgrade a store from 1.4 -> 1.5 or 1.4 -> 1.6
#allow_store_upgrade=true

# Enable this to specify a parser other than the default one. 1.5, 1.6, 1.7 are available
#cypher_parser_version=1.6
java文件(neo4j示例文件修改而來)
package org.easypoint;

import java.io.File;
import java.io.IOException;
import org.neo4j.graphdb.Direction;
import org.neo4j.graphdb.GraphDatabaseService;
import org.neo4j.graphdb.Node;
import org.neo4j.graphdb.Relationship;
import org.neo4j.graphdb.RelationshipType;
import org.neo4j.graphdb.Transaction;
import org.neo4j.graphdb.factory.GraphDatabaseFactory;
import org.neo4j.kernel.impl.util.FileUtils;

public class Learn1
{
    private static final String DB_PATH = "target/neo4j-hello-db";
    String greeting;
    // START SNIPPET: vars
    GraphDatabaseService graphDb;
    Node firstNode;
    Node secondNode;
    Relationship relationship;
    // END SNIPPET: vars

    // START SNIPPET: createReltype
    private static enum RelTypes implements RelationshipType
    {
        KNOWS
    }
    // END SNIPPET: createReltype

    public static void main( final String[] args )
    {
        Learn1 hello = new Learn1();
        hello.createDb();
        hello.removeData();
        hello.shutDown();
    }

    void createDb()
    {
        clearDb();
        // START SNIPPET: startDb
        graphDb = new GraphDatabaseFactory()
                .newEmbeddedDatabaseBuilder( "target/database/learn1" )
                .loadPropertiesFromFile(Learn1.class.getResource("/").getPath()+"neo4j.properties" )
                .newGraphDatabase();

        registerShutdownHook( graphDb );
        // END SNIPPET: startDb

        // START SNIPPET: transaction
        Transaction tx = graphDb.beginTx();
        try
        {
            // Updating operations go here
            // END SNIPPET: transaction
            // START SNIPPET: addData
            firstNode = graphDb.createNode();
            firstNode.setProperty( "message", "Hello, " );
            secondNode = graphDb.createNode();
            secondNode.setProperty( "message", "World!" );

            relationship = firstNode.createRelationshipTo( secondNode, RelTypes.KNOWS );
            relationship.setProperty( "message", "brave Neo4j " );
            // END SNIPPET: addData

            // START SNIPPET: readData
            System.out.print( firstNode.getProperty( "message" ) );
            System.out.print( relationship.getProperty( "message" ) );
            System.out.print( secondNode.getProperty( "message" ) );
            // END SNIPPET: readData

            greeting = ( (String) firstNode.getProperty( "message" ) )
                    + ( (String) relationship.getProperty( "message" ) )
                    + ( (String) secondNode.getProperty( "message" ) );

            // START SNIPPET: transaction
            tx.success();
        }
        finally
        {
            tx.finish();
        }
        // END SNIPPET: transaction
    }

    private void clearDb()
    {
        try
        {
            FileUtils.deleteRecursively( new File( DB_PATH ) );
        }
        catch ( IOException e )
        {
            throw new RuntimeException( e );
        }
    }

    void removeData()
    {
        Transaction tx = graphDb.beginTx();
        try
        {
            // START SNIPPET: removingData
            // let's remove the data
            firstNode.getSingleRelationship( RelTypes.KNOWS, Direction.OUTGOING ).delete();
            firstNode.delete();
            secondNode.delete();
            // END SNIPPET: removingData

            tx.success();
        }
        finally
        {
            tx.finish();
        }
    }

    void shutDown()
    {
        System.out.println();
        System.out.println( "Shutting down database ..." );
        // START SNIPPET: shutdownServer
        graphDb.shutdown();
        // END SNIPPET: shutdownServer
    }

    // START SNIPPET: shutdownHook
    private static void registerShutdownHook( final GraphDatabaseService graphDb )
    {
        // Registers a shutdown hook for the Neo4j instance so that it
        // shuts down nicely when the VM exits (even if you "Ctrl-C" the
        // running application).
        Runtime.getRuntime().addShutdownHook( new Thread()
        {
            @Override
            public void run()
            {
                graphDb.shutdown();
            }
        } );
    }
    // END SNIPPET: shutdownHook
}
運行java文件,可以看到在target/database/下創建了一個learn1的數據庫。
[easy@easy learn1]$ pwd
/home/easy/workspace/neo4j-learn/target/database/learn1
[easy@easy learn1]$ ls
active_tx_log
index
messages.log
neostore
neostore.id
neostore.nodestore.db
neostore.nodestore.db.id
neostore.propertystore.db
neostore.propertystore.db.arrays
neostore.propertystore.db.arrays.id
neostore.propertystore.db.id
neostore.propertystore.db.index
neostore.propertystore.db.index.id
neostore.propertystore.db.index.keys
neostore.propertystore.db.index.keys.id
neostore.propertystore.db.strings
neostore.propertystore.db.strings.id
neostore.relationshipstore.db
neostore.relationshipstore.db.id
neostore.relationshiptypestore.db
neostore.relationshiptypestore.db.id
neostore.relationshiptypestore.db.names
neostore.relationshiptypestore.db.names.id
nioneo_logical.log.active
nioneo_logical.log.v0
store_lock
tm_tx_log.1
[easy@easy learn1]$
我們已經簡單的將neo4j在j嵌入在ava程序中,而且從java代碼我們也可以看出,neo4j數據庫主要依靠node,relationship和property來存儲數據,利用relationship將各個node鏈接起來。
除了以內嵌的方式使用NEO4J,我們也可以將NEO4J作為服務來使用。
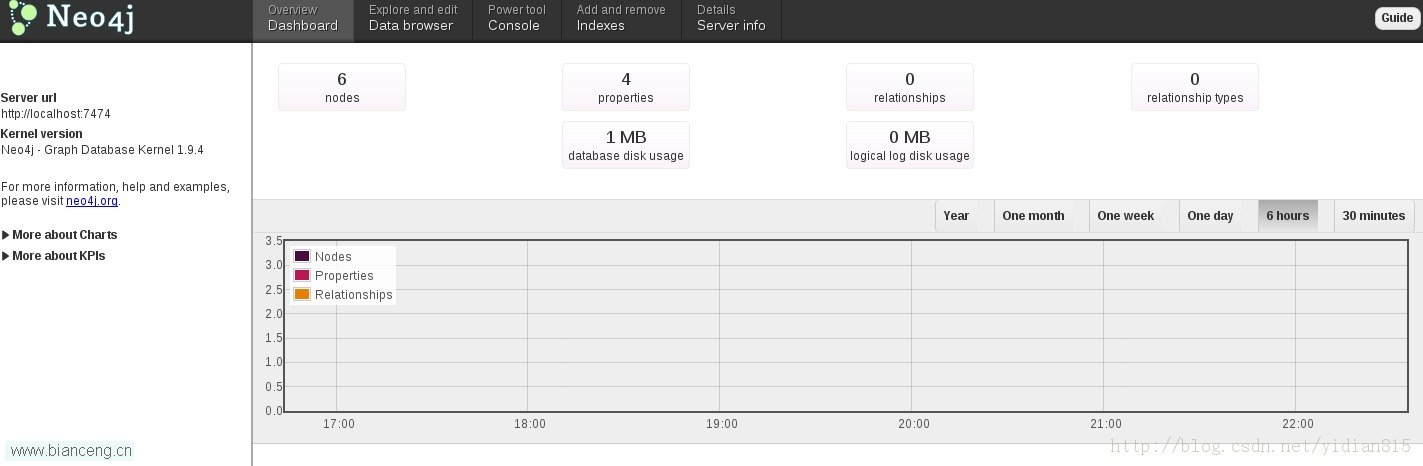
首先,在neo4j官網下載neo4j數據庫,將其解壓後,在bin目錄下運行 neo4j start,啟動數據服務。此時,可以在http://localhost:7474/webadmin/ 觀測服務的運行狀態。
查看本欄目
neo4j為我們提供了REST方式來訪問數據庫服務,這裡我們使用JERSEY作為REST 客戶端。配置MAVEN依賴如下
<dependency>
           <groupId>com.sun.jersey</groupId>
           <artifactId>jersey-project</artifactId>
           <version>1.17</version>
       </dependency>

       <dependency>
           <groupId>com.sun.jersey</groupId>
           <artifactId>jersey-server</artifactId>
           <version>1.17</version>
       </dependency>

       <dependency>
           <groupId>com.sun.jersey</groupId>
           <artifactId>jersey-client</artifactId>
           <version>1.17</version>
       </dependency>

       <dependency>
           <groupId>com.sun.jersey</groupId>
           <artifactId>jersey-core</artifactId>
           <version>1.17</version>
       </dependency>

       <dependency>
           <groupId>com.sun.jersey</groupId>
           <artifactId>jersey-json</artifactId>
           <version>1.17</version>
       </dependency>
新建java類Learn1Rest
package org.easypoint;

import com.sun.jersey.api.client.ClientResponse;
import com.sun.jersey.api.client.WebResource;
import com.sun.jersey.api.client.Client;
import java.net.URI;
import javax.ws.rs.core.MediaType;
/**
 * Created with IntelliJ IDEA.
 * User: easy
 * Date: 13-10-20
 * Time: 下午9:39
 * To change this template use File | Settings | File Templates.
 */
public class Learn1Rest {
    public static void main(String args[]){
        Learn1Rest lr = new Learn1Rest();
        URI firstNode = lr.createNode();
        lr.addProperty( firstNode, "name", "Joe Strummer" );
        URI secondNode = lr.createNode();
        lr.addProperty( secondNode, "band", "The Clash" );

    }


    public URI createNode(){
       String SERVER_ROOT_URI = "http://localhost:7474/db/data/";
       final String nodeEntryPointUri = SERVER_ROOT_URI + "node";
       WebResource resource = Client.create().resource(nodeEntryPointUri);

       ClientResponse response = resource.accept( MediaType.APPLICATION_JSON )
               .type(MediaType.APPLICATION_JSON)
               .entity("{}")
               .post(ClientResponse.class);
       final URI location = response.getLocation();
       System.out.println( String.format("POST to [%s], status code [%d], location header [%s]",
               nodeEntryPointUri, response.getStatus(), location.toString() ) );
       response.close();
       return location;

   }

    public void addProperty(URI nodeUri,String propertyName, String  propertyValue){
        String propertyUri = nodeUri.toString() + "/properties/" + propertyName;
        WebResource resource = Client.create()
                .resource( propertyUri );
        ClientResponse response = resource.accept( MediaType.APPLICATION_JSON )
                .type( MediaType.APPLICATION_JSON )
                .entity( "\"" + propertyValue + "\"" )
                .put( ClientResponse.class );
        System.out.println( String.format( "PUT to [%s], status code [%d]",
                propertyUri, response.getStatus() ) );
        response.close();

    }
}
運行main方法,再次查看http://localhost:7474/webadmin/
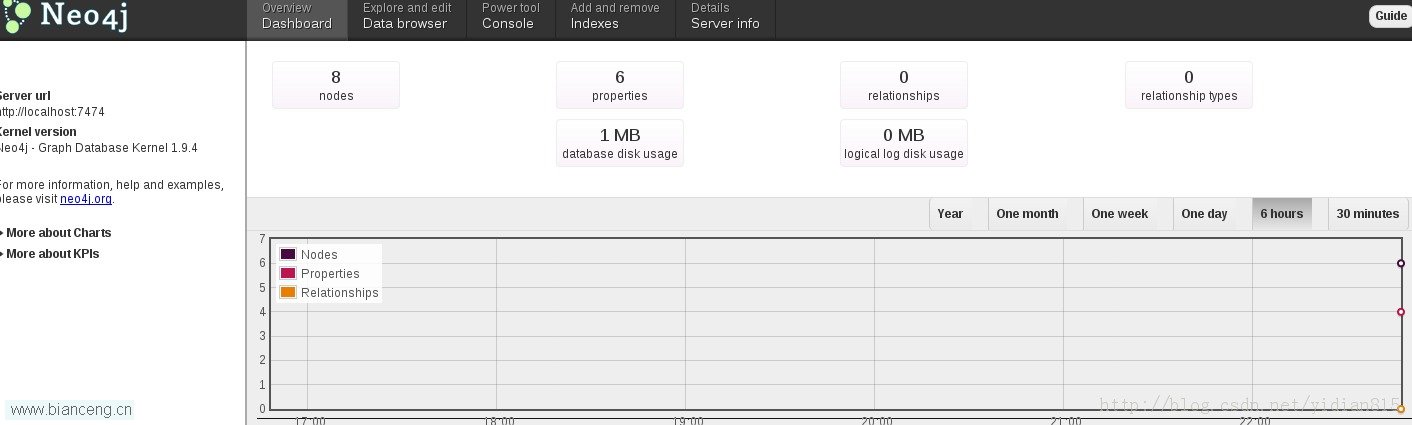
節點數量增加,訪問成功。