本文實例為大家分享了Spring Boot郵件發送功能的具體代碼,供大家參考,具體內容如下
1、引入依賴
 <!-- mail依賴 -->
  <dependency>
  <groupId>org.springframework.boot</groupId>
  <artifactId>spring-boot-starter-mail</artifactId>
 </dependency>
2、參數配置
在application.properties中配置郵件相關的參數
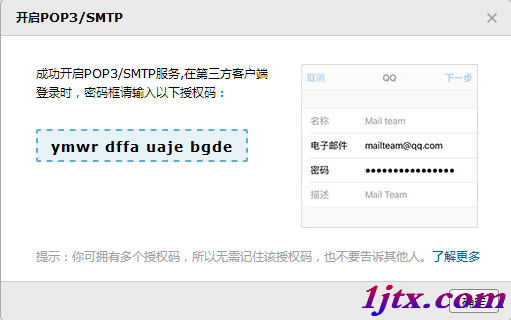
spring.thymeleaf.cache=false

spring.mail.host=smtp.qq.com
spring.mail.username=***@qq.com
spring.mail.password=ymwrdffauajebgde //此處的密碼時qq郵箱的授權碼
spring.mail.properties.mail.smtp.auth=true
spring.mail.properties.mail.smtp.starttls.enable=true
spring.mail.properties.mail.smtp.stattls.required=true
3、郵件Service代碼
@Service
public class MailService {

  @Value("${spring.mail.username}")
  private String from;

  @Autowired
  private JavaMailSender sender;

  /*發送郵件的方法*/
  public void sendSimple(String to, String title, String content){
    SimpleMailMessage message = new SimpleMailMessage();
    message.setFrom(from); //發送者
    message.setTo(to); //接受者
    message.setSubject(title); //發送標題
    message.setText(content); //發送內容
    sender.send(message);

    System.out.println("郵件發送成功");

  }
}
4、編寫頁面代碼
<!DOCTYPE html>
<html xmlns="http://www.w3.org/1999/xhtml" xmlns:th="http://www.thymeleaf.org"
   xmlns:sec="http://www.thymeleaf.org/thymeleaf-extras-springsecurity3">
<head>
<meta charset="UTF-8" />
<title>Insert title here</title>
</head>
<body>
  <h1 th:inlines="text">郵件發送</h1>
  <form action="sendMail" method="post">
    <p>選擇文件: <input type="text" name="title"/></p>
    <p><input type="submit" value="提交"/></p>
  </form>
</body>
</html>
5、郵件請求處理
@Controller
public class MailController {

  @Autowired
  private MailService mailService;

  private String to="***@qq.com";

  @RequestMapping("mail")
  public String mail(){
    return "/mail";
  }

  @RequestMapping("sendMail")
  @ResponseBody
  public String sendMail(@RequestParam("title")String title){
    System.out.println("-----title: " + title);
    mailService.sendSimple(to, title, title);
    return "success";
  }
}
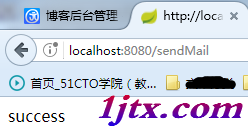
6、測試
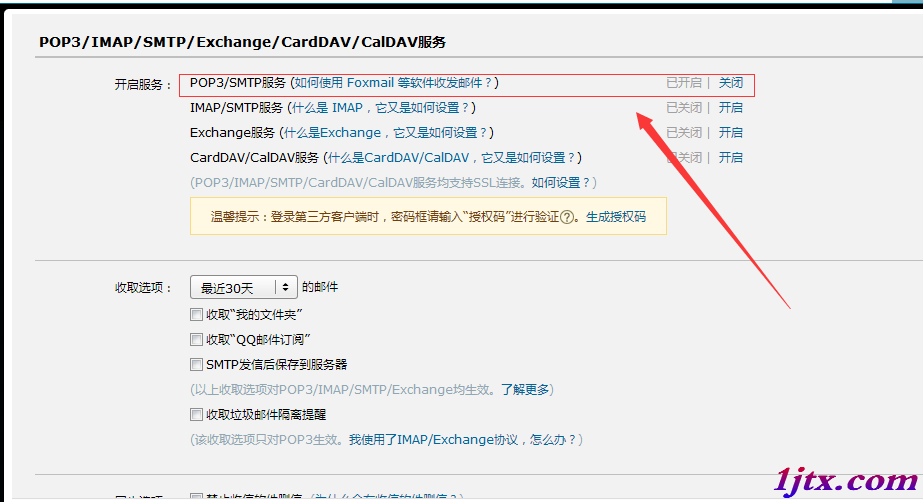
7、qq郵箱授權碼
以上就是本文的全部內容,希望對大家的學習有所幫助,也希望大家多多支持。