SpringMVC文件上傳功能實例解析。本站提示廣大學習愛好者:(SpringMVC文件上傳功能實例解析)文章只能為提供參考,不一定能成為您想要的結果。以下是SpringMVC文件上傳功能實例解析正文
說明:
文件上傳的途徑
文件上傳主要有兩種方式:
1.使用Apache Commons FileUpload元件。
2.利用Servlet3.0及其更高版本的內置支持。
客戶端編程
1.為了上傳文件,必須將HTML表格的enctype屬性值設為multipart/form-data,像下面這樣:
<form action="action" enctype="multipart/form-data" method="post">
  Select a file<input type="file" name="fieldName"/>
  <input type="submit" value="Upload"/>
</form>
2.在HTML5之前,如果要想上傳多個文件,必須使用多個文件input元素。但是,在HTML5中,通過在input元素中引入多個multiple屬性,使得多個文件的上傳變得更加簡單,下面均可使一個上傳框支持多個文件上傳。
<input type="file" name="fieldName" multiple/>
<input type="file" name="fieldName" multiple="multiple"/>
<input type="file" name="fieldName" multiple=""/>
MultipartFile接口
在SpringMVC中處理已經上傳的文件十分簡單,上傳到SpringMVC應用程序中的文件會被包在一個MultipartFile對象中,你唯一要做的事情就是用類型為MultipartFile的屬性編寫一個Domain類。就像下面這樣:
package domain;
import org.springframework.web.multipart.MultipartFile;
import java.io.Serializable;
import java.util.List;
public class Product implements Serializable {
  //實現了這個接口,可以安全的將數據保存到HttpSession中
  private long id;
  private String name;
  private String description;
  private String price;
  //在Domain類中加入MultipartFile類型的屬性,用來保存上傳的文件
  private List<MultipartFile> images;
  public List<MultipartFile> getImages() {
    return images;
  }
  public void setImages(List<MultipartFile> images) {
    this.images = images;
  }
  ......多個get和set方法。
MultipartFile接口提供了以下方法:
實例:用CommonsFileUpLoad上傳文件
導入Jar包及配置環境變量

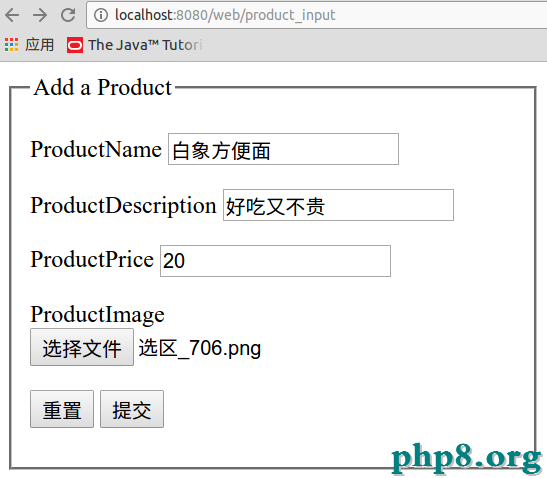
編寫視圖
代碼:
<%@ taglib prefix="form" uri="http://www.springframework.org/tags/form" %>
<%@ page contentType="text/html;charset=UTF-8" language="java" %>
<html>
<head>
  <title>Add Product Form</title>
</head>
<body>
<form:form action="product_save" method="post" commandName="product" enctype="multipart/form-data">
  <fieldset>
    <legend>Add a Product</legend>
    <p>
      <label for="name">ProductName</label>
      <form:input type="text" id="name" name="name" tabindex="1" path="name"/>
    </p>
    <p>
      <label for="description">ProductDescription</label>
      <form:input type="text" id="description" name="description" tabindex="2" path="description"/>
    </p>
    <p>
      <label for="price">ProductPrice</label>
      <form:input type="text" id="price" name="price" tabindex="3" path="price"/>
    </p>
    <p>
      <label for="image">ProductImage</label>
      <input type="file" name="images[0]">
    </p>
    <p>
      <input type="reset">
      <input type="submit">
    </p>
  </fieldset>
</form:form>
</body>
</html>
說明:
首先為了上傳文件,必須將HTML表格的enctype屬性值設為multipart/form-data
其次,在HTML5之前,如果要想上傳多個文件,必須要用到多個文件input元素。
但是在HTML5,通過在Input元素中引入過個multiple屬性,使得多個文件上傳變得更加簡單。
<input type="file" name="fieldName" multiple/>
<input type="file" name="fieldName" multiple="multiple"/>
<input type="file" name="fieldName" multiple=""/>
圖示:
編寫控制器
package controller;
import domain.Product;
import Service.ProductService;
import org.apache.commons.logging.Log;
import org.apache.commons.logging.LogFactory;
import org.springframework.beans.factory.annotation.Autowired;
import org.springframework.stereotype.Controller;
import org.springframework.ui.Model;
import org.springframework.validation.BindingResult;
import org.springframework.web.bind.annotation.ModelAttribute;
import org.springframework.web.bind.annotation.PathVariable;
import org.springframework.web.bind.annotation.RequestMapping;
import org.springframework.web.bind.annotation.RequestMethod;
import org.springframework.web.multipart.MultipartFile;
import javax.servlet.http.HttpServletRequest;
import java.io.File;
import java.io.IOException;
import java.util.List;
@Controller
public class ProductController {
  private static final Log logger=LogFactory.getLog(ProductController.class);
  @Autowired
  private ProductService productService;
  @RequestMapping(value = "/product_input")
  public String inputProduct(Model model)
  {
    logger.info("inputProduct called");
    model.addAttribute("product",new Product());
    return "ProductForm";
  }
  @RequestMapping(value = "/product_save",method = RequestMethod.POST)
  public String saveProduct(HttpServletRequest servletRequest, @ModelAttribute Product product,
BindingResult bindingResult,Model model)
  {
    List<MultipartFile> files= product.getImages();
    System.out.println("文件數量是"+files.size());
    if(null!=files&&files.size()>0)
    {
      for (MultipartFile file:files)
      {
        String fileName=file.getOriginalFilename(); //獲得文件名稱
        File imagFile = new File(servletRequest.getServletContext().getRealPath("/image"),fileName);try {
          file.transferTo(imagFile);//用於將文件寫到服務器本地
        } catch (IOException e) {
          e.printStackTrace();
        }
      }
    }
    model.addAttribute("product",product);
    return "ProductDetails";
  }
  @RequestMapping(value = "/product_view/{id}")
  public String viewProduct(@PathVariable Long id,Model model)
  {
    Product product =productService.get(id);
    model.addAttribute("product",product);
    return "ProductDetails";
  }
}
配置文件
你可以看到我們在SpringMVC的配置文件中配置了一個名為multipartResolver的Bean。
基於servlet的multipartresolver實現Apache Commons FileUpload 1.2或以上。
提供“maxuploadsize”、“maxinmemorysize”和“defaultencoding”設置bean的屬性(繼承commonsfileuploadsupport)
<?xml version="1.0" encoding="UTF-8"?>
<beans xmlns="http://www.springframework.org/schema/beans"
    xmlns:xsi="http://www.w3.org/2001/XMLSchema-instance"
    xmlns:context="http://www.springframework.org/schema/context"
    xmlns:mvc="http://www.springframework.org/schema/mvc"
    xsi:schemaLocation="http://www.springframework.org/schema/beans
http://www.springframework.org/schema/beans/spring-beans.xsd
http://www.springframework.org/schema/context http://www.springframework.org/schema/context/spring-context.xsd
    http://www.springframework.org/schema/mvc
      http://www.springframework.org/schema/mvc/spring-mvc-3.0.xsd">
  <context:component-scan base-package="controller"/>
  <context:component-scan base-package="Service"/>
  <!--
   <mvc:annotation-driven>元素注冊用於支持基於注解的控制器的請求處理方法的Bean對象。
    詳解:https://my.oschina.net/HeliosFly/blog/205343
  -->
  <mvc:annotation-driven></mvc:annotation-driven>
  <bean id="viewResolver"
     class="org.springframework.web.servlet.view.InternalResourceViewResolver">
    <property name="prefix" value="/WEB-INF/view/"/>
    <property name="suffix" value=".jsp"/>
  </bean>
  <!--resources 元素指示SpringMVC那些靜態資源需要單獨處理-->
  <mvc:resources mapping="/image/**" location="/image/"/>
  <bean id="multipartResolver" class="org.springframework.web.multipart.commons.CommonsMultipartResolver">
    <property name="maxUploadSize" value="2000000"/>
  </bean>
</beans>
說明:
resources 元素指示SpringMVC那些靜態資源需要單獨處理,此處我們要單獨處理的是image,如果不單獨處理而是經過dispatcher的話,就會發生404錯誤.
實例:用Servlet3及其更高版本上傳文件
說明:
有了Servlet3,就不需要Commons FileUpload 和Commons IO元件了.因為在Servlet3中內置了上傳文件的特性.
幸運的是Domain類和Controller類基本不變,我們僅僅需要修改一下配置文件。
配置文件:
修改Web.xml
我們可以看到實在dispatcher的基礎上添加了配置項:multipart-config
<?xml version="1.0" encoding="UTF-8"?>
<web-app xmlns="http://xmlns.jcp.org/xml/ns/javaee"
     xmlns:xsi="http://www.w3.org/2001/XMLSchema-instance"
     xsi:schemaLocation="http://xmlns.jcp.org/xml/ns/javaee http://xmlns.jcp.org/xml/ns/javaee/web-app_3_1.xsd"
     version="3.1">
  <context-param>
    <param-name>contextConfigLocation</param-name>
    <param-value>/WEB-INF/applicationContext.xml</param-value>
  </context-param>
  <listener>
    <listener-class>org.springframework.web.context.ContextLoaderListener</listener-class>
  </listener>
  <servlet>
    <servlet-name>dispatcher</servlet-name>
    <servlet-class>org.springframework.web.servlet.DispatcherServlet</servlet-class>
    <load-on-startup>1</load-on-startup>
    <multipart-config>
      <max-file-size>20848820</max-file-size>
      <!--上傳內文件的最大容量-->
      <max-request-size>418018841</max-request-size>
      <!--表示多部分HTTP請求允許的最大容量-->
      <file-size-threshold>1048576</file-size-threshold>
      <!--超過這個容量將會被寫到磁盤中-->
      <location>/image/</location>
      <!--要將已上傳的文件保存到磁盤中的位置-->
    </multipart-config>
  </servlet>
  <servlet-mapping>
    <servlet-name>dispatcher</servlet-name>
    <url-pattern>/</url-pattern>
  </servlet-mapping>
  <!--Spring中文亂碼攔截器-->
  <filter>
    <filter-name>setcharacter</filter-name>
    <filter-class>org.springframework.web.filter.CharacterEncodingFilter</filter-class>
    <init-param>
      <param-name>encoding</param-name>
      <param-value>UTF-8</param-value>
    </init-param>
  </filter>
  <filter-mapping>
    <filter-name>setcharacter</filter-name>
    <url-pattern>/*</url-pattern>
  </filter-mapping>
 </web-app>
SpringMVC配置文件添加多部分解析器
MultipartResolver接口的標准實現,基於Servlet 3.0部分API. To be added as "multipartResolver" bean to a Spring DispatcherServlet context, without any extra configuration at the bean level.
 <bean id="MultipartResolver" class="org.springframework.web.multipart.support.StandardServletMultipartResolver"></bean>
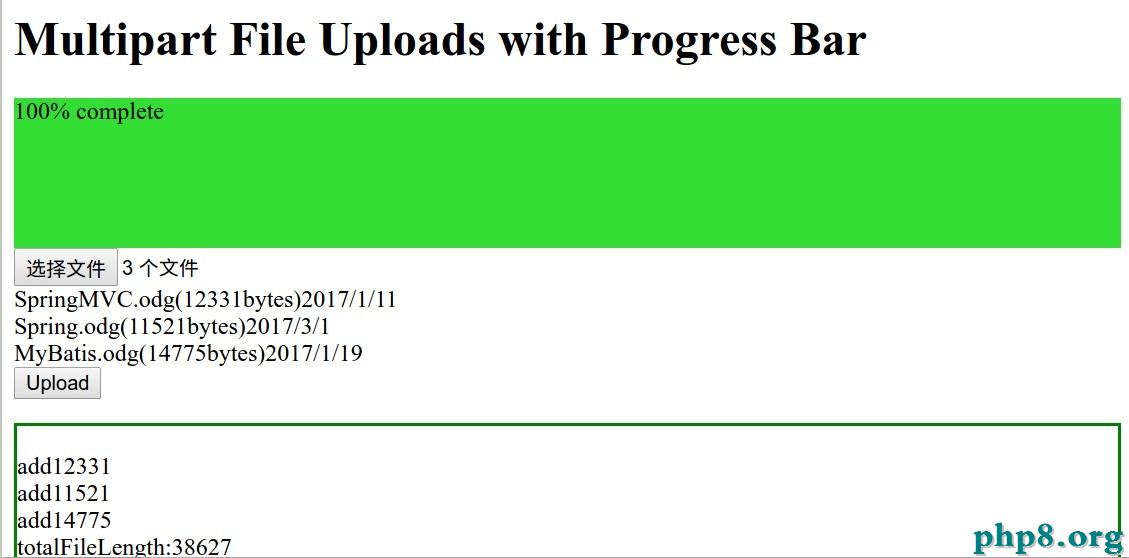
實例:為多文件上傳添加一個進度條
說明:
我們關注的是HTML5 input元素的change事件,當input元素的值發生改變時,他就會被觸發。其次,我們還關注XMLHttpRequest對象中添加progress事件。XMLHttpRequest自然是AJAX的骨架。當異步使用XMLHttpRequest對象上傳文件的時候就會持續地觸發progress事件,直到上傳進度完成或者取消。通過輕松監聽progress事件,可以輕松地檢測文件上傳操作的進度。
編寫Domain和Controller
1.Domain:UploadFile
package domain;
import org.springframework.web.multipart.MultipartFile;
import java.io.Serializable;
public class UploadFile implements Serializable {
  private MultipartFile multipartFile;
  public MultipartFile getMultipartFile() {
    return multipartFile;
  }
  public void setMultipartFile(MultipartFile multipartFile) {
    this.multipartFile = multipartFile;
  }
}
2.Controller:Html5FileUploadController類
package controller;
import domain.UploadFile;
import org.apache.commons.logging.Log;
import org.apache.commons.logging.LogFactory;
import org.springframework.stereotype.Controller;
import org.springframework.validation.BindingResult;
import org.springframework.web.bind.annotation.ModelAttribute;
import org.springframework.web.bind.annotation.RequestMapping;
import org.springframework.web.multipart.MultipartFile;
import javax.servlet.http.HttpServletRequest;
import java.io.File;
@Controller
public class Html5FileUploadController {
  private static final Log logger = LogFactory.getLog(Html5FileUploadController.class);
  @RequestMapping("/html5")
  public String inputProduct()
  {
    return "html5";
  }
  @RequestMapping("/file_upload")
  public void saveFile(HttpServletRequest servletRequest, @ModelAttribute UploadFile file, BindingResult result)
  {
    MultipartFile multipartFile =file.getMultipartFile();
    String filename =multipartFile.getOriginalFilename();
    try {
      File file1 = new File(servletRequest.getServletContext().getRealPath("/image"),filename);
      multipartFile.transferTo(file1);
      System.out.println("已經寫人本地文件:"+file1.getName());
    } catch (Exception e) {
      e.printStackTrace();
    }
  }
}
編寫HTML5頁面
<%--
 Created by IntelliJ IDEA.
 User: zy
 Date: 17-3-8
 Time: 下午10:01
 To change this template use File | Settings | File Templates.
--%>
<%@ page contentType="text/html;charset=UTF-8" language="java" %>
<html>
<head>
  <title>Title</title>
</head>
<body>
  <script>
    var totalFileLength,totalUploaded,fileCount,filesUploaded;
    function debug(s) { //輸出調試信息
      var debug = document.getElementById('debug');
      if(debug)
      {
        debug.innerHTML =debug.innerHTML+'</br>'+s;
      }
    }
    function onUploadComplete(e) { //當一個文件上傳完成,緊接著開始調用下次upLoadNext();
      totalUploaded+=document.getElementById('files').files[filesUploaded].size;
      filesUploaded++;
      debug('Complete'+filesUploaded+" of "+fileCount);
      debug('totalUploaded:'+totalUploaded);
      if(filesUploaded<fileCount)
      {
        upLoadNext();
      }
    }
    function onUploadFailed() {
      alert("Error uploading file");
    }
    function onUploadProgress(e) {//當進度發生改變時,改變進度條
      if(e.lengthComputable)
      {
        var percentComplete =parseInt((e.loaded+totalUploaded)*100/totalFileLength);
        var bar = document.getElementById("bar");
        bar.style.width=percentComplete+"%";
        bar.innerHTML =percentComplete+"% complete";
      }
      else
      {
        debug('unable to compute');
      }
    }
    function upLoadNext() { //將XMLHttpRequest對象的progress事件添加到onLoadProgress並將load事件和error事件分別綁定到對應方法。
      var xhr = new XMLHttpRequest();
      var fd =new FormData();
      var file =document.getElementById('files').files[filesUploaded];
      fd.append("multipartFile",file);
      xhr.upload.addEventListener("progress",onUploadProgress,false);
      xhr.addEventListener("load",onUploadComplete,false);
      xhr.addEventListener("error",onUploadFailed,false);
      xhr.open("POST","file_upload");
      debug('uploading'+file.name);
      xhr.send(fd);
    }
    function onFileSelect(e) { //當選擇的文件發生改變時,重新獲取並打印現在所選的文件信息
      var files =e.target.files;
      var output=[];
      fileCount =files.length;
      totalFileLength =0;
      for(var i=0;i<fileCount;i++)
      {
        var file =files[i];
        output.push(file.name,'(',file.size,'bytes',')',file.lastModifiedDate.toLocaleDateString());
        output.push("<br/>");
        debug('add'+file.size);
        totalFileLength+=file.size;
      }
      document.getElementById('selectedFiles').innerHTML = output.join('');
      debug('totalFileLength:'+totalFileLength);
    }
    function startUpload() { //當用戶點擊提交以後開始執行
      totalUploaded=filesUploaded=0;
      upLoadNext();
    }
    window.onload=function () {
      document.getElementById('files').addEventListener('change',onFileSelect,false);
      document.getElementById('upLoadButton').addEventListener('click',startUpload,false);
    }
  </script>
</body>
  <h1>Multipart File Uploads with Progress Bar</h1>
  <div id="bar" >
  </div>
<form>
  <input type="file" id="files" multiple>
  <br>
  <output id="selectedFiles"></output>
  <input id="upLoadButton" type="button" value="Upload">
</form>
<div id="debug" >
</div>
</html>
說明:
progressBar div用於展示上傳進度,debug div用於顯示調試信息。
執行腳本時,第一件事就是為4個變量分配空間:totalFileLength,totalUploaded,fileCount,filesUploaded;
以上所述是小編給大家介紹的SpringMVC文件上傳功能實例解析,希望對大家有所幫助,如果大家有任何疑問請給我留言,小編會及時回復大家的。在此也非常感謝大家對網站的支持!
[db:作者簡介][db:原文翻譯及解析]