java編程之單位測試(Junit)實例剖析(附實例源碼)。本站提示廣大學習愛好者:(java編程之單位測試(Junit)實例剖析(附實例源碼))文章只能為提供參考,不一定能成為您想要的結果。以下是java編程之單位測試(Junit)實例剖析(附實例源碼)正文
本文實例講述了java編程之單位測試。分享給年夜家供年夜家參考,詳細以下:
完全實例代碼代碼點擊此處本站下載。
在有些時刻,我們須要對我們本身編寫的代碼停止單位測試(利益是,削減前期保護的精神和費用),這是一些最根本的模塊測試。固然,在停止單位測試的同時也必定得清晰我們測試的代碼的外部邏輯完成,如許在測試的時刻能力清晰地將我們願望代碼邏輯完成獲得的成果和測試現實獲得的成果停止驗證比較。
空話少說,上代碼:
起首創立一個java工程,在工程中創立一個被單位測試的Student數據類,以下:
package com.phicomme.hu;
public class Student
{
 private String name;
 private String sex;
 private int high;
 private int age;
 private String school;
 public Student(String name, String sex ,int high, int age, String school)
 {
  this.name = name;
  this.sex = sex;
  this.high = high;
  this.age = age;
  this.school = school;
 }
 public String getName()
 {
  return name;
 }
 public void setName(String name)
 {
  this.name = name;
 }
 public String getSex()
 {
  return sex;
 }
 public void setSex(String sex)
 {
  this.sex = sex;
 }
 public int getHigh()
 {
  return high;
 }
 public void setHigh(int high)
 {
  this.high = high;
 }
 public int getAge()
 {
  return age;
 }
 public boolean setAge(int age)
 {
  if (age >25)
  {
   return false;
  }
  else
  {
   this.age = age;
   return true;
  }
 }
 public String getSchool()
 {
  return school;
 }
 public void setSchool(String school)
 {
  this.school = school;
 }
}
在eclipse下單位測試這個類:
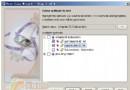
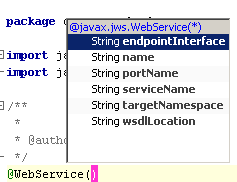
起首導入Junit包:選中java工程,點擊鼠標右鍵--->選擇properties---->在窗口當選Java Build Path---->在右邊點擊Add Library---->在彈出的窗口列表當選中Junit---->下一步----->Junit 4(我用的是Junit 4)---->finish
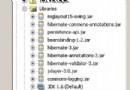
如許Junit 4包就導完了,接上去就是創立測試類:
將測試類和被測試類放在分歧的包中(也能夠放在統一個包中,此處只是為了差別),代碼以下:
測試類1:
package com.phicomme.test;
import com.phicomme.hu.Student;
import junit.framework.TestCase;
public class StudentTest01 extends TestCase
{
 Student testStudent;
 //此辦法在履行每個測試辦法之前(測試用例)之前挪用
 @Override
 protected void setUp() throws Exception
 {
  // TODO Auto-generated method stub
  super.setUp();
  testStudent = new Student("djm", "boy", 178, 24, "華東政法");
  System.out.println("setUp()");
 }
 //此辦法在履行每個測試辦法以後挪用
 @Override
 protected void tearDown() throws Exception
 {
  // TODO Auto-generated method stub
  super.tearDown();
  System.out.println("tearDown()");
 }
 //測試用例,測試Person對象的getSex()辦法
 public void testGetSex()
 {
  assertEquals("boy", testStudent.getSex());
  System.out.println("testGetSex()");
 }
 //測試Person對象的getAge()辦法
 public void testGetAge()
 {
  assertEquals(24, testStudent.getAge());
  System.out.println("testGetAge()");
 }
}
測試類2:
package com.phicomme.test;
import junit.framework.TestCase;
import com.phicomme.hu.Student;
public class StudentTest extends TestCase
{
 private Student testStudent;
 @Override
 protected void setUp() throws Exception
 {
  // TODO Auto-generated method stub
  super.setUp();
  testStudent = new Student("steven_hu", "boy", 170 , 23, "上海理工");
 }
 @Override
 protected void tearDown() throws Exception
 {
  // TODO Auto-generated method stub
  super.tearDown();
 }
 public void testSetage()
 {
  assertTrue(testStudent.setAge(21));
 }
 public void testGetSchool()
 {
  //預期值和現實值紛歧樣,測試時湧現掉敗(Failure)
  assertEquals("南昌年夜學", testStudent.getSchool());
 }
 public void testGetName()
 {
  assertEquals("hdy", testStudent.getName());
 }
}
固然,假如同時須要一路測試以上這兩個測試類,可以經由過程TestSuite類完成,它相當因而一個套件,可以把一切測試類添出去一路運轉測試;
代碼以下:
package com.phicomme.test;
import com.phicomme.hu.StudentTest02;
import junit.framework.Test;
import junit.framework.TestSuite;
public class AllTest
{
 //static PersonTest p = new PersonTest();
 //static PersonTest p1 = new PersonTest();
 public static Test suite()
 {
  TestSuite suite = new TestSuite("Test for com.phicomme.test");
  //suite.addTest(p);
  //suite.addTest(p1);
  suite.addTestSuite(StudentTest.class);
  suite.addTestSuite(StudentTest01.class);
  return suite;
 }
}
最初,分離測試以上三個類(選中須要測試的類---->鼠標右鍵---->Run As---->Junit Test):
StudentTest類的測試成果圖:
StudentTest01類的測試成果圖:
AllTest類的測試成果圖:
有關java的測試就講到這裡,願望對年夜家有贊助,有時光也會接著講講有關android的單位測試,和在手機上完成編寫一個UI界面替換eclipse如上圖中的測試界面;
願望本文所述對年夜家Java法式設計有所贊助。