Java文件上傳下載、郵件收發實例代碼。本站提示廣大學習愛好者:(Java文件上傳下載、郵件收發實例代碼)文章只能為提供參考,不一定能成為您想要的結果。以下是Java文件上傳下載、郵件收發實例代碼正文
文件上傳下載
前台:
1. 提交方法:post
2. 表單中有文件上傳的表單項: <input type=”file” />
3. 指定表單類型:
默許類型:enctype="application/x-www-form-urlencoded"
文件上傳類型:multipart/form-data
FileUpload
文件上傳功效開辟中比擬經常使用,apache也供給了文件上傳組件!
FileUpload組件:
1. 下載源碼
2. 項目中引入jar文件
commons-fileupload-1.2.1.jar 【文件上傳組件焦點jar包】
commons-io-1.4.jar 【封裝了對文件處置的相干對象類】
應用:
public class UploadServlet extends HttpServlet {
// upload目次,保留上傳的資本
public void doGet(HttpServletRequest request, HttpServletResponse response)
throws ServletException, IOException {
/*********文件上傳組件: 處置文件上傳************/
try {
// 1. 文件上傳工場
FileItemFactory factory = new DiskFileItemFactory();
// 2. 創立文件上傳焦點對象類
ServletFileUpload upload = new ServletFileUpload(factory);
// 1、設置單個文件許可的最年夜的年夜小: 30M
upload.setFileSizeMax(30*1024*1024);
// 2、設置文件上傳表單許可的總年夜小: 80M
upload.setSizeMax(80*1024*1024);
// 3、 設置上傳表單文件名的編碼
// 相當於:request.setCharacterEncoding("UTF-8");
upload.setHeaderEncoding("UTF-8");
// 3. 斷定: 以後表單能否為文件上傳表單
if (upload.isMultipartContent(request)){
// 4. 把要求數據轉換為一個個FileItem對象,再用聚集封裝
List<FileItem> list = upload.parseRequest(request);
// 遍歷: 獲得每個上傳的數據
for (FileItem item: list){
// 斷定:通俗文本數據
if (item.isFormField()){
// 通俗文本數據
String fieldName = item.getFieldName(); // 表單位素稱號
String content = item.getString(); // 表單位素稱號, 對應的數據
//item.getString("UTF-8"); 指定編碼
System.out.println(fieldName + " " + content);
}
// 上傳文件(文件流) ----> 上傳到upload目次下
else {
// 通俗文本數據
String fieldName = item.getFieldName(); // 表單位素稱號
String name = item.getName(); // 文件名
String content = item.getString(); // 表單位素稱號, 對應的數據
String type = item.getContentType(); // 文件類型
InputStream in = item.getInputStream(); // 上傳文件流
/*
* 4、文件名重名
* 關於分歧用戶readme.txt文件,不願望籠罩!
* 後台處置: 給用戶添加一個獨一標志!
*/
// a. 隨機生成一個獨一標志
String id = UUID.randomUUID().toString();
// b. 與文件名拼接
name = id +"#"+ name;
// 獲得上傳基途徑
String path = getServletContext().getRealPath("/upload");
// 創立目的文件
File file = new File(path,name);
// 對象類,文件上傳
item.write(file);
item.delete(); //刪除體系發生的暫時文件
System.out.println();
}
}
}
else {
System.out.println("以後表單不是文件上傳表單,處置掉敗!");
}
} catch (Exception e) {
e.printStackTrace();
}
}
// 手動完成進程
private void upload(HttpServletRequest request) throws IOException,
UnsupportedEncodingException {
/*
request.getParameter(""); // GET/POST
request.getQueryString(); // 獲得GET提交的數據
request.getInputStream(); // 獲得post提交的數據 */
/***********手動獲得文件上傳表雙數據************/
//1. 獲得表雙數據流
InputStream in = request.getInputStream();
//2. 轉換流
InputStreamReader inStream = new InputStreamReader(in, "UTF-8");
//3. 緩沖流
BufferedReader reader = new BufferedReader(inStream);
// 輸入數據
String str = null;
while ((str = reader.readLine()) != null) {
System.out.println(str);
}
// 封閉
reader.close();
inStream.close();
in.close();
}
public void doPost(HttpServletRequest request, HttpServletResponse response)
throws ServletException, IOException {
this.doGet(request, response);
}
}
案例:
Index.jsp
<body>
<a href="${pageContext.request.contextPath }/upload.jsp">文件上傳</a>
<a href="${pageContext.request.contextPath }/fileServlet?method=downList">文件下載</a>
</body>
Upload.jsp
<body>
<form name="frm_test" action="${pageContext.request.contextPath }/fileServlet?method=upload" method="post" enctype="multipart/form-data">
<%--<input type="hidden" name="method" value="upload">--%>
用戶名:<input type="text" name="userName"> <br/>
文件: <input type="file" name="file_img"> <br/>
<input type="submit" value="提交">
</form>
</body>
FileServlet.Java
/**
* 處置文件上傳與下載
* @author Jie.Yuan
*
*/
public class FileServlet extends HttpServlet {
public void doGet(HttpServletRequest request, HttpServletResponse response)
throws ServletException, IOException {
// 獲得要求參數: 辨別分歧的操作類型
String method = request.getParameter("method");
if ("upload".equals(method)) {
// 上傳
upload(request,response);
}
else if ("downList".equals(method)) {
// 進入下載列表
downList(request,response);
}
else if ("down".equals(method)) {
// 下載
down(request,response);
}
}
/**
* 1. 上傳
*/
private void upload(HttpServletRequest request, HttpServletResponse response)
throws ServletException, IOException {
try {
// 1. 創立工場對象
FileItemFactory factory = new DiskFileItemFactory();
// 2. 文件上傳焦點對象類
ServletFileUpload upload = new ServletFileUpload(factory);
// 設置年夜小限制參數
upload.setFileSizeMax(10*1024*1024); // 單個文件年夜小限制
upload.setSizeMax(50*1024*1024); // 總文件年夜小限制
upload.setHeaderEncoding("UTF-8"); // 對中文文件編碼處置
// 斷定
if (upload.isMultipartContent(request)) {
// 3. 把要求數據轉換為list聚集
List<FileItem> list = upload.parseRequest(request);
// 遍歷
for (FileItem item : list){
// 斷定:通俗文本數據
if (item.isFormField()){
// 獲得稱號
String name = item.getFieldName();
// 獲得值
String value = item.getString();
System.out.println(value);
}
// 文件表單項
else {
/******** 文件上傳 ***********/
// a. 獲得文件稱號
String name = item.getName();
// ----處置上傳文件名重名成績----
// a1. 先獲得獨一標志
String id = UUID.randomUUID().toString();
// a2. 拼接文件名
name = id + "#" + name;
// b. 獲得上傳目次
String basePath = getServletContext().getRealPath("/upload");
// c. 創立要上傳的文件對象
File file = new File(basePath,name);
// d. 上傳
item.write(file);
item.delete(); // 刪除組件運轉時發生的暫時文件
}
}
}
} catch (Exception e) {
e.printStackTrace();
}
}
/**
* 2. 進入下載列表
*/
private void downList(HttpServletRequest request, HttpServletResponse response)
throws ServletException, IOException {
// 完成思緒:先獲得upload目次下一切文件的文件名,再保留;跳轉到down.jsp列表展現
//1. 初始化map聚集Map<包括獨一標志的文件名, 冗長文件名> ;
Map<String,String> fileNames = new HashMap<String,String>();
//2. 獲得上傳目次,及其下一切的文件的文件名
String bathPath = getServletContext().getRealPath("/upload");
// 目次
File file = new File(bathPath);
// 目次下,一切文件名
String list[] = file.list();
// 遍歷,封裝
if (list != null && list.length > 0){
for (int i=0; i<list.length; i++){
// 全名
String fileName = list[i];
// 短名
String shortName = fileName.substring(fileName.lastIndexOf("#")+1);
// 封裝
fileNames.put(fileName, shortName);
}
}
// 3. 保留到request域
request.setAttribute("fileNames", fileNames);
// 4. 轉發
request.getRequestDispatcher("/downlist.jsp").forward(request, response);
}
/**
* 3. 處置下載
*/
private void down(HttpServletRequest request, HttpServletResponse response)
throws ServletException, IOException {
// 獲得用戶下載的文件稱號(url地址後追加數據,get)
String fileName = request.getParameter("fileName");
fileName = new String(fileName.getBytes("ISO8859-1"),"UTF-8");
// 先獲得上傳目次途徑
String basePath = getServletContext().getRealPath("/upload");
// 獲得一個文件流
InputStream in = new FileInputStream(new File(basePath,fileName));
// 假如文件名是中文,須要停止url編碼
fileName = URLEncoder.encode(fileName, "UTF-8");
// 設置下載的呼應頭
response.setHeader("content-disposition", "attachment;fileName=" + fileName);
// 獲得response字撙節
OutputStream out = response.getOutputStream();
byte[] b = new byte[1024];
int len = -1;
while ((len = in.read(b)) != -1){
out.write(b, 0, len);
}
// 封閉
out.close();
in.close();
}
public void doPost(HttpServletRequest request, HttpServletResponse response)
throws ServletException, IOException {
this.doGet(request, response);
}
}
郵件開辟
預備任務, 情況搭建:
1. 當地搭建一個郵件辦事器
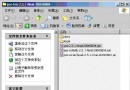
易郵辦事器,eyoumailserversetup.exe
2. 新建郵箱賬號
張三給李四發郵件。
步調1:
新建域名: 對象, 辦事器設置, 單域名框中輸出 itcast.com
步調2:
新建郵箱賬號: zhangsan@itcast.com
lisi@itcast.com
3. 裝置foxmail
設置裝備擺設郵件發送辦事器(smtp): localhost 25
郵件吸收辦事器(pop3): localhost 110
再新建賬號,便可以吸收郵件了!
留意
留意
假如是web項目,由於javaee自帶的有郵件功效,能夠存在成績!
我們要用本身的mail.jar文件功效! 須要刪除javaee中mail包!
應用:
JavaMail開辟,先引入jar文件:
activation.jar 【假如應用jdk1.6或以上版本,可以不消這個jar文件】
mail.jar 【郵件發送焦點包】
/**
* 1. 發送一封通俗郵件
* @author Jie.Yuan
*
*/
public class App_SendMail {
@Test
public void testSend() throws Exception {
//0. 郵件參數
Properties prop = new Properties();
prop.put("mail.transport.protocol", "smtp"); // 指定協定
prop.put("mail.smtp.host", "localhost"); // 主機 stmp.qq.com
prop.put("mail.smtp.port", 25); // 端口
prop.put("mail.smtp.auth", "true"); // 用戶暗碼認證
prop.put("mail.debug", "true"); // 調試形式
//1. 創立一個郵件的會話
Session session = Session.getDefaultInstance(prop);
//2. 創立郵件體對象 (整封郵件對象)
MimeMessage message = new MimeMessage(session);
//3. 設置郵件體參數:
//3.1 題目
message.setSubject("我的第一封郵件 ");
//3.2 郵件發送時光
message.setSentDate(new Date());
//3.3 發件人
message.setSender(new InternetAddress("zhangsan@itcast.com"));
//3.4 吸收人
message.setRecipient(RecipientType.TO, new InternetAddress("lisi@itcast.com"));
//3.5內容
message.setText("你好,曾經發送勝利! 注釋...."); // 簡略純文本郵件
message.saveChanges(); // 保留郵件(可選)
//4. 發送
Transport trans = session.getTransport();
trans.connect("zhangsan", "888");
// 發送郵件
trans.sendMessage(message, message.getAllRecipients());
trans.close();
}
}
帶圖片
/**
* 帶圖片資本的郵件
* @author Jie.Yuan
*
*/
public class App_2SendWithImg {
// 初始化參數
private static Properties prop;
// 發件人
private static InternetAddress sendMan = null;
static {
prop = new Properties();
prop.put("mail.transport.protocol", "smtp"); // 指定協定
prop.put("mail.smtp.host", "localhost"); // 主機 stmp.qq.com
prop.put("mail.smtp.port", 25); // 端口
prop.put("mail.smtp.auth", "true"); // 用戶暗碼認證
prop.put("mail.debug", "true"); // 調試形式
try {
sendMan = new InternetAddress("zhangsan@itcast.com");
} catch (AddressException e) {
throw new RuntimeException(e);
}
}
@Test
public void testSend() throws Exception {
// 1. 創立郵件會話
Session session = Session.getDefaultInstance(prop);
// 2. 創立郵件對象
MimeMessage message = new MimeMessage(session);
// 3. 設置參數:題目、發件人、收件人、發送時光、內容
message.setSubject("帶圖片郵件");
message.setSender(sendMan);
message.setRecipient(RecipientType.TO, new InternetAddress("lisi@itcast.com"));
message.setSentDate(new Date());
/***************設置郵件內容: 多功效用戶郵件 (related)*******************/
// 4.1 構建一個多功效郵件塊
MimeMultipart related = new MimeMultipart("related");
// 4.2 構建多功效郵件塊內容 = 左邊文本 + 右邊圖片資本
MimeBodyPart content = new MimeBodyPart();
MimeBodyPart resource = new MimeBodyPart();
// 設置詳細內容: a.資本(圖片)
String filePath = App_2SendWithImg.class.getResource("8.jpg").getPath();
DataSource ds = new FileDataSource(new File(filePath));
DataHandler handler = new DataHandler(ds);
resource.setDataHandler(handler);
resource.setContentID("8.jpg"); // 設置資本稱號,給外鍵援用
// 設置詳細內容: b.文本
content.setContent("<img src='cid:8.jpg'/> 好哈哈!", "text/html;charset=UTF-8");
related.addBodyPart(content);
related.addBodyPart(resource);
/*******4.3 把構建的龐雜郵件快,添加到郵件中********/
message.setContent(related);

// 5. 發送
Transport trans = session.getTransport();
trans.connect("zhangsan", "888");
trans.sendMessage(message, message.getAllRecipients());
trans.close();
}
}
圖片+附件
/**
* 3. 帶圖片資本和附件的郵件
* @author Jie.Yuan
*
*/
public class App_3ImgAndAtta {
// 初始化參數
private static Properties prop;
// 發件人
private static InternetAddress sendMan = null;
static {
prop = new Properties();
prop.put("mail.transport.protocol", "smtp"); // 指定協定
prop.put("mail.smtp.host", "localhost"); // 主機 stmp.qq.com
prop.put("mail.smtp.port", 25); // 端口
prop.put("mail.smtp.auth", "true"); // 用戶暗碼認證
prop.put("mail.debug", "true"); // 調試形式
try {
sendMan = new InternetAddress("zhangsan@itcast.com");
} catch (AddressException e) {
throw new RuntimeException(e);
}
}
@Test
public void testSend() throws Exception {
// 1. 創立郵件會話
Session session = Session.getDefaultInstance(prop);
// 2. 創立郵件對象
MimeMessage message = new MimeMessage(session);
// 3. 設置參數:題目、發件人、收件人、發送時光、內容
message.setSubject("帶圖片郵件");
message.setSender(sendMan);
message.setRecipient(RecipientType.TO, new InternetAddress("lisi@itcast.com"));
message.setSentDate(new Date());
/*
* 帶附件(圖片)郵件開辟
*/
// 構建一個總的郵件塊
MimeMultipart mixed = new MimeMultipart("mixed");
// ---> 總郵件快,設置到郵件對象中
message.setContent(mixed);
// 左邊: (文本+圖片資本)
MimeBodyPart left = new MimeBodyPart();
// 右邊: 附件
MimeBodyPart right = new MimeBodyPart();
// 設置到總郵件塊
mixed.addBodyPart(left);
mixed.addBodyPart(right);
/******附件********/
String attr_path = this.getClass().getResource("a.docx").getPath();
DataSource attr_ds = new FileDataSource(new File(attr_path));
DataHandler attr_handler = new DataHandler(attr_ds);
right.setDataHandler(attr_handler);
right.setFileName("a.docx");
/***************設置郵件內容: 多功效用戶郵件 (related)*******************/
// 4.1 構建一個多功效郵件塊
MimeMultipart related = new MimeMultipart("related");
// ----> 設置到總郵件快的左邊中
left.setContent(related);
// 4.2 構建多功效郵件塊內容 = 左邊文本 + 右邊圖片資本
MimeBodyPart content = new MimeBodyPart();
MimeBodyPart resource = new MimeBodyPart();
// 設置詳細內容: a.資本(圖片)
String filePath = App_3ImgAndAtta.class.getResource("8.jpg").getPath();
DataSource ds = new FileDataSource(new File(filePath));
DataHandler handler = new DataHandler(ds);
resource.setDataHandler(handler);
resource.setContentID("8.jpg"); // 設置資本稱號,給外鍵援用
// 設置詳細內容: b.文本
content.setContent("<img src='cid:8.jpg'/> 好哈哈!", "text/html;charset=UTF-8");
related.addBodyPart(content);
related.addBodyPart(resource);
// 5. 發送
Transport trans = session.getTransport();
trans.connect("zhangsan", "888");
trans.sendMessage(message, message.getAllRecipients());
trans.close();
}
}
以上所述是小編給年夜家引見的Java文件上傳下載、郵件收發實例代碼 ,願望對年夜家有所贊助,假如年夜家有任何疑問請給我留言,小編會實時答復年夜家的。在此也異常感激年夜家對網站的支撐!