第四章 配置集中管理 + 配置動態管理,第四章動態
問題:之前的配置文件都是散在各個項目中的,導致配置文件的管理比較困難,而且配置的值一旦改變,我們就需要重新編譯部署整個項目,非常麻煩!!!
解決方案:
- 配置的集中管理:采用consul的KV,將所有微服務的application.properties中的配置內容存入consul。
- 配置的動態管理:采用archaius,將consul上的配置信息讀到spring的PropertySource和archaius的PollResult中,當修改了配置信息後,經常改變的值通過DynamicFactory來獲取,不經常改變的值可以通過其他方式獲取(例如,environment、@value、@ConfigurationProperties(prefix = "xxx")),這樣的話,大部分情況下,修改了consul上的配置信息後,相應的項目不需要重啟,也會讀到最新的值。(當然不經常改變的值如果發生了修改,還是需要重啟整個項目的)--- 這一塊兒參考:第二十二章 springboot + archaius + consul(配置管理)
預備知識:理解springboot的啟動過程。
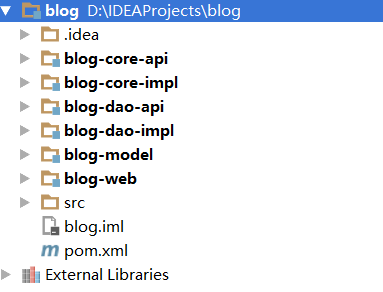
一、項目結構
二、基礎框架:framework
1、pom.xml

![]()
1 <!-- archaius -->
2 <dependency>
3 <groupId>com.netflix.archaius</groupId>
4 <artifactId>archaius-core</artifactId>
5 <version>0.6.6</version>
6 </dependency>
7 <!-- 動態配置,archaius底層 -->
8 <dependency>
9 <groupId>commons-configuration</groupId>
10 <artifactId>commons-configuration</artifactId>
11 <version>1.8</version>
12 </dependency>
View Code
說明:引入archaius及其底層commons-configuration
2、讀取配置信息的數據源:ConsulConfigurationSource
![]()
1 package com.microservice.archaius;
2
3 import java.io.StringReader;
4 import java.util.HashMap;
5 import java.util.Map;
6 import java.util.Properties;
7
8 import org.apache.commons.lang3.StringUtils;
9
10 import com.google.common.base.Optional;
11 import com.netflix.config.PollResult;
12 import com.netflix.config.PolledConfigurationSource;
13 import com.orbitz.consul.Consul;
14 import com.orbitz.consul.KeyValueClient;
15
16 /**
17 * 指定archaius讀取配置的源頭
18 */
19 public class ConsulConfigurationSource implements PolledConfigurationSource {
20
21 private String keyName;
22
23 public ConsulConfigurationSource(String keyName) {
24 this.keyName = keyName;
25 }
26
27 /**
28 * 默認情況下,每隔60s,該方法會執行一次
29 */
30 @Override
31 public PollResult poll(boolean initial, Object checkPoint) throws Exception {
32 Consul consul = Consul.builder().build();
33 KeyValueClient kvClient = consul.keyValueClient();
34 Optional<String> kvOpt = kvClient.getValueAsString(keyName);
35 String kvStr = StringUtils.EMPTY;
36 if (kvOpt.isPresent()) {
37 kvStr = kvOpt.get();
38 }
39
40 Properties props = new Properties();
41 props.load(new StringReader(kvStr));//String->Properties
42
43 Map<String, Object> propMap = new HashMap<>();
44 for (Object key : props.keySet()) {
45 propMap.put((String) key, props.get(key));
46 }
47 return PollResult.createFull(propMap);
48 }
49
50 }
View Code
步驟:
- 從consul上讀取相應key的value
- 將讀下來的String類型的value轉成Properties
- 將Properties的KV傳入PollResult
注意:
- 上邊這個過程默認每隔60s執行一次(也就是說,consul上修改的配置項最多過60s就會被讀取到新值),這個值可以通過在system.setproperty中設置讀取時間來改變archaius.fixedDelayPollingScheduler.delayMills
3、設置PropertySource:ConsulPropertySource
![]()
1 package com.microservice.archaius;
2
3 import java.util.Iterator;
4 import java.util.Map;
5
6 import org.springframework.core.env.MapPropertySource;
7
8 import com.netflix.config.AbstractPollingScheduler;
9 import com.netflix.config.ConfigurationManager;
10 import com.netflix.config.DynamicConfiguration;
11 import com.netflix.config.FixedDelayPollingScheduler;
12 import com.netflix.config.PolledConfigurationSource;
13
14 /**
15 * 將 consul讀取的配置信息存入netflix config和PropertySource
16 */
17 public class ConsulPropertySource extends MapPropertySource {
18
19 /**
20 * @param name 屬性源名稱:這裡就是consul KV中的K
21 * @param source 屬性源:這裡就是consul KV中的V
22 */
23 public ConsulPropertySource(String name, Map<String, Object> source) {
24 super(name, source);//初始化
25
26 /**
27 * 從consul上讀取屬性並存入netflix config
28 */
29 PolledConfigurationSource configSource = new ConsulConfigurationSource(name);//定義讀取配置的源頭
30 AbstractPollingScheduler scheduler = new FixedDelayPollingScheduler();//設置讀取配置文件的
31 DynamicConfiguration configuration = new DynamicConfiguration(configSource, scheduler);
32 ConfigurationManager.install(configuration);
33
34 /**
35 * 將屬性存入PropertySource
36 */
37 @SuppressWarnings("rawtypes")
38 Iterator it = configuration.getKeys();
39 while (it.hasNext()) {
40 String key = (String) it.next();
41 this.source.put(key, configuration.getProperty(key));
42 }
43 }
44
45 }
View Code
步驟:
- 繼承自MapPropertySource(PropertySource的子類),首先初始化該屬性源的name和source
- name:數據源名稱。"service/微服務名稱/微服務tag/config"(例如,service/jigangservice/dev/config)
- source:數據源值。
- 通過動態數據源與調度器構建DynamicConfiguration,並加入緩存管理器
- 將DynamicConfiguration中的從consul上讀下來的Properties的KV設置到source中去
注意:
- 從這裡,我們可以看出,一個微服務項目的配置信息會存兩份:一份在PollResult,一份存在spring的PropertySource,前者動態改變,後者固定不變
4、初始化器:ConsulPropertySourceBootstrapInitializer
![]()
1 package com.microservice.archaius;
2
3 import java.util.HashMap;
4 import java.util.Properties;
5
6 import org.springframework.context.ApplicationContextInitializer;
7 import org.springframework.context.ConfigurableApplicationContext;
8 import org.springframework.core.env.ConfigurableEnvironment;
9 import org.springframework.core.env.MutablePropertySources;
10 import org.springframework.core.env.PropertySource;
11
12 import com.microservice.util.BaseContants;
13 import com.microservice.util.PropertyUtil;
14
15 public class ConsulPropertySourceBootstrapInitializer implements ApplicationContextInitializer<ConfigurableApplicationContext> {
16
17 @Override
18 public void initialize(ConfigurableApplicationContext applicationContext) {
19 ConfigurableEnvironment env = applicationContext.getEnvironment();
20 PropertySource<?> source = this.locate(env);
21 MutablePropertySources propertySources = env.getPropertySources();
22 propertySources.addLast(source);
23 }
24
25 private PropertySource<?> locate(ConfigurableEnvironment env) {
26 env.getPropertySources().remove(BaseContants.DEFAULT_PROPERTIES_SOURCE_NAME);//移除application.properties的PropertySource
27 Properties props = PropertyUtil.loadProps("bootstrap.properties");
28 String servicename = props.getProperty(BaseContants.SERVICE_NAME_KEY);
29 String servicetag = props.getProperty(BaseContants.SERVICE_TAG_KEY);
30 return new ConsulPropertySource("service/" + servicename + "/" + servicetag + "/config", new HashMap<>());
31 }
32 }
View Code
步驟:
- 實現ApplicationContextInitializer接口,重寫其中的initialize方法
- 首先,刪除application.properties的PropertySource,否則可能會讀到application.properties中的內容,而我們只是想讀consul上的內容
- 加載bootstrap.properties文件,讀取其中的servicename(微服務名)和servicetag(微服務tag)
- 與啟動相關而與業務不相關的數據寫在bootstrap.properties中去,而與業務相關的參數寫到consul裡去
- 調用ConsulPropertySource的多參構造器就好了
5、兩個輔助類:BaseContants + PropertyUtil
![]()
1 package com.microservice.util;
2
3 public class BaseContants {
4 public static final String SERVICE_NAME_KEY = "service.name";
5 public static final String SERVICE_TAG_KEY = "service.tag";
6 public static final String DEFAULT_PROPERTIES_SOURCE_NAME = "applicationConfigurationProperties";
7 }
View Code
![]()
1 package com.microservice.util;
2
3 import java.io.IOException;
4 import java.io.InputStream;
5 import java.util.Properties;
6
7 /**
8 * 文件操作工具類
9 */
10 public class PropertyUtil {
11
12 /**
13 * 加載屬性文件*.properties
14 * @param fileName 不是屬性全路徑名稱,而是相對於類路徑的名稱
15 */
16 public static Properties loadProps(String fileName) {
17 Properties props = null;
18 InputStream is = null;
19
20 try {
21 is = Thread.currentThread().getContextClassLoader().getResourceAsStream(fileName);//獲取類路徑下的fileName文件,並且轉化為輸入流
22 if (is != null) {
23 props = new Properties();
24 props.load(is); //加載屬性文件
25 }
26 } catch (Exception e) {
27 e.printStackTrace();
28 } finally {
29 if (is != null) {
30 try {
31 is.close();
32 } catch (IOException e) {
33 e.printStackTrace();
34 }
35 }
36 }
37
38 return props;
39 }
40 }
View Code
6、啟動類:MySpringAplication
![]()
1 package com.microservice;
2
3 import org.springframework.boot.SpringApplication;
4 import org.springframework.boot.autoconfigure.SpringBootApplication;
5
6 import com.microservice.archaius.ConsulPropertySourceBootstrapInitializer;
7 import com.microservice.consul.ConsulRegisterListener;
8
9 import springfox.documentation.swagger2.annotations.EnableSwagger2;
10
11 /**
12 * 注意:@SpringBootApplication該注解必須在SpringApplication.run()所在的類上
13 */
14 @SpringBootApplication
15 @EnableSwagger2
16 public class MySpringAplication {
17
18 public void run(String[] args) {
19 SpringApplication sa = new SpringApplication(MySpringAplication.class);
20 sa.addInitializers(new ConsulPropertySourceBootstrapInitializer());//讀取配置文件
21 sa.addListeners(new ConsulRegisterListener());//consul服務注冊
22 sa.run(args);
23 }
24
25 public static void main(String[] args) {
26 }
27 }
View Code
說明:添加了initializer
三、微服務A:myserviceA
1、啟動參數配置類:bootstrap.properties
![]()
1 service.name=myserviceA
2 service.tag=dev
3 service.port=8080
4 health.url=http://localhost:8080/health
5 health.interval=10
View Code
2、測試controller
![]()
1 package com.microservice.myserviceA.controller;
2
3 import org.springframework.beans.factory.annotation.Autowired;
4 import org.springframework.beans.factory.annotation.Value;
5 import org.springframework.core.env.Environment;
6 import org.springframework.web.bind.annotation.RequestMapping;
7 import org.springframework.web.bind.annotation.RestController;
8
9 import com.netflix.config.DynamicPropertyFactory;
10 import com.netflix.config.DynamicStringProperty;
11
12 @RestController
13 @RequestMapping("/test/archaius")
14 public class TestController {
15 @Autowired
16 private Environment env;
17 @Value("${mysql.driverClassName}")
18 private String zjgBrother;
19
20 @RequestMapping("/xxx")
21 public String test(){
22 System.out.println("env->"+env.getProperty("xxx"));
23 System.out.println("value->"+zjgBrother);
24
25 DynamicStringProperty dsp = DynamicPropertyFactory.getInstance().getStringProperty("hystrix.command.HystrixCommandKey.execution.isolation.thread.timeoutInMilliseconds", "xxx");
26 System.out.println("Dynamic->"+dsp.get());
27 return "hello";
28 }
29 }
View Code
說明:測試了從environment獲取、從@value獲取以及dynamicFactory中獲取三種方式,前兩種是從PropertySource中獲取(不能感知consul上配置的變化),最後一種是從PollResult中獲取(可以感知consul上的配置的變化)
四、測試
- 在consul的KV上進行手動配置(或者用過consul-git提交,之後會說)
- 啟動swagger,運行controller
難點:
- 只有掌握了springboot的啟動流程,才可以知道在initializer中添加讀取配置、構建propertySource的代碼
- 這一塊兒也可以參考springcloud的做法,構建兩個applicationContext,父context負責讀取配置信息,然後傳給子類的main函數的context。具體文檔:http://projects.spring.io/spring-cloud/docs/1.0.1/spring-cloud.html