程序師世界是廣大編程愛好者互助、分享、學習的平台,程序師世界有你更精彩!
首頁
編程語言
C語言|JAVA編程
Python編程
網頁編程
ASP編程|PHP編程
JSP編程
數據庫知識
MYSQL數據庫|SqlServer數據庫
Oracle數據庫|DB2數據庫
 程式師世界 >> 編程語言 >> JAVA編程 >> JAVA綜合教程 >> 單點登錄CAS使用記(一):前期准備以及為CAS-Server配置SSL協議,cas-serverssl

單點登錄CAS使用記(一):前期准備以及為CAS-Server配置SSL協議,cas-serverssl

編輯:JAVA綜合教程

單點登錄CAS使用記(一):前期准備以及為CAS-Server配置SSL協議,cas-serverssl


知識點:

SSO:單點登錄(Single Sign On),是目前比較流行的企業業務整合的解決方案之一。SSO的定義是在多個應用系統中,用戶只需要登錄一次就可以訪問所有相互信任的應用系統。

CAS:耶魯大學開發的單點登錄(Single Sign On)系統稱為CAS(Central Authentication Server),他是一個開源的、相對比較簡單易用的SSO解決方案。

SSL(Secure Sockets Layer 安全套接層),及其繼任者傳輸層安全(Transport Layer Security,TLS)是為網絡通信提供安全及數據完整性的一種安全協議。TLS與SSL在傳輸層對網絡連接進行加密。


背景:

目前公司有相互關聯的幾個獨立項目,需要使用單點登錄進行整合,實現一站登錄,全站皆可以訪問。選用CAS開源項目。


現狀:

因為之前沒有做過,所以只能邊查、邊學、邊做。有一些網絡上查不到的需求,只能分析CAS源碼,采取折中處理方式來實現,如果大家發現有不合理處理方式,請隨時批評指正。

另外,寫這篇博文的時候,單點登錄功能基本已經實現完畢了,這裡回顧記錄一下學習過程。

------------------------------------------分割----------------------------------------------

1.開發環境准備

證書生成工具:OpenSSL

服務器:Ngnix + tomcat

SSO框架:CAS


1.1 首先創建本地域名

demo.testcas.com 用來綁定CAS-Server

app1.testcas.com、app1.testcas.com 綁定兩個測試demo,用來驗證免登陸處理。

創建方法:

進入:C:\WINDOWS\system32\drivers\etc

打開:hosts文件

添加如下:

      127.0.0.1 demo.testcas.com
      127.0.0.1 app1.testcas.com
      127.0.0.1 app2.testcas.com


1.2 生成安全證書

Cas server默認的安全認證是基於https協議的,這就要求在應用程序和CAS Server端配置SSL協議。

一般網絡上生成自用的不受浏覽器信任的證書都是直接通過JDK自帶的應用keytool來制作的,但是因為我們用了Ngnix作為代理服務器,

而Ngnix不兼容keytool生成的證書來部署HTTPS網站,所以需要使用OpenSSL來生成證書。


1. 安裝OpenSSL

2. 進入OpenSSL安裝目錄,我的安裝路徑:D:\developesoft\openssl\openssl

3. 命令模式 進入 bin 目錄

    D:\developesoft\openssl\openssl\bin
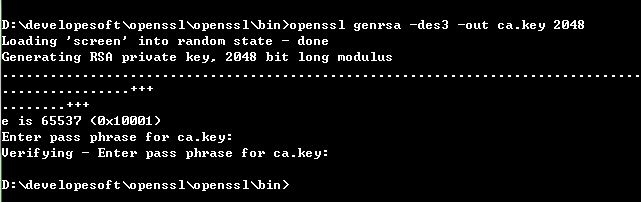
    

4.生成CA私鑰:

輸入:openssl genrsa -des3 -out ca.key 2048

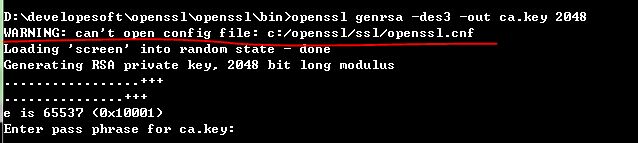
如果報紅線標注的Warning,那麼把安裝目錄下的ssl/openssl.cnf 拷貝到 指定目錄c:/openssl/ssl/openssl.cnf下,重新執行命令
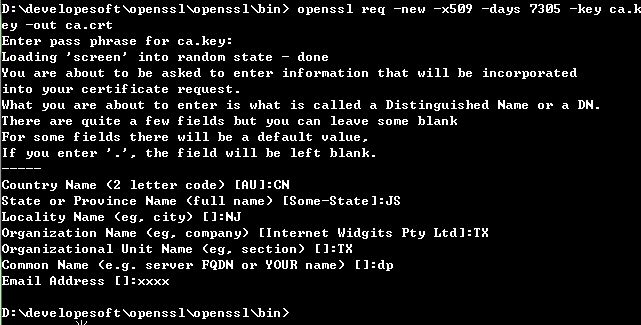
 

5.ca.crt CA根證書(公鑰):

 openssl req -new -x509 -days 7305 -key ca.key -out ca.crt


 6.制作生成網站的證書並用CA簽名認證

我的測試網站域名為demo.testcas.com

生成demo.testcas.com證書私鑰:

openssl genrsa -des3 -out demo.testcas.com.pem 1024


制作解密後的demo.testcas.com證書私鑰:

openssl rsa -in demo.testcas.com.pem -out demo.testcas.com.key


生成簽名請求:

openssl req -new -key demo.testcas.com.pem -out demo.testcas.com.csr

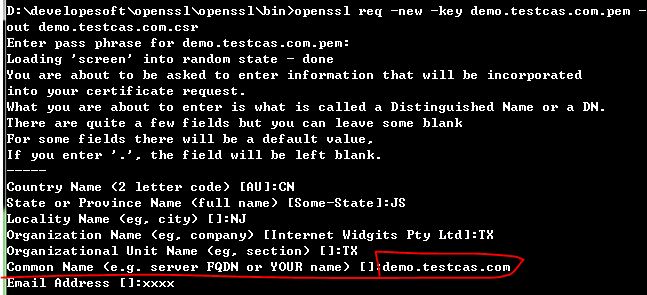
Common Name處輸入網址域名,其他隨便填寫都行


用CA進行簽名:

openssl ca -policy policy_anything -days 1460 -cert ca.crt -keyfile ca.key -in demo.testcas.com.csr -out demo.testcas.com.crt


在OpenSSL安裝目錄的bin目錄下,可以看到生成的證書與私鑰

demo.testcas.com.crt

demo.testcas.com.key


1.3 為nginx配置https

1.下載並安裝nginx,雙擊nginx.exe,在浏覽器地址欄輸入:127.0.0.1,確認是否安裝成功。

2.打開conf/nginx.conf

   找到# HTTPS server,做如下配置:

  # HTTPS server
    #
    server {
        listen       443 ssl;
        server_name  demo.testcas.com;

        ssl_certificate      demo.testcas.com.crt;
        ssl_certificate_key  demo.test.cas.com.key;

        ssl_session_cache    shared:SSL:1m;
        ssl_session_timeout  5m;

        ssl_ciphers  HIGH:!aNULL:!MD5;
        ssl_prefer_server_ciphers  on;

        location / {
            #root   html;
            #index  index.html index.htm;
			proxy_set_header        Host $host;
            proxy_set_header        X-Real-IP $remote_addr;
			proxy_set_header        X-Forwarded-For $proxy_add_x_forwarded_for;
			proxy_pass http://demo;
        }
    }


紅字部分為剛才生成證書的路徑,可以直接把這證書copy到nginx安裝目錄下。

另外,當用戶輸入http請求時,直接跳轉到https請求

server {
        listen       80;
        server_name  demo.testcas.com;
	rewrite ^(.*)$  https://$host$1 permanent;

        #charset koi8-r;

        #access_log  logs/host.access.log  main;

        location / {
            #root   html;
            #index  index.html index.htm;
			proxy_pass http://demo;
        }
    }


配置全文如下:

#user nobody; worker_processes 1; #error_log logs/error.log; #error_log logs/error.log notice; #error_log logs/error.log info; #pid logs/nginx.pid; events { worker_connections 1024; } http { include mime.types; default_type application/octet-stream; #log_format main '$remote_addr - $remote_user [$time_local] "$request" ' # '$status $body_bytes_sent "$http_referer" ' # '"$http_user_agent" "$http_x_forwarded_for"'; #access_log logs/access.log main; sendfile on; #tcp_nopush on; #keepalive_timeout 0; keepalive_timeout 65; #gzip on; upstream demo { server 127.0.0.1:8781; } upstream app1 { server 127.0.0.1:8380; } upstream app2 { server 127.0.0.1:8680; } upstream myapp { server 127.0.0.1:8084; } server { listen 80; server_name demo.testcas.com; rewrite ^(.*)$ https://$host$1 permanent; #charset koi8-r; #access_log logs/host.access.log main; location / { #root html; #index index.html index.htm; proxy_pass http://demo; } } server { listen 80; server_name app1.testcas.com; #charset koi8-r; #access_log logs/host.access.log main; location / { #root html; #index index.html index.htm; proxy_pass http://app1; } } server { listen 80; server_name app2.testcas.com; #charset koi8-r; #access_log logs/host.access.log main; location / { #root html; #index index.html index.htm; proxy_pass http://app2; } } server { listen 80; server_name myapp.testcas.com; #charset koi8-r; #access_log logs/host.access.log main; location / { #root html; #index index.html index.htm; proxy_pass http://myapp; } } # another virtual host using mix of IP-, name-, and port-based configuration # #server { # listen 8000; # listen somename:8080; # server_name somename alias another.alias; # location / { # root html; # index index.html index.htm; # } #} # HTTPS server # server { listen 443 ssl; server_name demo.testcas.com; ssl_certificate mycas.crt; ssl_certificate_key mycas.key; ssl_session_cache shared:SSL:1m; ssl_session_timeout 5m; ssl_ciphers HIGH:!aNULL:!MD5; ssl_prefer_server_ciphers on; location / { #root html; #index index.html index.htm; proxy_set_header Host $host; proxy_set_header X-Real-IP $remote_addr; proxy_set_header X-Forwarded-For $proxy_add_x_forwarded_for; proxy_pass http://demo; } } } View Code


3.重啟nginx,在浏覽器輸入demo.testcas.com
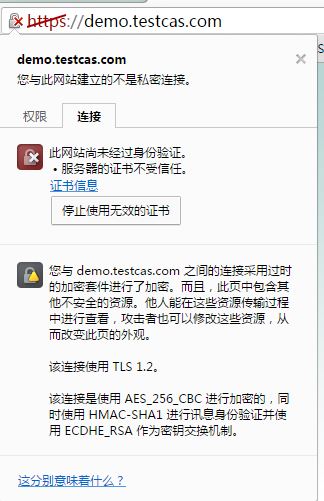
 

說明證書安裝成功。


單點登錄CAS使用記系列:

  • 單點登錄CAS使用記(一):前期准備以及為CAS-Server配置SSL協議

  • 單點登錄CAS使用記(二):部署CAS服務器以及客戶端

  • 單點登錄CAS使用記(三):實現自定義驗證用戶登錄

  • 單點登錄CAS使用記(四):為登錄頁面加上驗證碼

  • 單點登錄CAS使用記(五):cas-client不攔截靜態資源以及無需登錄的請求。

  • 單點登錄CAS使用記(六):單點登出、單點注銷

  • 單點登錄CAS使用記(七):關於服務器超時以及客戶端超時的分析

  • 單點登錄CAS使用記(八):使用maven的overlay實現無侵入的改造CAS


  1. 上一頁:
  2. 下一頁:
Copyright © 程式師世界 All Rights Reserved