前面幾篇文章講了下如果編寫簡單的eclipse插件,如創建插件項目、編寫右鍵彈出菜單等功能,接下來主要寫一下如何生成代碼的功能,這一片的功能跟插件本身的編寫關聯不太大,主要處理插件之後的業務內容。即彈出菜單後,點擊後 執行生成代碼的功能,由於這一塊的功能相對獨立,所以單獨建一個項目用來管理,以跟插件項目進行解耦,方便後期的維護,由於這一塊內容相對較多且引用了其他項目的一些內容,所以簡單列舉一下內容講解一下,就不在進行從頭進行演示了。後面會附加項目源碼,可以自己運行下看看效果。
對了,這裡著重提示一下,本項目中引用且參考了其他的項目就是以前一個開源的koala項目,現在應該有一段時間不更新了,不過裡面的思想還是很不錯的,大家有時間可以去看看。本項目中的一些目錄結構及項目代碼都參考或引用了該項目的內容。
本片生成代碼的核心生成領域對象的Form、Assembler,Form是平時業務中所屬的VO,Assembler是領域對象到Form的一個轉換的裝配器。
protected String getPath() { return MessageFormat.format("{0}/src/{1}/{2}.java", projectPath, // getPackageName().replaceAll("\\.", "/"), getName());}
該類為NewFile的子類,用來生成Form文件,在項目開發過程中有領域類,如各種Model,也有一些數據傳輸類(VO),這裡要生成的Form文件就是VO。該類中包含一些成員變量,存儲要生成Form類的名稱、字段信息、模板路徑以及要導入的包。
成員變量:
fieldMap:存儲要生成的Form類字段信息,key為字段名,value為類型,改字段在構造方法中初始化,如下代碼:
private void initLoader() throws MalformedURLException{if ("WEB".equals(webType)) {String dir = webRootPath + "/web/WEB-INF/classes/";String libs = webRootPath + "/web/WEB-INF/lib/";loadeWeb(dir, libs);} else {String dir = webRootPath + "/bin";loadJar(dir);}}
loadWeb:該方法將class路徑以及所有的jar包存儲到成員變量urlList中去,然後構造方法會new一個URLClassLoader,將urlList轉換成URL數組後作為參數。然後通過URLClassLoader.loadClass(name)方法可以獲取指定的class
private void loadeWeb(String dir, String libs) throws MalformedURLException {urlList.add(new URL("file:" + dir));File lib = new File(libs);File[] jarFiles = lib.listFiles();for (File jarFile : jarFiles) {logger.info("addJar:" + jarFile.getAbsolutePath());urlList.add(new URL("file:" + jarFile.getAbsolutePath()));}}
forName:通過URLClassLoader.loadClass(name),獲取加載後的指定class信息
CURDClassLoader:構造方法,整合了以上方法的功能,首先調用initLoader初始化class、及jar包路徑,然後調用loadWeb獲取class路徑及所有的jar包路徑,最後生成一個URLClassLoader。發布一個公有方法forName通過URLClassLoader.loadClass獲取指定class的信息。
private CURDClassLoader(String webRootPath) throws MalformedURLException{this.webRootPath = webRootPath;initLoader();URL[] urls = new URL[] {};classloader = new URLClassLoader(urlList.toArray(urls));}
這個類是領域建模核心,分析領域對象的類名、屬性信息等,
成員變量:
classloader:這個是剛才創建的CURDClassLoader 類的一個實例,用來加載要分析的類
方法:
analysis:此方法為該工具類的入口方法,傳入一個項目路徑、要分析的java文件,然後進行分析類的屬性與相關的字段,分析類及屬性信息是通過java的反射機制完成的,以下為完整代碼,如果有不明白的地方請百度下或留言一起學習吧。
/*** 傳入選中的JAVA文件的完整路徑,對此源文件進行領域建模分析* @param srcJava java文件完整的路徑,從包名開始,如:com.yunzaipiao.user.User* @throws Exception*/public EntityModel analysis(String projectPath, String srcJava) throws Exception{// String binPath = srcPath.replace("/src", "/bin");// binPath = binPath.substring(0, binPath.lastIndexOf("/"));// 編譯// new CURDClassCompilerAndLoad().compiler(srcPath, binPath);classloader = CURDClassLoader.getInstance(projectPath);//實體本身進行分析EntityModel entity = analysisField(srcJava);classloader.close();return entity;}/*** 分析用戶選中的ENTITY類* @param srcJava*/private EntityModel analysisField(String srcJava){if(entityMap.containsKey(srcJava))return entityMap.get(srcJava);logger.info("==============對"+srcJava+"進行建模工作============");EntityModel entity = new EntityModel();entityMap.put(srcJava, entity);Class classEntity = null;try {classEntity = classloader.forName(srcJava);} catch (ClassNotFoundException e) {e.printStackTrace();}entity.setName(classEntity.getSimpleName());entity.setClassName(classEntity.getName());analysisField(classEntity,entity);logger.info("entity.name: " + classEntity.getSimpleName());logger.info("entity.className: " + classEntity.getName());logger.info("entity.packageName: " + classEntity.getPackage().getName());logger.info("==============對"+srcJava+"進行建模完成=============");return entity;}/*** 傳入一個類,解析這個類所擁有的屬性* @param classEntity*/@SuppressWarnings("rawtypes")private void analysisField(Class classEntity,EntityModel entity){List<Class> classesForAnalysis = new ArrayList<Class>();classesForAnalysis.add(classEntity);Class supperClass = classEntity.getSuperclass();while (supperClass != null) {classesForAnalysis.add(supperClass);supperClass = supperClass.getSuperclass();}for (int i = classesForAnalysis.size() -1; i >=0; i--) {Class classForAnalysis = classesForAnalysis.get(i);Field[] fields = classForAnalysis.getDeclaredFields();Method[] methods = classForAnalysis.getDeclaredMethods();Map<String,Method> methodMap = new HashMap<String,Method>();for(Method method:methods){methodMap.put(method.getName().toLowerCase(), method);}for(Field field:fields){boolean isStatic = Modifier.isStatic(field.getModifiers());if(isStatic)continue;logger.info("分析到屬性:"+field.getName()+";類型是:【"+field.getType().getName()+"】");//分析FIELDcreateModel(field,entity);}}}private void createModel(Field field,EntityModel entity){FieldModel fieldModel = new FieldModel(field.getName(),field.getType().getName());entity.getFields().add(fieldModel);}
該包下面有三個類,ClassLoaderClear、CodeGenerator、VelocityContextUtils三個工具類,其中ClassLoaderClear為清除與釋放加載項目時的一些資源,具體細節請查看源碼吧;VelocityContextUtils就是生成一個單例模式的VelocityContext的實例,也沒有什麼好講解的,下面主要講解一下CodeGenerator類。
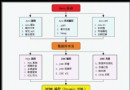
首先請看一下我們平時做項目的目錄結構,
public static void generateCode(String javaPath) throws Exception {try {String projectPath = javaPath.substring(0,javaPath.indexOf("/src") + 1);projectPath = projectPath.substring(0, projectPath.lastIndexOf("/"));logger.info("項目路徑是:" + projectPath);String srcPath = javaPath.substring(javaPath.indexOf("/src") + 4);String srcJava = srcPath.substring(1, srcPath.lastIndexOf(".java"));logger.info("要分析的實體類是:" + srcJava);srcJava = srcJava.replaceAll("/", ".");EntityModel entityModel = CURDCoreAnalysis.getInstance().analysis(projectPath, srcJava);VelocityContext context = VelocityContextUtils.getVelocityContext();context.put("entity", entityModel);FormNewFile formNewFile = createFormFile(projectPath, entityModel);formNewFile.process();AssemblerNewFile assemblerNewFile = createAssemblerFile(projectPath, entityModel);assemblerNewFile.process();} catch (Exception e) {throw e;}}
可以看到該方法,首先通過傳入的java源文件的全路徑,分析項目路徑及java類的全名稱,然後通過上面講過的CURDCoreAnalysis分析類的名稱及屬性信息,然後通過VelocityContext獲取一個實例,將分析到的信息放入velocity屬性中,然後創建一個FormNewFile,通過process方法創建Form文件,最後創建Assembler文件。
在上面的generateCode方法中調用了createFormFile、createAssemblerFile兩個方法用來創建對應的FormNewFile與AssemblerNewFile,首先看一下createFormFile方法:
private static FormNewFile createFormFile(String projectPath,EntityModel entityModel) {String className = entityModel.getClassName();String formName = entityModel.getName();if (formName.endsWith("Model")) {formName = formName.substring(0, formName.indexOf("Model"));}formName += "Form";String packageName = className.substring(0, className.lastIndexOf("."))+ ".form";packageName = packageName.replace(".model.", ".web.");FormNewFile formNewFile = new FormNewFile(formName, projectPath,packageName, NewFileType.Form, entityModel);return formNewFile;}
由代碼出可以看到,如果領域對象的結尾包含Model則去掉,然後在後面加一個後綴Form,然後分析Form文件要存儲的路徑為.form包下面,這裡由於項目特殊的原因,我們的項目中的路徑領域對象一般在model包下面,而form對象一般在web包下面,所以後面進行了替換,將model替換為web.然後創建一個FormNewFile對象。
createAssemblerFile與createFormFile類似,也就不在具體講述了。
好了,對於領域對象的Form、Assembler文件的生成基本已經完成了,可以調用CodeGenerator.generateCode(javaPath)方法,傳入一個java文件的全路徑名進行測試一下,如果不出意外會生成對應的兩個文件,但是這樣肯定不是我們的最終目的,且前面特別講述了插件的創建方式,所以我們要把該項目集成到前面幾節創建的插件項目中去。
第一步,首先將本次創建的項目打包成jar包,導出。項目右鍵->Export->JAR file,
public Object execute(ExecutionEvent event) throws ExecutionException {String path = getSelectPath();
if (null!=path) { try {CodeGenerator.generateCode(path);
MessageDialog.openInformation(
null,
"生成代碼",
"生成代碼成功!!");
} catch (Exception e) {e.printStackTrace();
}
}
return null;
}
private String getSelectPath(){IWorkbenchPage page = PlatformUI.getWorkbench().getActiveWorkbenchWindow().getActivePage();
ISelection selection = page.getSelection();
IStructuredSelection sel = (IStructuredSelection)selection;
Object element = sel.getFirstElement();
IResource resources = null;
if (element instanceof IResource) {resources = (IResource) element;
}
if (!(element instanceof IAdaptable)) {return null;
}
IAdaptable adaptable = (IAdaptable) element;
Object adapter = adaptable.getAdapter(IResource.class);
resources = (IResource) adapter;
String path = resources.getLocationURI().getPath();
if (null!=path) { if (path.startsWith("/") && path.substring(2, 3).equals(":")) {path = path.substring(1);
}
}
System.out.println(path);
return path;
}
在插件項目中右鍵,run as Eclipse Application,運行成功後,新建一個web項目,並更改項目的編譯class文件的輸出路徑為:web/WEB-INF/classes路徑中,如下圖:

所有完成後,新建一個類,點擊生成代碼,生成後的目錄及代碼如下圖:

好了,寫的有點倉促,如果有不明白或不正確的地方歡迎指正。。。
附件鏈接地址:http://files.cnblogs.com/files/haifeng1990/TestPlugin.rar