yum update升級以後的系統版本為
[root@yl-web yl]# cat /etc/redhat-release
CentOS Linux release 7.1.1503 (Core)
一般網上給出的資料都是
#yum install mysql
#yum install mysql-server
#yum install mysql-devel
安裝mysql和mysql-devel都成功,但是安裝mysql-server失敗,如下:
[root@yl-web yl]# yum install mysql-server
Loaded plugins: fastestmirror
Loading mirror speeds from cached hostfile
 * base: mirrors.sina.cn
 * extras: mirrors.sina.cn
 * updates: mirrors.sina.cn
No package mysql-server available.
Error: Nothing to do
查資料發現是CentOS 7 版本將MySQL數據庫軟件從默認的程序列表中移除,用mariadb代替了。
有兩種解決辦法:
MariaDB數據庫管理系統是MySQL的一個分支,主要由開源社區在維護,采用GPL授權許可。開發這個分支的原因之一是:甲骨文公司收購了MySQL後,有將MySQL閉源的潛在風險,因此社區采用分支的方式來避開這個風險。MariaDB的目的是完全兼容MySQL,包括API和命令行,使之能輕松成為MySQL的代替品。
安裝mariadb,大小59 M。
[root@yl-web yl]# yum install mariadb-server mariadb
mariadb數據庫的相關命令是:
systemctl start mariadb #啟動MariaDB
systemctl stop mariadb #停止MariaDB
systemctl restart mariadb #重啟MariaDB
systemctl enable mariadb #設置開機啟動
所以先啟動數據庫
[root@yl-web yl]# systemctl start mariadb
然後就可以正常使用mysql了
[root@yl-web yl]# mysql -u root -p
Enter password:
Welcome to the MariaDB monitor.  Commands end with ; or \g.
Your MariaDB connection id is 3
Server version: 5.5.41-MariaDB MariaDB Server

Copyright (c) 2000, 2014, Oracle, MariaDB Corporation Ab and others.

Type 'help;' or '\h' for help. Type '\c' to clear the current input statement.

MariaDB [(none)]> show databases;
+--------------------+
| Database           |
+--------------------+
| information_schema |
| mysql              |
| performance_schema |
| test               |
+--------------------+
4 rows in set (0.00 sec)

MariaDB [(none)]>
安裝mariadb後顯示的也是 MariaDB [(none)]> ,可能看起來有點不習慣。下面是第二種方法。
# wget http://dev.mysql.com/get/mysql-community-release-el7-5.noarch.rpm
# rpm -ivh mysql-community-release-el7-5.noarch.rpm
# yum install mysql-community-server
安裝成功後重啟mysql服務。
# service mysqld restart
初次安裝mysql,root賬戶沒有密碼。
[root@yl-web yl]# mysql -u root
Welcome to the MySQL monitor.  Commands end with ; or \g.
Your MySQL connection id is 3
Server version: 5.6.26 MySQL Community Server (GPL)

Copyright (c) 2000, 2015, Oracle and/or its affiliates. All rights reserved.

Oracle is a registered trademark of Oracle Corporation and/or its
affiliates. Other names may be trademarks of their respective
owners.

Type 'help;' or '\h' for help. Type '\c' to clear the current input statement.

mysql> show databases;
+--------------------+
| Database           |
+--------------------+
| information_schema |
| mysql              |
| performance_schema |
| test               |
+--------------------+
4 rows in set (0.01 sec)

mysql>
設置密碼
mysql> set password for 'root'@'localhost' =password('password');
Query OK, 0 rows affected (0.00 sec)

mysql>
不需要重啟數據庫即可生效。
在mysql安裝過程中如下內容:
Installed:
  mysql-community-client.x86_64 0:5.6.26-2.el7                mysql-community-devel.x86_64 0:5.6.26-2.el7
  mysql-community-libs.x86_64 0:5.6.26-2.el7                  mysql-community-server.x86_64 0:5.6.26-2.el7

Dependency Installed:
  mysql-community-common.x86_64 0:5.6.26-2.el7

Replaced:
  mariadb.x86_64 1:5.5.41-2.el7_0          mariadb-devel.x86_64 1:5.5.41-2.el7_0   mariadb-libs.x86_64 1:5.5.41-2.el7_0
  mariadb-server.x86_64 1:5.5.41-2.el7_0
所以安裝完以後mariadb自動就被替換了,將不再生效。
[root@yl-web yl]# rpm -qa |grep mariadb
[root@yl-web yl]#
mysql配置文件為/etc/my.cnf
最後加上編碼配置
[mysql]
default-character-set =utf8
這裡的字符編碼必須和/usr/share/mysql/charsets/Index.xml中一致。

把在所有數據庫的所有表的所有權限賦值給位於所有IP地址的root用戶。
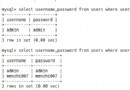
mysql> grant all privileges on *.* to root@'%'identified by 'password';
如果是新用戶而不是root,則要先新建用戶
mysql>create user 'username'@'%' identified by 'password';
此時就可以進行遠程連接了。
本文作者starof,因知識本身在變化,作者也在不斷學習成長,文章內容也不定時更新,為避免誤導讀者,方便追根溯源,請諸位轉載注明出處:http://www.cnblogs.com/starof/p/4680083.html有問題歡迎與我討論,共同進步。