前提
在CentOS上安裝phpMyAdmin,你第一步需要架設一台Web服務器(如Apache或nginx),安裝好MySQL/MariaDB數據庫和PHP。根據你的偏好和需求,你可以從LAMP和LEMP中選擇一種安裝。
另一個要求是允許在你的CentOS上安裝EPEL庫。如果你還沒設置過請猛戳這裡。
在CentOS6或7上安裝phpMyAdmin
一旦你設置了EPEL庫,你就能輕松地用以下命令安裝phpMyAdmin了。
在CentOS 7上:
$ sudo yum install phpmyadmin
在CentOS 7上:
$ sudo yum install phpmyadmin php-mcrypt
在CentOS 7上配置phpMyAdmin
默認情況下,CentOS 7上的phpMyAdmin只允許從回環地址(127.0.0.1)訪問。為了能遠程連接,你需要改動它的配置。
用文本編輯器打開phpMyAdmin的配置文件(路徑:/etc/httpd/conf.d/phpMyAdmin.conf),找出並注釋掉帶有"Require ip XXXX"字樣的代碼行。會有四處這樣的代碼行,用"Require all granted"取而代之。重新改動過的配置文件如下所示。
  $ sudo vi /etc/httpd/conf.d/phpMyAdmin.conf

  . . . . .
  <Directory /usr/share/phpMyAdmin/>
    AddDefaultCharset UTF-8

    <IfModule mod_authz_core.c>
     # Apache 2.4
     <RequireAny>
      #Require ip 127.0.0.1
      #Require ip ::1
      Require all granted
     </RequireAny>
    </IfModule>
    <IfModule !mod_authz_core.c>
     # Apache 2.2
     Order Deny,Allow
     Deny from All
     Allow from 127.0.0.1
     Allow from ::1
    </IfModule>
  </Directory>

  <Directory /usr/share/phpMyAdmin/setup/>
    <IfModule mod_authz_core.c>
     # Apache 2.4
     <RequireAny>
      #Require ip 127.0.0.1
      #Require ip ::1
      Require all granted
     </RequireAny>
    </IfModule>
    <IfModule !mod_authz_core.c>
     # Apache 2.2
     Order Deny,Allow
     Deny from All
     Allow from 127.0.0.1
     Allow from ::1
    </IfModule>
  </Directory>
  . . . . .
最後,重啟httpd使改動生效。
$ sudo systemctl restart httpd
在CentOS 6上配置phpMyAdmin
默認情況下,CentOS 6上的phpMyAdmin是禁止從每個IP地址訪問的。為了能遠程連接,你需要改動它的配置。
用文本編輯器打開phpMyAdmin的配置文件(路徑:/etc/httpd/conf.d/phpMyAdmin.conf),找出並注釋掉"Deny from all"字樣的代碼行。然後把"Allow from 127.0.0.1"字樣的代碼行改成"Allow from 0.0.0.0"。重新改動過的配置文件如下所示。
  $ sudo vi /etc/httpd/conf.d/phpmyadmin.conf

  <Directory "/usr/share/phpmyadmin">
   Order Deny,Allow
  # Deny from all
   Allow from 0.0.0.0
  </Directory>
下一步是將phpMyAdmin的配置文件用blowfish加密工具加密。這一步需要加密cookie裡的密碼來作為基於cookie的部分認證。
用文本編輯器打開如下路徑所示的文件並且用blowfish設置一個隨機密碼,如下所示。
  $ sudo vi /usr/share/phpmyadmin/config.inc.php

  $cfg['blowfish_secret'] = 'kd5G}d33aXDc50!'; /* YOU MUST FILL IN THIS FOR COOKIE AUTH! */
最後,重啟httpd使改動生效。
$ sudo service httpd restart
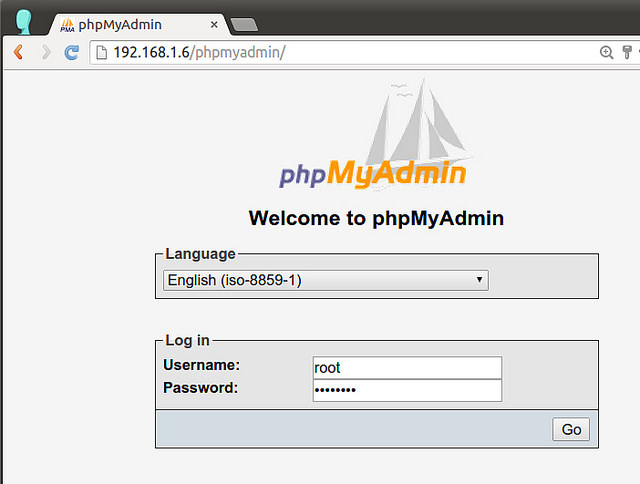
測試phpMyAdmin
測試phpMyAdmin是否設置成功,訪問這個頁面:http://<web-server-ip-addresss>/phpmyadmin