下載mysql:
http://downloads.mysql.com/archives.php
選擇一個mysql的版本,之後一定要看好,下glibc的。如:mysql-5.0.90-linux-i686-glibc23.tar.gz
本例中下載到了/media目錄下,這個不是好習慣...
▲安裝mysql:
下面是linux命令
[plain] view plaincopy
至此,mysql安裝成功。
因為在運行狀態,我沒有ctrl-c,只好再開一個ssh窗口...
▲為mysql的root用戶添加密碼
下面是linux命令
[c-sharp] view plaincopy
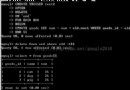
進入mysql後:
[c-sharp] view plaincopy
其實是設置了root的localhost的密碼為chang
顯示執行成功,然後exit退出mysql。
之後,再次登錄mysql,這次要用密碼了:
[c-sharp] view plaincopy
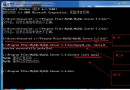
輸入密碼chang之後,可以正常登錄,如下:
Welcome to the MySQL monitor. Commands end with ; or /g.
Your MySQL connection id is 1
Server version: 5.0.90 MySQL Community Server (GPL)
Type 'help;' or '/h' for help. Type '/c' to clear the current input statement.
查看一下用戶信息:
[c-sharp] view plaincopy
結果如下:
+------+-----------+----------+
| user | host | password |
+------+-----------+----------+
| root | localhost | *F05D019BA3BEC01CA9FBD4141E4EA57A28EF3EDF | ← (root密碼為chang)
| root | linux | | ← (root密碼為空)
| root | 127.0.0.1 | | ← (root密碼為空)
| | localhost | |
+------+-----------+----------+
分別更改它們的密碼:
[c-sharp] view plaincopy
[c-sharp] view plaincopy
[c-sharp] view plaincopy
再次查看用戶信息會發現已經更改過來。
然後退出mysql。
▲把mysql做成服務
[c-sharp] view plaincopy
啟動mysql服務
[c-sharp] view plaincopy
這時候就可以重啟機器試試了
重啟後再登陸mysql,發現可以登陸。服務制作成功!
▲配置mysql
[c-sharp] view plaincopy
(注釋:如果沒有自動生成my.cnf文件,那麼:安裝完的mysql包下有個support-files文件夾,其中有my-huge.cnf等,將my-huge copy一份,改名為my.cnf,將其適當地修改(當然是根據你的數據庫配置)然後copy至/etc/my.cnf)
打開my.cnf後
找到[client] 添加:
default-character-set = utf8 # 默認字符集為utf8
找到[mysqld] 添加:
default-character-set = utf8 #默認字符集為utf8
init_connect = 'SET NAMES utf8' #設定連接mysql數據庫時使用utf8編碼,以讓mysql數據庫為utf8運行
修改好後,重新啟動即可.
我這裡是重啟了mysql的服務:
[c-sharp] view plaincopy
之後進入mysql,查一下是否更改了字符集:
[c-sharp] view plaincopy
出現下面的畫面:
+--------------------------+----------------------------------------+
| Variable_name | Value |
+--------------------------+----------------------------------------+
| character_set_client | utf8 |
| character_set_connection | utf8 |
| character_set_database | utf8 |
| character_set_filesystem | binary |
| character_set_results | utf8 |
| character_set_server | utf8 |
| character_set_system | utf8 |
| character_sets_dir | /usr/local/mysql/share/mysql/charsets/ |
+--------------------------+----------------------------------------+
好,數據庫語言完畢。
▲打開mysql的遠程訪問
mysql默認是不允許遠程訪問的。
用密碼登陸mysql,可以正常登陸,但是換台機器用工具連,就報錯:
ERROR 1130: Host 192.168.1.6 is not allowed to connect to this MySQL server
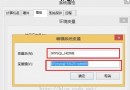
方法: 改表法。mysql默認是不允許遠程訪問的,只能在localhost訪問。這個時候只要在localhost的那台電腦,登入mysql後,更改 “mysql” 數據庫裡的 “user” 表裡的 “host” 項,從”localhost”改成”%”
mysql -u root -p
Enter password: chang
mysql>use mysql;
mysql>update user set host = '%' where user = 'root'; //可能會報錯
mysql>flush privileges;
mysql>select host,user from user where user='root';
執行完上面的,就可以遠程連接了!
注釋:
update user set host = '%' where user = 'root'; //這個命令執行錯誤時,可能會報錯:
ERROR 1062 (23000): Duplicate entry '%-root' for key 1;
解決方法:
1,不用管它。呵呵。
2,改成這樣執行
update user set host='%' where user='root' and host='localhost';
也就是把localhost改成了所有主機。
---------------------------------------------------
之後運行app程序,報錯:
ImportError: libmysqlclient_r.so.15: cannot open shared object file: No such file or directory
解決辦法是把/usr/local/mysql/lib下的
libmysqlclient_r.so.15
拷貝到/usr/lib解決。
至此,mysql安裝配置完畢!
================= 我是華麗的分割線 ========================
----------------------------------------------------
■附注:
附注1: 重啟和關閉mysql服務
重啟mysql服務
:$ sudo /etc/init.d/mysql restart
關閉mysql服務
:$ sudo /etc/init.d/mysql stop
----------------------------------------------------
附注2: 非服務狀態下,啟動和停止mysql
啟動mysql
代碼:
:& cd /usr/local/mysql
:& bin/mysqld_safe --basedir=/usr/local/mysql --user=mysql &
停止mysql
代碼:
:& cd /usr/local/mysql
:$ bin/mysqladmin -uroot -ppassw0rd shutdown
----------------------------------------------------
附注3: mysql命令行中文顯示?號
mysql> set names utf8;
---------------------------------------------------
附注4: mysql的數據庫存放路徑
/var/lib/mysql
---------------------------------------------------
附注5: 從mysql中導出和導入數據
mysqldump 數據庫名 > 文件名 #導出數據庫
mysqladmin create 數據庫名 #建立數據庫
mysql 數據庫名 < 文件名 #導入數據庫
---------------------------------------------------
附注6: 修改mysql的root口令
sudo mysqladmin -u root -p password '你的新密碼'
或者:括號裡是新密碼
use mysql;
update user set Password=password('chang') where User='root';
flush privileges;
---------------------------------------------------
附注7: 忘了mysql的root口令怎麼辦
sudo /etc/init.d/mysql stop
sudo mysqld_safe --skip-grant-tables &
sudo mysqladmin -u user password 'newpassword
sudo mysqladmin flush-privileges
---------------------------------------------------
附注8: 輸入要登錄的mysql主機
./mysql -u root -h 127.0.0.1 -p
執行安全設置
#bin/mysql_secure_installation


NOTE: RUNNING ALL PARTS OF THIS SCRIPT IS RECOMMENDED FOR ALL MySQL
      SERVERS IN PRODUCTION USE!  PLEASE READ EACH STEP CAREFULLY!

In order to log into MySQL to secure it, we'll need the current
password for the root user.  If you've just installed MySQL, and
you haven't set the root password yet, the password will be blank,
so you should just press enter here.

Enter current password for root (enter for none):<---輸入現在的root密碼,因為我們還沒設置,直接回車
OK, successfully used password, moving on...

Setting the root password ensures that nobody can log into the MySQL
root user without the proper authorisation.

Set root password? [Y/n] Y   <---是否設定root密碼,當然設置了,輸入Y回車
New password: <---輸入root密碼,並回車,輸入的過程中不會有任何顯示
Re-enter new password: <---再次輸入root密碼,並回車,輸入的過程中不會有任何顯示
Password updated successfully!
Reloading privilege tables..
 ... Success!

By default, a MySQL installation has an anonymous user, allowing anyone
to log into MySQL without having to have a user account created for
them.  This is intended only for testing, and to make the installation
go a bit smoother.  You should remove them before moving into a
production environment.

Remove anonymous users? [Y/n] Y <---是否刪除匿名用戶,刪除,輸入Y回車
 ... Success!

Normally, root should only be allowed to connect from 'localhost'.  This
ensures that someone cannot guess at the root password from the network.

Disallow root login remotely? [Y/n] Y <---是否刪禁止root用戶遠程登錄,當然禁止,輸入Y回車
 ... Success!

By default, MySQL comes with a database named 'test' that anyone can
access.  This is also intended only for testing, and should be removed
before moving into a production environment.

Remove test database and access to it? [Y/n] <---是否刪除測試數據庫test,刪除,輸入Y回車
 - Dropping test database...
 ... Success!
 - Removing privileges on test database...
 ... Success!

Reloading the privilege tables will ensure that all changes made so far
will take effect immediately.

Reload privilege tables now? [Y/n] Y <---刷新權限,輸入Y回車
 ... Success!

Cleaning up...

All done!  If you've completed all of the above steps, your MySQL
installation should now be secure.

Thanks for using MySQL!