這裡簡單的介紹一下關於mysql熱備份安裝的方法,主要是在Ubuntu下,有需要的朋友可以參考一下。
1.安裝最新的Ubuntu Server版本,並更新系統。
2.安裝MySQL Server:sudo apt-get instal mysql-server,然後設置管理員密碼,去掉本地地址綁定,以便可以進行遠程訪問。
主:192.168.137.12
從:192.168.137.13
3.設置utf8字符集來支持中文,在主從服務器的配置文件/etc/mysql/my.cnf中加入:
代碼如下 復制代碼
[client]
default-character-set = utf8
[mysqld]
default-character-set = utf8
init_connect = 'SET NAMES utf8;'
4.在服務器中啟動備份。首先在主服務器在配置文件中添加下面的內容。其中s3(舉個例子)為需要同步的數據庫。
代碼如下 復制代碼
[mysqld]
log-bin = mysql-bin
server-id = 1
binlog-do-db = s3
5.重新啟動主數據庫。
代碼如下 復制代碼 sudo service start mysql6.連接到主數據庫,並創建你需要同步的數據庫,如果已經存在可以忽略這一步。
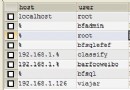
代碼如下 復制代碼 mysql –u root –p7.在服務器中添加一個賬號(sync)用於同步數據庫,並賦予從備份的權限,重要。
代碼如下 復制代碼 grant replication slave on *.* to 'sync'@'%' identified by '12345'8.記錄s3數據庫的日志文件名稱和位置,用於從機備份開始的位置。
代碼如下 復制代碼 mysql> show master status;9.修改從機的配置文件。
代碼如下 復制代碼 [mysqld]
10.重新啟動從機,新建數據庫(s3)或者從原來的數據庫恢復數據庫。並執行命令:
代碼如下 復制代碼 change master to MASTER_HOST='192.168.137.12', MASTER_USER='sync',MASTER_PASSWORD='12345',MASTER_LOG_FILE='mysql-bin.000007',MASTER_LOG_POS=106;11.啟動從機備份,並查看從機狀態。
代碼如下 復制代碼start slave;
show slave statusG;
*************************** 1. row ***************************
Slave_IO_State: Waiting for master to send event
Master_Host: 192.168.137.12
Master_User: sync
Master_Port: 3306
Connect_Retry: 60
Master_Log_File: mysql-bin.000007
Read_Master_Log_Pos: 106
Relay_Log_File: S3-DB-SLAVE-1-relay-bin.000010
Relay_Log_Pos: 251
Relay_Master_Log_File: mysql-bin.000007
Slave_IO_Running: Yes
Slave_SQL_Running: Yes
Replicate_Do_DB: s3
Replicate_Ignore_DB:
Replicate_Do_Table:
Replicate_Ignore_Table:
Replicate_Wild_Do_Table:
Replicate_Wild_Ignore_Table:
Last_Errno: 0
Last_Error:
Skip_Counter: 0
Exec_Master_Log_Pos: 106
Relay_Log_Space: 559
Until_Condition: None
Until_Log_File:
Until_Log_Pos: 0
Master_SSL_Allowed: No
Master_SSL_CA_File:
Master_SSL_CA_Path:
Master_SSL_Cert:
Master_SSL_Cipher:
Master_SSL_Key:
Seconds_Behind_Master: 0
Master_SSL_Verify_Server_Cert: No
Last_IO_Errno: 0
Last_IO_Error:
Last_SQL_Errno: 0
Last_SQL_Error:
1 row in set (0.00 sec)
Slave_IO_Running: Yes
Slave_SQL_Running: Yes
表示工作正常,否者出現問題。出現問題重要的解決工具是查看日志記錄。
代碼如下 復制代碼cat /var/log/mysql/error.log