以下步驟描述EBS R12.2中如何注冊客戶化模塊,參考Oracle support
Creating a CustomApplication in Oracle E-Business Suite Release 12.2 (文檔 ID 1577707.1)
1、下載補丁3636980,拷貝3636980\izu\admin目錄下3個.txt文件到/tmp目錄下進行修改
如:izuprod.txt改名為cuxhdprod.txt
izuterr.txt改名為cuxhdterr.txt
2、修改newprods.txt內容
product=izu
base_product_top=*APPL_TOP*
oracle_schema=izu
sizing_factor=100
main_tspace=USER_DATA
index_tspace=USER_IDX
temp_tspace=TEMP
default_tspace=USER_DATA
以上為newprods.txt內容,修改為所要注冊模塊對應值,如:
product=cuxhd
base_product_top=*APPL_TOP*
oracle_schema=cuxhd
sizing_factor=100
main_tspace=APPS_TS_TX_DATA
index_tspace=APPS_TS_TX_IDX
temp_tspace=TEMP
default_tspace=APPS_TS_TX_DATA
注意:文件中izu修改為cuxhd,IZU修改為CUXHD
3、修改cuxhdprod.txt文件
替換文件中izu為cuxhd,替換prodid 278為cuxhd的唯一number
注意:文件中izu修改為cuxhd,IZU修改為CUXHD
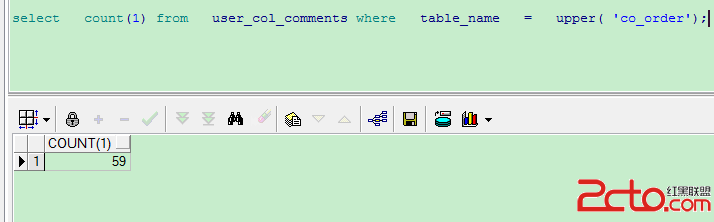
如下SQL,可檢查想要設置的prodid是否被占用
select decode(count,0, 'Selected number is Available', 'Selected number already in use') Status,&&enter_custom_applID selected_number
from
(
select count(*) as count from
(
select 'x' from fnd_oracle_userid
where oracle_id= &&enter_custom_applID
union
select 'x' from fnd_application
where application_id=&&enter_custom_applID
)
);
運行上述SQL,輸入想要設置的prodid
4、修改cuxhdterr.txt文件
替換文件中izu為cuxhd,修改Oracle_Support_Diagnostic_Tools為cuxhd_custom_app
注意:文件中izu修改為cuxhd,IZU修改為CUXHD
5、拷貝上述三個.txt文件到$APPL_TOP/admin下
6、運行adsplice命令
adsplice必須在$APPL_TOP/admin下運行
運行adsplice
當遇到如下提示時,默認回車
The defaultdirectory is [/u01/VS03/apps/apps_st/appl/admin] :
Please enter thename of your AD Splicer control file [newprods.txt] :
Do you wish toregenerate your environment file [Yes] ?
7、確認客戶化模塊是否在數據庫中創建
查看fnd_application中是否有CUXHD記錄
select * fromfnd_application where application_short_name = 'CUXHD';
通過application_id查看fnd_product_installations中是否有記錄
select * fromfnd_product_installations where APPLICATION_ID = 5001;
查看數據庫用戶是否創建成功
select * fromdba_users where username = 'CUXHD';
[appl03@vs006admin]$ sqlplus cuxhd/cuxhd
重新應用環境變量,確認$CUXHD_TOP
[appl03@vs006 ~]$echo $CUXHD_TOP
/u01/VS03/apps/apps_st/appl/cuxhd/12.0.0
[appl03@vs006 ~]$ ls$CUXHD_TOP
admin log mesg out sql
注意:如果之前使用fnd_oracle_user_pkg.lod_row API注冊過模塊,因為這些注冊的密碼將會被加密,注冊後運行adpatch、adsplice將出錯。
需要使用FNDCPASS來修改密碼
如果應用使用sharedAPPL_TOP那麼,只需要在剩余節點運行autoconfig
如果應用使用的是非sharedAPPL_TOP那麼,需要在剩余節點重復上述5、6、7三步操作
以下步驟依據需求操作
1、創建客戶化對象
在$CUXHD_TOP中,
a)可以為form創建$CUXHD_TOP/forms/US和$CUXHD_TOP/forms/ZHS目錄
b)可以為package創建$CUXHD_TOP/admin/sql目錄
c)可以為report創建$CUXHD_TOP/reports/US和$CUXHD_TOP/reports/ZHS
.
.
.
2、將所有客戶化data object權限授予APPS用戶
SQL> grant allprivileges on myTable to apps;
APPS用戶下創建相關同義詞
SQL>createsynonym myTable for CUXHD.myTable;>
問題:
1、當下一次使用adop打補丁時,在prepare階段,將會同步adsplice的操作到另一套FS
如果在同步過程失敗,日志$APPL_TOP/admin/$TWO_TASK/log/adsplicelog出現
UPDATEFND_ORACLE_USERID SET READ_ONLY_FLAG = 'A' WHERE ORACLE_ID
解決方法:應用Patch18815526:R12.AD.C,重啟prepare phase