安裝依賴
[root@centos7-1 ~]# yum -y install gcc openssl-devel libyaml-devel libffi-devel readline-devel zlib-devel gdbm-devel ncurses-devel gcc-c++ automake autoconf
安裝 redis
[root@centos7-1 ~]# wget http://download.redis.io/releases/redis-3.0.6.tar.gz
[root@centos7-1 ~]# tar xvf redis-3.0.6.tar.gz
[root@centos7-1 ~]# cd redis-3.0.6/
[root@centos7-1 redis-3.0.6]# make MALLOC=libc
[root@centos7-1 redis-3.0.6]# make install
啟動 server
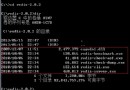
通過命令 redis-server 來啟動 redis server。通過下面的輸出信息可以看出這次啟動並沒有指定配置文件,可以使用命令 redis-server /path/to/redis.conf 來指定具體的配置文件啟動。
[root@centos7-1 redis-3.0.6]# redis-server
4435:C 25 Jan 11:40:48.816 # Warning: no config file specified, using the default config. In order to specify a config file use redis-server /path/to/redis.conf
4435:M 25 Jan 11:40:48.817 * Increased maximum number of open files to 10032 (it was originally set to 1024).
    _._
   _.-``__ ''-._
  _.-`` `. `_. ''-._   Redis 3.0.6 (00000000/0) 64 bit
 .-`` .-```. ```\/ _.,_ ''-._
 ( '  ,  .-` | `, )  Running in standalone mode
 |`-._`-...-` __...-.``-._|'` _.-'|  Port: 6379
 | `-._ `._ /  _.-' |  PID: 4435
 `-._ `-._ `-./ _.-' _.-'
 |`-._`-._ `-.__.-' _.-'_.-'|
 | `-._`-._  _.-'_.-' |   http://redis.io
 `-._ `-._`-.__.-'_.-' _.-'
 |`-._`-._ `-.__.-' _.-'_.-'|
 | `-._`-._  _.-'_.-' |
 `-._ `-._`-.__.-'_.-' _.-'
  `-._ `-.__.-' _.-'
   `-._  _.-'
    `-.__.-'
4435:M 25 Jan 11:40:48.817 # WARNING: The TCP backlog setting of 511 cannot be enforced because /proc/sys/net/core/somaxconn is set to the lower value of 128.
4435:M 25 Jan 11:40:48.817 # Server started, Redis version 3.0.6
4435:M 25 Jan 11:40:48.817 # WARNING overcommit_memory is set to 0! Background save may fail under low memory condition. To fix this issue add 'vm.overcommit_memory = 1' to /etc/sysctl.conf and then reboot or run the command 'sysctl vm.overcommit_memory=1' for this to take effect.
4435:M 25 Jan 11:40:48.817 # WARNING you have Transparent Huge Pages (THP) support enabled in your kernel. This will create latency and memory usage issues with Redis. To fix this issue run the command 'echo never > /sys/kernel/mm/transparent_hugepage/enabled' as root, and add it to your /etc/rc.local in order to retain the setting after a reboot. Redis must be restarted after THP is disabled.
4435:M 25 Jan 11:40:48.817 * DB loaded from disk: 0.000 seconds
4435:M 25 Jan 11:40:48.817 * The server is now ready to accept connections on port 6379
到此,單節點的 Redis server 已經安裝完畢,以下進入配置和安裝集群的過程。
創建集群中的6個節點
集群配置文件
集群相關的配置文件主要修改 redis.conf 中的一下幾個地方,因為都部署在一個服務器上,每個節點的端口不同。
[root@centos7-1 redis-3.0.6]$ vi redis.conf
#修改以下地方
port 7000
cluster-enabled yes
cluster-config-file nodes-7000.conf
cluster-node-timeout 5000
appendonly yes
每個節點的配置文件
創建6個文件夾,分別表示一個 redis 節點,文件夾使用 redis 節點的端口號命名,文件裡存放每個節點的配置文件。
[root@centos7-1 redis-3.0.6]# mkdir /usr/local/redis-cluster
[root@centos7-1 redis-3.0.6]# cd /usr/local/redis-cluster
[root@centos7-1 redis-cluster]# mkdir 7000 7001 7002 7003 7004 7005
拷貝 redis.conf 拷貝到6個文件夾中
[root@centos7-1 redis-cluster]# cp ~/redis-3.0.6/redis.conf 7000
[root@centos7-1 redis-cluster]# cp ~/redis-3.0.6/redis.conf 7001
[root@centos7-1 redis-cluster]# cp ~/redis-3.0.6/redis.conf 7002
[root@centos7-1 redis-cluster]# cp ~/redis-3.0.6/redis.conf 7003
[root@centos7-1 redis-cluster]# cp ~/redis-3.0.6/redis.conf 7004
[root@centos7-1 redis-cluster]# cp ~/redis-3.0.6/redis.conf 7005
並修改每個配置中的內容為各自節點的端口,注意 port 和 cluster-config-file 的值必須唯一。
分別啟動每個節點
[root@centos7-1 ~]# redis-server /usr/local/redis-cluster/7000/redis.conf
[root@centos7-1 ~]# redis-server /usr/local/redis-cluster/7001/redis.conf
[root@centos7-1 ~]# redis-server /usr/local/redis-cluster/7002/redis.conf
[root@centos7-1 ~]# redis-server /usr/local/redis-cluster/7003/redis.conf
[root@centos7-1 ~]# redis-server /usr/local/redis-cluster/7004/redis.conf
[root@centos7-1 ~]# redis-server /usr/local/redis-cluster/7005/redis.conf
啟動完成後查看進程
[root@centos7-1 ~]# ps -ef | grep redis
root  4704 2177 0 12:12 pts/0 00:00:07 redis-server *:7000 [cluster]
root  4707 4599 0 12:12 pts/1 00:00:07 redis-server *:7001 [cluster]
root  4710 4638 0 12:12 pts/2 00:00:07 redis-server *:7002 [cluster]
root  4752 4717 0 12:12 pts/3 00:00:07 redis-server *:7003 [cluster]
root  4788 4759 0 12:12 pts/4 00:00:07 redis-server *:7004 [cluster]
root  4824 4795 0 12:13 pts/5 00:00:07 redis-server *:7005 [cluster]
root  9018 8984 0 14:08 pts/6 00:00:00 grep --color=auto redis
建立 Redis 集群
上面的步驟分別創建了6個節點,並已經啟動,這裡要把這6個節點加入到一個集群裡面。redis 已經為我們提供了集群操作的腳本 redis-trib.rb , 操作起來很簡單, 繼續。
安裝 ruby
由於集群操作需要用到 ruby 腳本 redis-trib.rb , 所以要安裝 ruby 和 rubygems
[root@centos7-1 ~]# yum -y install ruby rubygems
[root@centos7-1 ~]# gem install redis --version 3.0.6
Fetching: redis-3.0.6.gem (100%)
Successfully installed redis-3.0.6
Parsing documentation for redis-3.0.6
Installing ri documentation for redis-3.0.6
1 gem installed
redis-trib.rb 是一個 ruby 腳本工具,用來建立和管理 redis 集群,因為使用比較頻繁,所以拷貝腳本 redis-trib.rb 到 /usr/local/bin/
[root@centos7-1 redis-3.0.6]$ cp src/redis-trib.rb /usr/local/bin/
創建集群
[root@centos7-1 ~]# redis-trib.rb create --replicas 1 127.0.0.1:7000 127.0.0.1:7001 127.0.0.1:7002 127.0.0.1:7003 127.0.0.1:7004 127.0.0.1:7005
>>> Creating cluster
>>> Performing hash slots allocation on 6 nodes...
Using 3 masters:
127.0.0.1:7000
127.0.0.1:7001
127.0.0.1:7002
Adding replica 127.0.0.1:7003 to 127.0.0.1:7000
Adding replica 127.0.0.1:7004 to 127.0.0.1:7001
Adding replica 127.0.0.1:7005 to 127.0.0.1:7002
M: d900d3667196121f95bdbd68ca2317926a6950bc 127.0.0.1:7000
 slots:0-5460 (5461 slots) master
M: b662853288cc89a3b78f70120d57c0a34f6a91d5 127.0.0.1:7001
 slots:5461-10922 (5462 slots) master
M: 6dc5ee101c2432ec4c1d934d54a6a3565116bbff 127.0.0.1:7002
 slots:10923-16383 (5461 slots) master
S: d18e50ac6aff2f612fac43da74a79288aa574c87 127.0.0.1:7003
 replicates d900d3667196121f95bdbd68ca2317926a6950bc
S: 85f6455e14d03ebaefeca3dbe3c78c92f2f76ead 127.0.0.1:7004
 replicates b662853288cc89a3b78f70120d57c0a34f6a91d5
S: 89d792acda7f2c99c95b0d3947572647cf9edc67 127.0.0.1:7005
 replicates 6dc5ee101c2432ec4c1d934d54a6a3565116bbff
Can I set the above configuration? (type 'yes' to accept): yes
>>> Nodes configuration updated
>>> Assign a different config epoch to each node
>>> Sending CLUSTER MEET messages to join the cluster
Waiting for the cluster to join..
>>> Performing Cluster Check (using node 127.0.0.1:7000)
M: d900d3667196121f95bdbd68ca2317926a6950bc 127.0.0.1:7000
 slots:0-5460 (5461 slots) master
M: b662853288cc89a3b78f70120d57c0a34f6a91d5 127.0.0.1:7001
 slots:5461-10922 (5462 slots) master
M: 6dc5ee101c2432ec4c1d934d54a6a3565116bbff 127.0.0.1:7002
 slots:10923-16383 (5461 slots) master
M: d18e50ac6aff2f612fac43da74a79288aa574c87 127.0.0.1:7003
 slots: (0 slots) master
 replicates d900d3667196121f95bdbd68ca2317926a6950bc
M: 85f6455e14d03ebaefeca3dbe3c78c92f2f76ead 127.0.0.1:7004
 slots: (0 slots) master
 replicates b662853288cc89a3b78f70120d57c0a34f6a91d5
M: 89d792acda7f2c99c95b0d3947572647cf9edc67 127.0.0.1:7005
 slots: (0 slots) master
 replicates 6dc5ee101c2432ec4c1d934d54a6a3565116bbff
[OK] All nodes agree about slots configuration.
>>> Check for open slots...
>>> Check slots coverage...
[OK] All 16384 slots covered.
以上 create 命令創建了集群,選項 –replicas 1 表示每個 Master 都需要一個 Slave。所以結果是集群中創建了3個 Master 節點 和 3個 Slave 節點。
上面信息中 M 表示 Master 節點, S 表示 Slave 節點。
由此可以看出三組 Master 和 Slave 關系如下:
M: d900d3667196121f95bdbd68ca2317926a6950bc -> S: d18e50ac6aff2f612fac43da74a79288aa574c87
M: 6dc5ee101c2432ec4c1d934d54a6a3565116bbff -> S: 89d792acda7f2c99c95b0d3947572647cf9edc67
M: b662853288cc89a3b78f70120d57c0a34f6a91d5 -> S: 85f6455e14d03ebaefeca3dbe3c78c92f2f76ead
檢測集群的狀態
[root@centos7-1 ~]# redis-trib.rb check 127.0.0.1:7000
>>> Performing Cluster Check (using node 127.0.0.1:7000)
M: d900d3667196121f95bdbd68ca2317926a6950bc 127.0.0.1:7000
 slots:0-5460 (5461 slots) master
 1 additional replica(s)
M: 6dc5ee101c2432ec4c1d934d54a6a3565116bbff 127.0.0.1:7002
 slots:10923-16383 (5461 slots) master
 1 additional replica(s)
S: 89d792acda7f2c99c95b0d3947572647cf9edc67 127.0.0.1:7005
 slots: (0 slots) slave
 replicates 6dc5ee101c2432ec4c1d934d54a6a3565116bbff
S: d18e50ac6aff2f612fac43da74a79288aa574c87 127.0.0.1:7003
 slots: (0 slots) slave
 replicates d900d3667196121f95bdbd68ca2317926a6950bc
S: 85f6455e14d03ebaefeca3dbe3c78c92f2f76ead 127.0.0.1:7004
 slots: (0 slots) slave
 replicates b662853288cc89a3b78f70120d57c0a34f6a91d5
M: b662853288cc89a3b78f70120d57c0a34f6a91d5 127.0.0.1:7001
 slots:5461-10922 (5462 slots) master
 1 additional replica(s)
[OK] All nodes agree about slots configuration.
>>> Check for open slots...
>>> Check slots coverage...
[OK] All 16384 slots covered.
測試集群
利用 redis-cli -c -p 端口號 連接集群
[root@centos7-1 ~]# redis-cli -c -p 7000
127.0.0.1:7000> get hello
(nil)
127.0.0.1:7000> set hello "hello world"
OK
127.0.0.1:7000> get hello
"hello world"
127.0.0.1:7000> get name
-> Redirected to slot [5798] located at 127.0.0.1:7001
(nil)
127.0.0.1:7001> set name "redis server"
OK
127.0.0.1:7001> get name
"redis server"
總結
上就是關於在CentOS 7系統下安裝redis 3.0.6並配置集群的全部內容了,希望本文的內容對大家的學習或者工作能帶來一定的幫助,如果有疑問大家可以留言交流。