首先我們來看MapperScannerConfigurer的繼承和實現關系
public class MapperScannerConfigurer implements BeanDefinitionRegistryPostProcessor, InitializingBean, ApplicationContextAware, BeanNameAware
這裡我們關注BeanDefinitionRegistryPostProcessor這個接口:它繼承了BeanFactoryPostProcessor,用來在BeanFactoryPostProcessor初始化之前再往容器中注冊一些額外的BeanDefinition。
看到這裡你應該有點想法了吧?對,它就是掃描了我們給的basePackage下的類之後,然後生成BeanDefinition再添加到容器中的。
下面還是從源碼入手,我們先看BeanDefinitionRegistryPostProcessor初始化時調用的方法:
  public void postProcessBeanDefinitionRegistry(BeanDefinitionRegistry registry) throws BeansException {
    if (this.processPropertyPlaceHolders) {
      processPropertyPlaceHolders();
    }

    ClassPathMapperScanner scanner = new ClassPathMapperScanner(registry);
    scanner.setAddToConfig(this.addToConfig);
    scanner.setAnnotationClass(this.annotationClass);
    scanner.setMarkerInterface(this.markerInterface);
    scanner.setSqlSessionFactory(this.sqlSessionFactory);
    scanner.setSqlSessionTemplate(this.sqlSessionTemplate);
    scanner.setSqlSessionFactoryBeanName(this.sqlSessionFactoryBeanName);
    scanner.setSqlSessionTemplateBeanName(this.sqlSessionTemplateBeanName);
    scanner.setResourceLoader(this.applicationContext);
    scanner.setBeanNameGenerator(this.nameGenerator);
    scanner.registerFilters();
    scanner.scan(StringUtils.tokenizeToStringArray(this.basePackage, ConfigurableApplicationContext.CONFIG_LOCATION_DELIMITERS));
  }
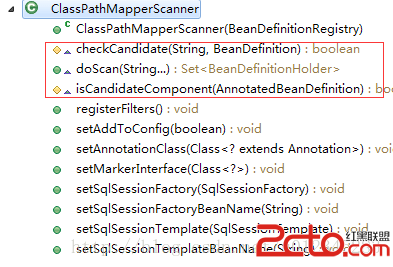
這裡我們先看ClassPathMapperScanner這個類,可以從名字上(Scanner)看出來,它就是去Scan的核心類。並且除了最後一行,其余的代碼都是在配置這個Scanner。
這裡根據名字我們可以猜想,最後一行scanner.scan(...)就是在掃描Mapper並將它添加到BeanDefinition中去。為了驗證我們的想法,跟進去看看:
	public int scan(String... basePackages) {
		int beanCountAtScanStart = this.registry.getBeanDefinitionCount();

		doScan(basePackages);

		// Register annotation config processors, if necessary.
		if (this.includeAnnotationConfig) {
			AnnotationConfigUtils.registerAnnotationConfigProcessors(this.registry);
		}

		return this.registry.getBeanDefinitionCount() - beanCountAtScanStart;
	}
發現進的並不是ClassPathMapperScanner這個類,而是ClassPathBeanDefinitionScanner這個類,並且ClassPathBeanDefinitionScanner在spring的包下。那麼再回過頭來看看ClassPathBeanDefinitionScanner的定義:
public class ClassPathMapperScanner extends ClassPathBeanDefinitionScanner
恩,確實是繼承了org.springframework.context.annotation.ClassPathBeanDefinitionScanner,並且我們可以看到它覆蓋了好幾個方法:
doScan(...),熟嗎?不熟的請往上看到scan方法中。監測的邏輯實際上都在doScan(...)中,接下來我們就關注這個Override的方法:
@Override public SetdoScan(String... basePackages) { Set beanDefinitions = super.doScan(basePackages); if (beanDefinitions.isEmpty()) { logger.warn("No MyBatis mapper was found in '" + Arrays.toString(basePackages) + "' package. Please check your configuration."); } else { for (BeanDefinitionHolder holder : beanDefinitions) { GenericBeanDefinition definition = (GenericBeanDefinition) holder.getBeanDefinition(); if (logger.isDebugEnabled()) { logger.debug("Creating MapperFactoryBean with name '" + holder.getBeanName() + "' and '" + definition.getBeanClassName() + "' mapperInterface"); } // the mapper interface is the original class of the bean // but, the actual class of the bean is MapperFactoryBean definition.getPropertyValues().add("mapperInterface", definition.getBeanClassName()); definition.setBeanClass(MapperFactoryBean.class); definition.getPropertyValues().add("addToConfig", this.addToConfig); boolean explicitFactoryUsed = false; if (StringUtils.hasText(this.sqlSessionFactoryBeanName)) { definition.getPropertyValues().add("sqlSessionFactory", new RuntimeBeanReference(this.sqlSessionFactoryBeanName)); explicitFactoryUsed = true; } else if (this.sqlSessionFactory != null) { definition.getPropertyValues().add("sqlSessionFactory", this.sqlSessionFactory); explicitFactoryUsed = true; } if (StringUtils.hasText(this.sqlSessionTemplateBeanName)) { if (explicitFactoryUsed) { logger.warn("Cannot use both: sqlSessionTemplate and sqlSessionFactory together. sqlSessionFactory is ignored."); } definition.getPropertyValues().add("sqlSessionTemplate", new RuntimeBeanReference(this.sqlSessionTemplateBeanName)); explicitFactoryUsed = true; } else if (this.sqlSessionTemplate != null) { if (explicitFactoryUsed) { logger.warn("Cannot use both: sqlSessionTemplate and sqlSessionFactory together. sqlSessionFactory is ignored."); } definition.getPropertyValues().add("sqlSessionTemplate", this.sqlSessionTemplate); explicitFactoryUsed = true; } if (!explicitFactoryUsed) { if (logger.isDebugEnabled()) { logger.debug("Enabling autowire by type for MapperFactoryBean with name '" + holder.getBeanName() + "'."); } definition.setAutowireMode(AbstractBeanDefinition.AUTOWIRE_BY_TYPE); } } } return beanDefinitions; }
第一步就能看到,調用了父類的doScan(...)方法,父類的doScan(..)這裡就不放出來了,它是Spring自動掃描機制的核心,也就是我們注冊:
這個東西會用到的,它可以幫我們自動注冊@Controller、@Service等組件。
本質上,也是通過掃描這些類,並將它們加入到BeanDefinition中,所以上面通過父類的doScan(...)方法其實是將我們設置的base-package下的類都封裝成了BeanDefinition,並且添加到了一個Set集合中去了。也就是doScan(..)第一句得到的beanDefinitions。
但和父類略有不同的是,得到了所有的BeanDefinition之後,這並不真正要注入到容器中的類,還記得MyBatis手動把Mapper注入到Spring時是如何配置的嗎:
而上面通過自動掃描注冊的Mapper的BeanDefinition是類似這樣的:
關鍵是這個class,所以需要轉換,並將屬性注入進去,mapperInterface和sqlSessionFactory都是必須的。
這樣就完成了Mapper的自動掃描,不知道這樣講是否思路清晰~