你可能會認為生成一個帶柔和陰影的特效文字與生成一個帶光圈的特效文字是完全不 同的,其實他們所用到的技術是完全相同的,只是在設置上有些許變化。 在帶柔和陰影 的效果中,我用到了GDI+中的一些插值模式來生成模糊的文字輪廓,當位圖繪制平面放大 時,插值模式決定原來某點像素應該怎樣和周圍的融合。 低質量的插值只是簡單的把一 個像素變換成同色色塊,高質量插值如高質量雙線性插值與高質量雙三次插值會考慮像素 色的平滑與反走樣,我發現高質量雙線 性插值模式最好。
這個技術把文字繪制兩次,一次在一個小位圖上繪制光圈,它將被用你所選的插值模 式放大,另一次將在平面上繪制實際文字。用於生成光圈的位圖必須與實際 文字成比例 ,在這兒我用1/5,因此光圈文字大小是實際文字的1/5。
步驟如下:
建一個比實際繪制區域小的成比例的位圖,這兒我用1/5;
建一個路徑,把你想要生成效果的文字加入路徑中;
用1中位圖創建Graphics,建一個能縮小輸出圖形的矩陣;
用你想要的光圈顏色,填充文本路徑,為了調節,用很細的畫筆描出路徑;
設置你要輸出位圖的Graphics的插值模式為高質雙線形性,把光圈位圖按比例放大到 目標Graphic上;
最後,在目標Graphic上,按實際尺寸填充文本路徑,這樣將生成下面所示光圈效果;
二、代碼說明請使用
void CTextHaloEffectView::OnDraw(CDC* pDC)

{

  CTextHaloEffectDoc* pDoc = GetDocument();

  ASSERT_VALID(pDoc);

  if (!pDoc)

    return;

  //客戶區大小

  CRect ClientRect;

  GetClientRect(&ClientRect);

  CSize ClientSize(ClientRect.Width(),ClientRect.Height());

  using namespace Gdiplus;

  Graphics g(pDC->m_hDC);

  RectF ClientRectangle(ClientRect.top,ClientRect.left,ClientRect.Width (),ClientRect.Height());

  g.FillRectangle(&SolidBrush(Color::Black),ClientRectangle);

  Bitmap bm(ClientSize.cx/5,ClientSize.cy/5,&g);

  //創建文字路徑

  GraphicsPath pth;

  //Add the string in the chosen style.

  int style = FontStyleRegular;

  pth.AddString(L"文字光圈",-1,&FontFamily(L"宋體 "),style,100,Point(20,20),NULL);

  //位圖Graphics

  Graphics* bmpg = Graphics::FromImage(&bm);

  //Create a matrix that shrinks the drawing output by the fixed ratio.

  Matrix mx(1.0f/5,0,0,1.0f/5,-(1.0f/5),-(1.0f/5));

  //Choose an appropriate smoothing mode for the halo.

  bmpg->SetSmoothingMode(SmoothingModeAntiAlias);

  //Transform the graphics object so that the same half may be used for both halo and text output.


  //變換為位圖的1/5,放大後將和實際文本相仿

  bmpg->SetTransform(&mx);

  //Using a suitable pen...

  Pen p(Color::Yellow,3);

  //Draw around the outline of the path

  bmpg->DrawPath(&p,&pth);

  //and then fill in for good measure.

  bmpg->FillPath(&SolidBrush(Color::Yellow),&pth);

  //this just shifts the effect a little bit so that the edge isn''t cut off in the demonstration

  //移動50,50

  g.SetTransform(&Matrix(1,0,0,1,50,50));

  //setup the smoothing mode for path drawing

  g.SetSmoothingMode(SmoothingModeAntiAlias);

  //and the interpolation mode for the expansion of the halo bitmap

  g.SetInterpolationMode(InterpolationModeHighQualityBicubic);

  //expand the halo making the edges nice and fuzzy.

  g.DrawImage(&bm,ClientRectangle,0,0,bm.GetWidth(),bm.GetHeight (),UnitPixel);

  //Redraw the original text

  g.FillPath(&SolidBrush(Color::Black),&pth);

  //and you''re done.

}
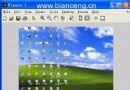
三、效果圖

圖一 效果圖
四、說明
為了讓沒有裝GDI+的朋友使用方便,此次把在GDI+直接包含在源代碼中,使用時把 gdiplus.dll文件直接拷到$path即可。
注:本作者熟悉C++/MFC,熟悉GDI/GDI+,英文文檔翻譯,接做文檔翻譯,小型系統開 發,技術難題突破,IT技術培訓等
下載源代碼:http://www.vckbase.com/code/downcode.asp?id=2677