本文為大家分享了asp.net core 如何集成kindeditor並實現圖片上傳功能的具體方法,供大家參考,具體內容如下
准備工作
1.visual studio 2015 update3開發環境
2.net core 1.0.1 及以上版本
目錄
新建asp.net core web項目
下載kindeditor
增加圖片上傳控制器
配置kindeditor參數
代碼下載
新建asp.net core web項目
新建一個asp.net core項目,這裡命名為kindeditor
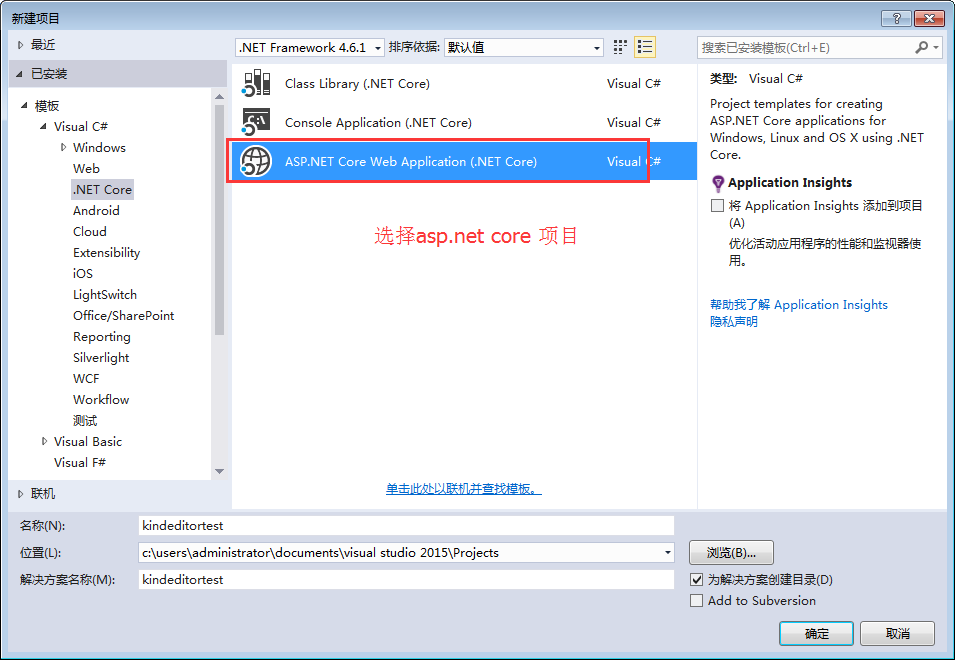
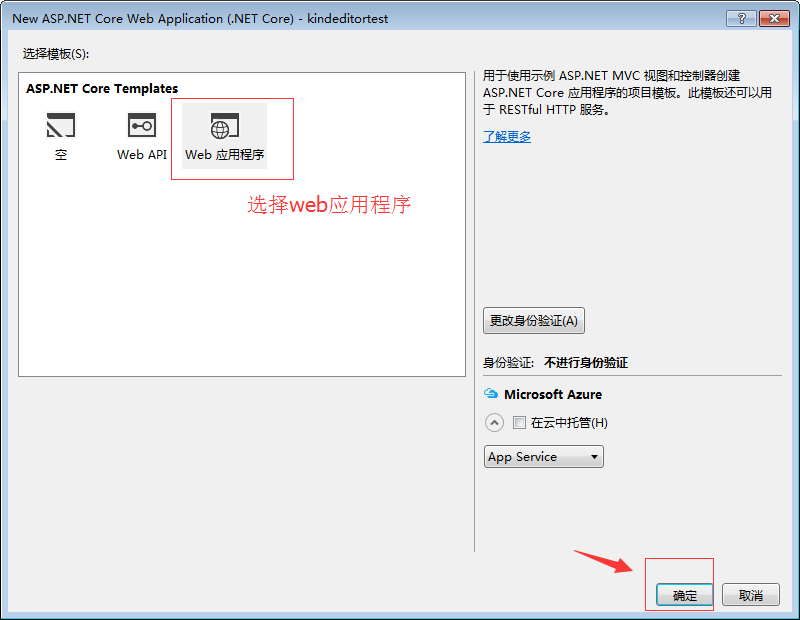
選中web應用程序
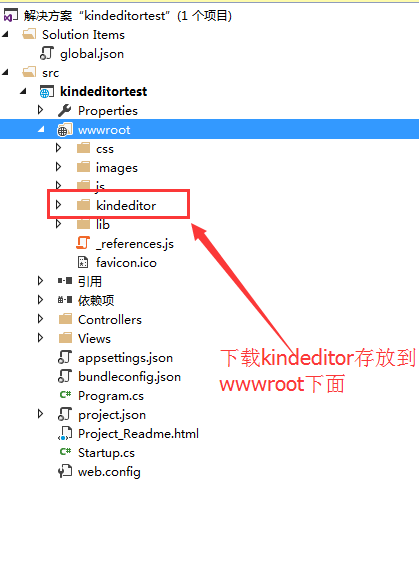
下載kindeditor
這裡我們新建了一個系統自帶的樣本項目,去 kindeditor官網下載一個版本,解壓後拷貝大wwwroot中
修改views/index.cshtml
@{
 ViewData["Title"] = "Home Page";
}
<link href="~/kindeditor/themes/default/default.css" rel="stylesheet" />
<script src="~/kindeditor/kindeditor-min.js"></script>
<script src="~/kindeditor/lang/zh_CN.js"></script>

<div class="row">
 <textarea id="detail_desc" name="detail_desc" style="width:700px;height:300px;">

 </textarea>
</div>
<script type="text/javascript">
 //實例化編輯器
 //建議使用工廠方法getEditor創建和引用編輯器實例,如果在某個閉包下引用該編輯器,直接調用UE.getEditor('editor')就能拿到相關的實例
 KindEditor.ready(function (K) {
  window.editor = K.create('#detail_desc', {
   width: '98%',
   height: '500px'
  });
 });
</script>
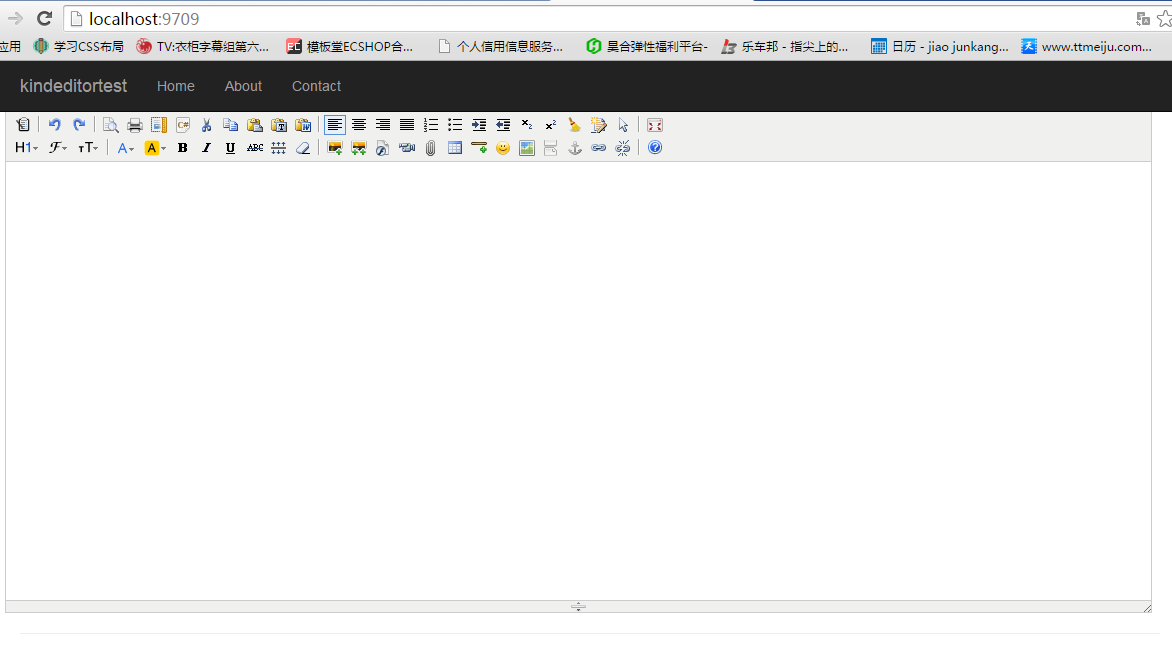
運行一下現在就可以看到kindeditor已經集成進來了。
增加圖片上傳控制器
注意返回是一個json對象,因此建了一個簡單的對象返回。
using System;
using System.Collections.Generic;
using System.Linq;
using System.Threading.Tasks;
using Microsoft.AspNetCore.Mvc;
using Microsoft.AspNetCore.Http;
using Microsoft.Net.Http.Headers;
using Microsoft.AspNetCore.Hosting;
using System.IO;
namespace kindeditortest.Controllers
{
 public class HomeController : Controller
 {
  private IHostingEnvironment hostingEnv;
  public IActionResult Index()
  {
   return View();
  }
  public HomeController(IHostingEnvironment env)
  {
   this.hostingEnv = env;
  }
  /// <summary>
 /// Kindeditor圖片上傳
  /// </summary>
 /// <param name="imgFile">Kindeditor圖片上傳自帶的命名,不可更改名稱</param>
 /// <param name="dir">不可更改名稱 這裡沒有用到dir</param>
 /// <returns></returns>
 public IActionResult KindeditorPicUpload(IList<IFormFile> imgFile, string dir)
  {
   PicUploadResponse rspJson = new PicUploadResponse() { error = 0, url = "/upload/" };
   long size = 0;
   string tempname = "";
   foreach (var file in imgFile)
   {
    var filename = ContentDispositionHeaderValue
        .Parse(file.ContentDisposition)
        .FileName
        .Trim('"');
    var extname = filename.Substring(filename.LastIndexOf("."), filename.Length - filename.LastIndexOf("."));
    var filename1 = System.Guid.NewGuid().ToString() + extname;
    tempname = filename1;
    var path = hostingEnv.WebRootPath;
    filename = hostingEnv.WebRootPath + $@"\upload\{filename1}";
    size += file.Length;
    using (FileStream fs = System.IO.File.Create(filename))
    {
     file.CopyTo(fs);
     fs.Flush();
     //這裡是業務邏輯
    }
   }
   rspJson.error = 0;
   rspJson.url = $@"../../upload/" + tempname;
   return Json(rspJson);
  }
  public IActionResult About()
  {
   ViewData["Message"] = "Your application description page.";
   return View();
  }
  public IActionResult Contact()
  {
   ViewData["Message"] = "Your contact page.";
   return View();
  }
  public IActionResult Error()
  {
   return View();
  }
 }
 public class PicUploadResponse
 {
  public int error { get; set; }
  public string url { get; set; }
 }
}
配置kindeditor參數
<script type="text/javascript">
 //實例化編輯器
 //建議使用工廠方法getEditor創建和引用編輯器實例,如果在某個閉包下引用該編輯器,直接調用UE.getEditor('editor')就能拿到相關的實例
 KindEditor.ready(function (K) {
  window.editor = K.create('#detail_desc', {
   width: '98%',
   height: '500px',
   uploadJson: '/home/KindeditorPicUpload',
   fileManagerJson: '/home/KindeditorPicUpload',
   allowFileManager: true
  });
 });
</script>
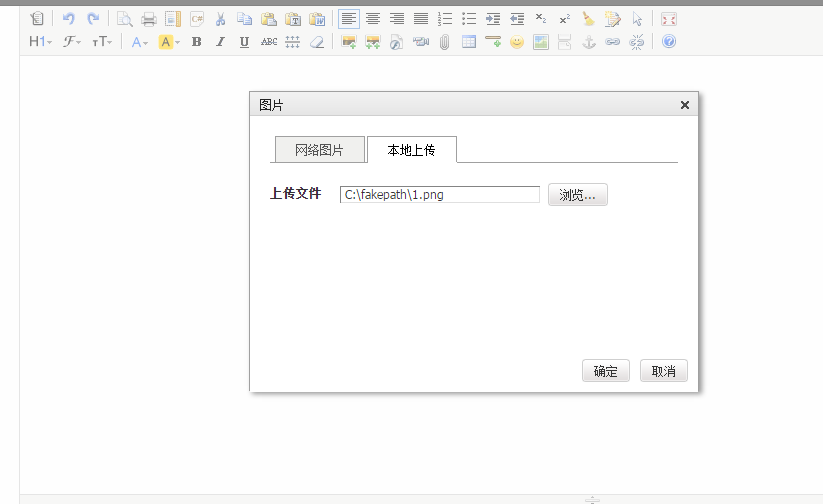
運行效果
源碼下載:http://xiazai.jb51.net/201611/yuanma/ASP.NETkindeditor(jb51.net).rar
以上就是本文的全部內容,希望對大家的學習有所幫助,也希望大家多多支持腳本之家。