序:
最近在給客戶做一個管理系統的時候,客戶提出要將查詢結果導出到Excel。對於還是實習生的我倍感壓力,於是找了點資料。網上有個示例,其中方法十分簡單。於是照貓畫虎,把方法和心得與大家分享。OK,Let`s go
第一步:
創建一個Excel文件(就是 普通的Excel),在第一個單元格輸入“city”,然後選擇“另存為”,此時彈出保存窗口。注意:將保持格式選擇為“XML 表格(*.xml)”,點擊保存。完畢後用記事本打開這個Excel文件。你將看到如下的代碼
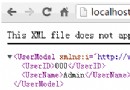
<?xml version="1.0"?>
<?mso-application progid="Excel.Sheet"?>
<Workbook xmlns="urn:schemas-microsoft-com:office:spreadsheet"
xmlns:o="urn:schemas-microsoft-com:office:office"
xmlns:x="urn:schemas-microsoft-com:office:excel"
xmlns:ss="urn:schemas-microsoft-com:office:spreadsheet"
xmlns:html="http://www.w3.org/TR/REC-html40">
<DocumentProperties xmlns="urn:schemas-microsoft-com:office:office">
<Author>MC SYSTEM</Author>
<LastAuthor>MC SYSTEM</LastAuthor>
<Created>2009-05-28T16:20:57Z</Created>
<Company>MC SYSTEM</Company>
<Version>11.5606</Version>
</DocumentProperties>
<ExcelWorkbook xmlns="urn:schemas-microsoft-com:office:excel">
<WindowHeight>11250</WindowHeight>
<WindowWidth>18180</WindowWidth>
<WindowTopX>120</WindowTopX>
<WindowTopY>75</WindowTopY>
<ProtectStructure>False</ProtectStructure>
<ProtectWindows>False</ProtectWindows>
</ExcelWorkbook>
<Styles>
<Style ss:ID="Default" ss:Name="Normal">
<Alignment ss:Vertical="Center"/>
<Borders/>
<Font ss:FontName="宋體" x:CharSet="134" ss:Size="12"/>
<Interior/>
<NumberFormat/>
<Protection/>
</Style>
</Styles>
<Worksheet ss:Name="Sheet1">
<Table ss:ExpandedColumnCount="1" ss:ExpandedRowCount="1" x:FullColumns="1"
x:FullRows="1" ss:DefaultColumnWidth="54" ss:DefaultRowHeight="14.25">
<Row ss:>
<Cell><Data ss:Type="String">org</Data></Cell>
</Row>
</Table>
<WorksheetOptions xmlns="urn:schemas-microsoft-com:office:excel">
<Unsynced/>
<Selected/>
<Panes>
<Pane>
<Number>3</Number>
<ActiveRow>3</ActiveRow>
<ActiveCol>1</ActiveCol>
</Pane>
</Panes>
<ProtectObjects>False</ProtectObjects>
<ProtectScenarios>False</ProtectScenarios>
</WorksheetOptions>
</Worksheet>
<Worksheet ss:Name="Sheet2">
<Table ss:ExpandedColumnCount="0" ss:ExpandedRowCount="0" x:FullColumns="1"
x:FullRows="1" ss:DefaultColumnWidth="54" ss:DefaultRowHeight="14.25"/>
<WorksheetOptions xmlns="urn:schemas-microsoft-com:office:excel">
<Unsynced/>
<ProtectObjects>False</ProtectObjects>
<ProtectScenarios>False</ProtectScenarios>
</WorksheetOptions>
</Worksheet>
<Worksheet ss:Name="Sheet3">
<Table ss:ExpandedColumnCount="0" ss:ExpandedRowCount="0" x:FullColumns="1"
x:FullRows="1" ss:DefaultColumnWidth="54" ss:DefaultRowHeight="14.25"/>
<WorksheetOptions xmlns="urn:schemas-microsoft-com:office:excel">
<Unsynced/>
<ProtectObjects>False</ProtectObjects>
<ProtectScenarios>False</ProtectScenarios>
</WorksheetOptions>
</Worksheet>
</Workbook>
其實這個就是將XML轉換成Excel最關鍵的部分。實際上這就是Excel對應的XML格式。也就是說按照這個格式來寫一個XML文件,然後用Excel打開,Excel會將這個文件以Excel的樣子正確的現實出來。
第二步:
在.net項目中添加一個xslt文件。學過xslt的朋友都知道通過xslt可以將xml轉換成其他的格式。可能有的朋友還沒有理解我的意思。其實我們通過xslt將xml轉換成“第一步”中的格式,然後保存或者輸出到客戶端就完成了導出Excel的功能了。
對於第一步中的XML代碼我們要進行一些修改,因為這是Excel自動生成的,其中包含了大量的無用信息。修改後的代碼如下:
<?xml version="1.0"?>
 <?mso-application progid="Excel.Sheet"?>
 <Workbook xmlns="urn:schemas-microsoft-com:office:spreadsheet"
 xmlns:o="urn:schemas-microsoft-com:office:office"
 xmlns:x="urn:schemas-microsoft-com:office:excel"
 xmlns:ss="urn:schemas-microsoft-com:office:spreadsheet"
 xmlns:html="http://www.w3.org/TR/REC-html40">

 <Worksheet ss:Name="Sheet1">
  <Table ss:ExpandedColumnCount="1" ss:ExpandedRowCount="1" x:FullColumns="1"
    x:FullRows="1" ss:DefaultColumnWidth="54" ss:DefaultRowHeight="14.25">
    <Row ss:>
      <Cell>

      <Data ss:Type="String">

        city <!--還記得嗎?這是第一步中輸入的city -->

      </Data>

     </Cell>
    </Row>
  </Table>
 </Worksheet>
 </Workbook>
到目前為止,這個代碼還沒有實際的用處。我們將這個代碼copy到創建的xslt文件中,並將xslt的一些語法加入到上面的代碼中,最後xslt文件將是這個樣子:
<?xml version="1.0"?>
 <xsl:stylesheet version="1.0" xmlns:xsl="http://www.w3.org/1999/XSL/Transform">
 <xsl:template match="/">

  <?mso-application progid="Excel.Sheet"?>
  <Workbook xmlns="urn:schemas-microsoft-com:office:spreadsheet"
  xmlns:o="urn:schemas-microsoft-com:office:office"
  xmlns:x="urn:schemas-microsoft-com:office:excel"
  xmlns:ss="urn:schemas-microsoft-com:office:spreadsheet"
  xmlns:html="http://www.w3.org/TR/REC-html40">

  <Worksheet ss:Name="Sheet1">
    <Table>
      <xsl:for-each select="*">
       <Row>
        <Cell>
        <Data ss:Type="String">
          <xsl:value-of select="."/>
        </Data>
       </Cell>
        <Cell>
        <Data ss:Type="String">
           <xsl:value-of select="."/>
        </Data>
       </Cell>
      </Row>
     </xsl:for-each>
    </Table>

  </Worksheet>
  </Workbook>

 </xsl:template>
</xsl:stylesheet>
保存這個xslt文件。
第三步:
編寫.net後台代碼,我是通過一個按鈕事件觸發導出的。代碼如下:
private void button1_Click(object sender, EventArgs e)
{
 XmlDocument xdoc = new XmlDocument();
 xdoc.LoadXml("<records><record><org>北京</org></record></records>");
 XslCompiledTransform xct = new XslCompiledTransform();
 xct.Load(Application.StartupPath+"\\excel.xslt");


 XmlTextWriter writer = new XmlTextWriter("output.xls", null);
 writer.WriteProcessingInstruction("xml", "version="1.0"");

 xct.Transform(xdoc, null,writer);
 writer.Close();

}
總結:
其實這個方法的核心就是利用.net的xslt轉換功能將xml以一種特殊格式輸出出去。而這種格式可以利用Excel軟件自動生成