導言
在之前的28篇教程的例子裡,如果我們需要顯示某個數據源的多條記錄,我們使用GridView .GridView 的一行表示數據源的一條記錄,列表示一個字段.雖然GridView 用來顯示數據,分頁,排序,編輯,刪除非常的方便,但是有點臃腫.而且GridView 結構的標記是固定的—它包含一個帶有<tr>和<td>的HTML <table>標記.
為了在顯示多條記錄時,有更好的自定義功能,ASP.NET 2.0提供了DataList 和Repeater (ASP.NET 1.x版本裡也有 ).DataList 和Repeater 使用模板來顯示內容,而不是象在GridView裡那樣使用BoundFields, CheckBoxFields, ButtonFields等.DataList 的標記語言為HTML <table>, 不過它允許每一行顯示多條記錄.另一方面,Repeater不會生成多余的標記語言,因此如果你想精確控制標記語言的生成,它是最理想的選擇.
在後面的若干章教程裡,我們將從使用DataList 和Repeater 的模板顯示數據開始,來學習它們的最基本的用法.我們將學習如何控制這些控件的格式,如何在DataList裡改變數據的布局,最常見的主/從場景,編輯和刪除數據的方法,以及如何分頁等.
第一步 1: 添加DataList 和Repeater 教程頁
在開始本篇教程前,我們首先花點時間來創建一些頁,這些頁會在本篇和後面的幾篇教程裡用到.先添加一個名為DataListRepeaterBasics的文件夾,然後,添加下面的頁,添加頁的時候確保每頁都選擇了 Site.master作為母板頁:
Default.aspx
Basics.aspx
Formatting.aspx
RepeatColumnAndDirection.aspx
NestedControls.aspx
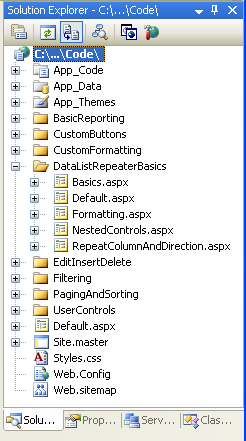
圖 1: 創建 DataListRepeaterBasics 文件夾 和添加頁
打開Default.aspx頁的設計視圖,從UserControls文件夾將SectionLevelTutorialListing.ascx用戶控件拖進來.這個用戶控件提供的功能就是列出教程章節.我們在母板頁和站點導航裡創建的它.
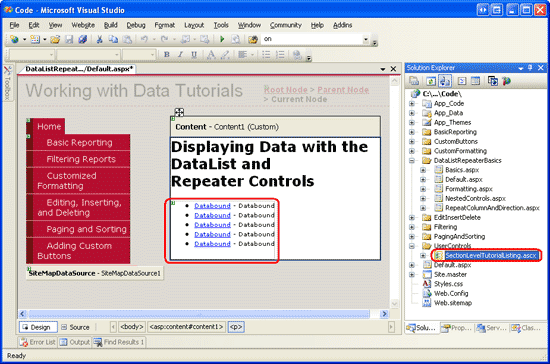
圖 2: 添加SectionLevelTutorialListing.ascx 用戶控件到Default.aspx
最後,將這些頁的地址加到 Web.sitemap 的條目裡.在Paging and Sorting <siteMapNode>之後添加下面的標記.
<siteMapNode
 title="Displaying Data with the DataList and Repeater"
 description="Samples of Reports that Use the DataList and Repeater Controls"
 url="~/DataListRepeaterBasics/Default.aspx" >
 <siteMapNode
 title="Basic Examples"
 description="Examines the basics for displaying data using the
   DataList and Repeater controls."
 url="~/DataListRepeaterBasics/Basics.aspx" />
 <siteMapNode
 title="Formatting"
 description="Learn how to format the DataList and the Web controls within
   the DataList and Repeater's templates."
 url="~/DataListRepeaterBasics/Formatting.aspx" />
 <siteMapNode
 title="Adjusting the DataList s Layout"
 description="Illustrates how to alter the DataList's layout, showing
   multiple data source records per table row."
 url="~/DataListRepeaterBasics/RepeatColumnAndDirection.aspx" />
 <siteMapNode
 title="Nesting a Repeater within a DataList"
 description="Learn how to nest a Repeater within the template of a DataList."
 url="~/DataListRepeaterBasics/NestedControls.aspx" />
</siteMapNode>
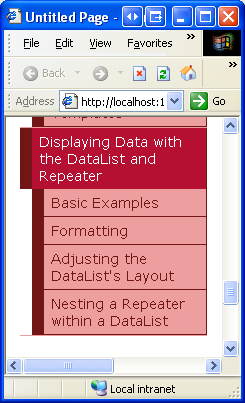
圖 3: 向 Site Map 裡添加新的頁
第二步: 在 DataList裡顯示Product信息
和FormView一樣,DataList 使用模板來顯示信息,而非BoundFields, CheckBoxFields等.而與FormView不同的是,DataList 是被用來顯示一組記錄,而不是單獨的一條.現在我們開始本章的教程.首先看看如何將product 綁定到DataList.打開DataListRepeaterBasics 文件夾裡的Basics.aspx 頁,然後從工具箱裡拖一個DataList 進來.如圖4所示,在指定模板前,設計器會是灰色的.
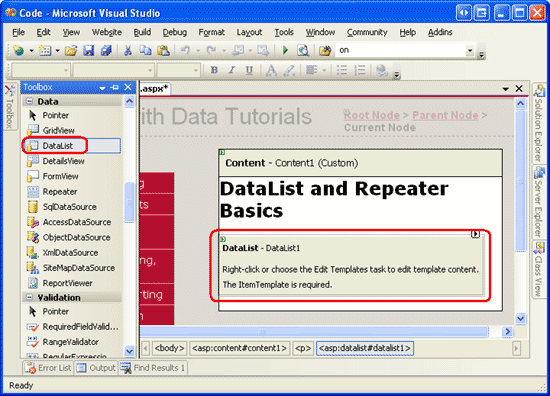
圖 4: 從工具箱拖一個DataList到設計器裡
打開DataList的智能標簽,添加一個ObjectDataSource ,使用ProductsBLL 類的GetProducts 方法來配置它.因為在本教程裡創建的DataList 為只讀的,因此在INSERT, UPDATE, 和DELETE 標簽的下拉列表裡都選擇None.
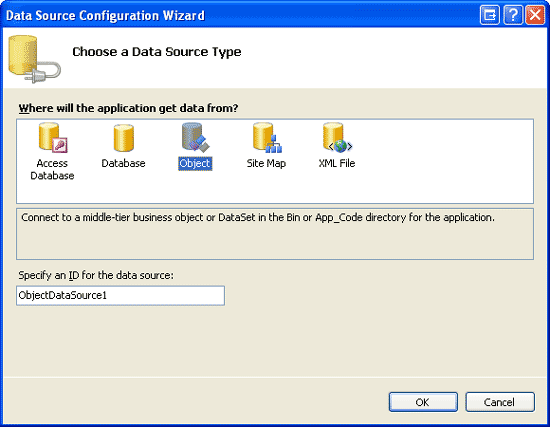
圖 5: 創建一個新的ObjectDataSource
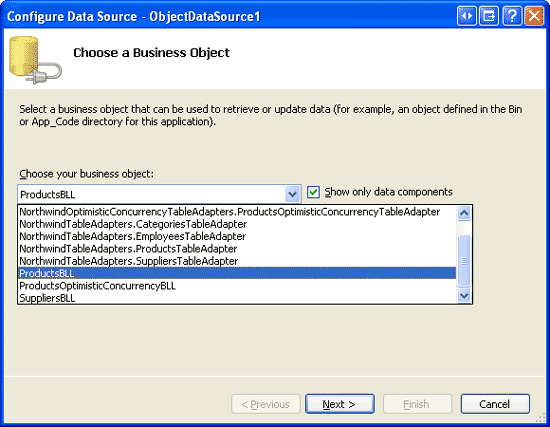
圖 6: 用ProductsBLL 類來配置ObjectDataSource
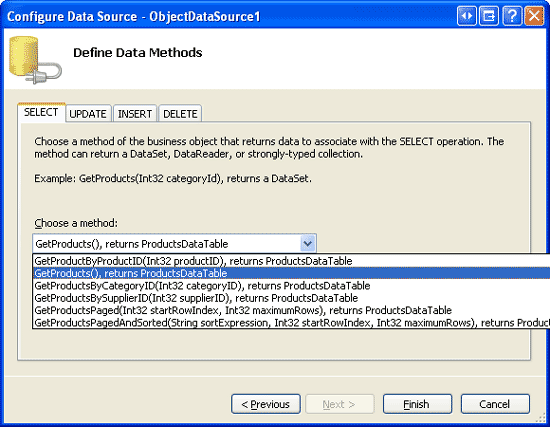
圖 7: 使用GetProducts 方法來獲取所有Product的信息
通過智能標簽裡配置完ObjectDataSource ,並把它和DataList 關聯起來後,Visual Studio會在DataList 裡自動為數據源返回的每個字段創建一個ItemTemplate 用來顯示name 和value (見下面的代碼).這個默認的ItemTemplate看起來和綁定FormView 時自動產生的模板是一樣的.
<asp:DataList ID="DataList1" runat="server" DataKeyField="ProductID"
 DataSourceID="ObjectDataSource1" EnableViewState="False">
 <ItemTemplate>
 ProductID: <asp:Label ID="ProductIDLabel" runat="server"
    Text='<%# Eval("ProductID") %>' /><br />
 ProductName: <asp:Label ID="ProductNameLabel" runat="server"
    Text='<%# Eval("ProductName") %>' /><br />
 SupplierID: <asp:Label ID="SupplierIDLabel" runat="server"
    Text='<%# Eval("SupplierID") %>' /><br />
 CategoryID: <asp:Label ID="CategoryIDLabel" runat="server"
    Text='<%# Eval("CategoryID") %>'/><br />
 QuantityPerUnit: <asp:Label ID="QuantityPerUnitLabel" runat="server"
    Text='<%# Eval("QuantityPerUnit") %>' /><br />
 UnitPrice: <asp:Label ID="UnitPriceLabel" runat="server"
    Text='<%# Eval("UnitPrice") %>' /><br />
 UnitsInStock: <asp:Label ID="UnitsInStockLabel" runat="server"
    Text='<%# Eval("UnitsInStock") %>' /><br />
 UnitsOnOrder: <asp:Label ID="UnitsOnOrderLabel" runat="server"
    Text='<%# Eval("UnitsOnOrder") %>' /><br />
 ReorderLevel: <asp:Label ID="ReorderLevelLabel" runat="server"
    Text='<%# Eval("ReorderLevel") %>' /><br />
 Discontinued: <asp:Label ID="DiscontinuedLabel" runat="server"
    Text='<%# Eval("Discontinued") %>' /><br />
 CategoryName: <asp:Label ID="CategoryNameLabel" runat="server"
    Text='<%# Eval("CategoryName") %>' /><br />
 SupplierName: <asp:Label ID="SupplierNameLabel" runat="server"
    Text='<%# Eval("SupplierName") %>' /><br />
 <br />
 </ItemTemplate>
</asp:DataList>
<asp:ObjectDataSource ID="ObjectDataSource1" runat="server"
 OldValuesParameterFormatString="original_{0}"
 SelectMethod="GetProducts" TypeName="ProductsBLL">
</asp:ObjectDataSource>
注意:當通過智能標簽將數據源綁定到FormView 時,Vistual Studio會創建一個ItemTemplate,一個InsertItemTemplate和一個EditItemTemplate.然而對DataList來說,只會創建一個ItemTemplate .這是因為DataList 不象FormView那樣,有內置的編輯和插入功能.DataList 沒有編輯和刪除相關的事件,雖然要完成這些功能,對DataList 來說沒有FormView那麼簡單,我們仍然可以加少量代碼來實現它.我們在以後的教程裡會講到如何在DataList 裡完成編輯和刪除的功能.
讓我們花點時間來改善一下模板的外觀.我們只顯示product的name,supplier,category,數量和單價.而且我們用<h4> 來顯示名字,其它字段都放在 <h4>heading下的<table>裡.你可以通過DataList的只能標簽裡的 Edit Templates ,或者直接修改頁面聲明語法來達到以上目的.如果你是通過Edit Templates 來實現,那你的頁面代碼可能和下面的不完全一樣.但是通過浏覽器浏覽你的頁面應該和圖8看起來差不多.
<asp:DataList ID="DataList1" runat="server" DataKeyField="ProductID"
 DataSourceID="ObjectDataSource1" EnableViewState="False">
 <ItemTemplate>
 <h4><asp:Label ID="ProductNameLabel" runat="server"
  Text='<%# Eval("ProductName") %>' /></h4>
 <table border="0">
  <tr>
  <td class="ProductPropertyLabel">Category:</td>
  <td><asp:Label ID="CategoryNameLabel" runat="server"
   Text='<%# Eval("CategoryName") %>' /></td>
  <td class="ProductPropertyLabel">Supplier:</td>
  <td><asp:Label ID="SupplierNameLabel" runat="server"
   Text='<%# Eval("SupplierName") %>' /></td>
  </tr>
  <tr>
  <td class="ProductPropertyLabel">Qty/Unit:</td>
  <td><asp:Label ID="QuantityPerUnitLabel" runat="server"
   Text='<%# Eval("QuantityPerUnit") %>' /></td>
  <td class="ProductPropertyLabel">Price:</td>
  <td><asp:Label ID="UnitPriceLabel" runat="server"
   Text='<%# Eval("UnitPrice", "{0:C}") %>' /></td>
  </tr>
 </table>
 </ItemTemplate>
</asp:DataList>
注意:上面的例子使用的是Text指定為數據綁定的值的Label控件.我們也可以不使用Label,而只是保留數據綁定的代碼.也就是說,我們可以用<%# Eval("CategoryName") %>來代替<asp:Label ID="CategoryNameLabel" runat="server" Text='<%# Eval("CategoryName") %>' />.
使用Label控件有兩個好處,第一點在下一章我們會看到,就是提供了一個格式化數據的簡單途徑.第二點是不使用web控件的時候,Edit Templates 不顯示聲明的數據綁定代碼.通過Edit Templates 的界面很容易操作靜態標記語言和web控件,其前提是所有的數據綁定都是通過web控件的智能標簽裡的Edit DataBindings對話框來實現.因此,使用DataList的時候,我建議使用Label控件,這樣通過Edit Templates 就可以操作其內容.我們會看到,使用Repeater 時如果需要編輯其內容,需要切換到源視圖.而設計Repeater模板的時候,我通常不使用Label控件,除非我需要格式化綁定數據的外觀.
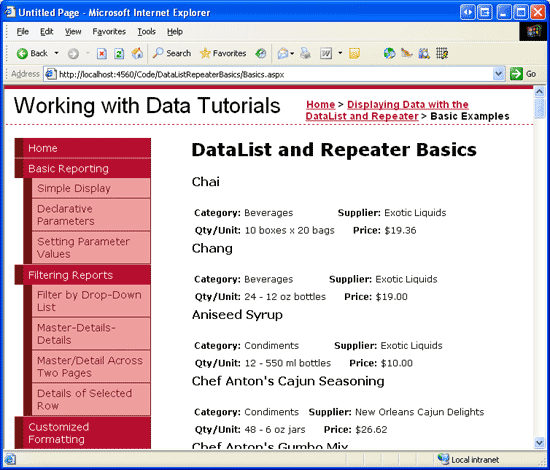
圖 8: 用DataList的 ItemTemplate顯示Product
第三步: 改善DataList的外觀
和GridView一樣,DataList 提供了一些和風格有關的屬性,比如Font, ForeColor, BackColor, CssClass, ItemStyle, AlternatingItemStyle, SelectedItemStyle等.當使用 GridView 和DetailsView 時,我們首先在DataWebControls Theme裡創建了一些皮膚文件,這些文件預定義了這兩個控件的CssClass 屬性和RowStyle, HeaderStyle等.我們使用DataList的時候也采取這種方法.
象在使用ObjectDataSource展現數據 裡談到的那樣,一個Skin 文件定義了一個web控件的默認顯示屬性.一個Theme 是一組Skin, CSS, image, 和JavaScript files 的集合,它定義了一個web站點的外觀.在使用ObjectDataSource展現數據 那一章裡,我們創建了一個DataWebControls Theme(App_Themes 文件夾下) ,它包含兩個Skin文件- GridView.skin 和DetailsView.skin.我們現在來為DataList添加第三個.右鍵單擊App_Themes/DataWebControls 文件夾,選擇Add a New Item,選擇Skin File,在名字裡填DataList.skin.

圖 9: 創建一個名為DataList.skin的Skin文件
將下面的標記語言添加到DataList.skin裡.
<asp:DataList runat="server" CssClass="DataWebControlStyle">
 <AlternatingItemStyle CssClass="AlternatingRowStyle" />
 <ItemStyle CssClass="RowStyle" />
 <HeaderStyle CssClass="HeaderStyle" />
 <FooterStyle CssClass="FooterStyle" />
 <SelectedItemStyle CssClass="SelectedRowStyle" />
</asp:DataList>
上面用GridView 和DetailsView 使用的CSS文件設置DataList .在DataWebControlStyle, AlternatingRowStyle, RowStyle裡用到的CSS文件是在Styles.css 裡定義的.
添加完Skin後,DataList的外觀看起來會變了(你可以在視圖菜單裡選擇刷新來看改變後的效果).見圖10,alternating product 的背景色為粉紅色.
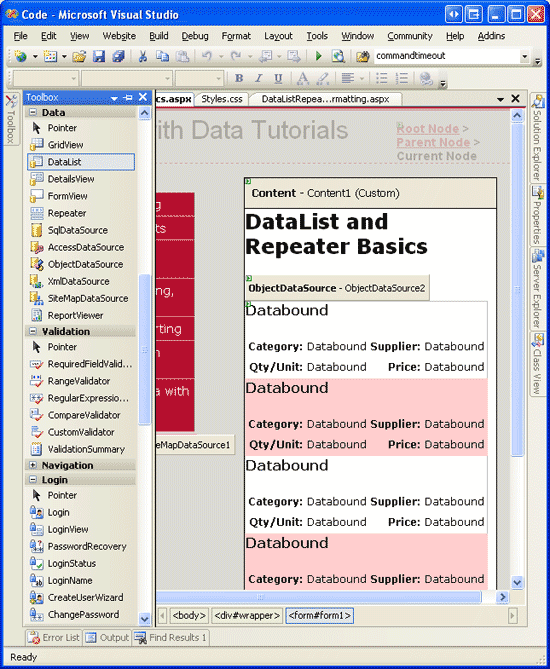
圖 10: 添加skin文件後的效果
第四步: 浏覽DataList的其它Templates
DataList 還支持除了ItemTemplate外的其它6種template:
HeaderTemplate — 用來呈現 header row
AlternatingItemTemplate — 用來呈現alternating items
SelectedItemTemplate — 用來呈現selected item; selected item 的index 可以通過DataList 的 SelectedIndex property 得到
EditItemTemplate — 用來呈現被編輯的item
SeparatorTemplate — 用來分隔各個item
FooterTemplate - 用來呈現footer row
當指定HeaderTemplate 或FooterTemplate時,DataList 會加一個header 或footer .和GridView一樣,DataList 的header 和footer 沒有和數據綁定在一起.
注意:如我們在在GridView的頁腳中顯示統計信息 一章裡看到的那樣,header 和footer 不支持數據綁定語法,而數據綁定的信息可以通過GridView的RowDataBound event handler來寫.這個技術可以用來技術綁定的數據的和或其它信息,並在footer裡顯示.同樣的,可以在DataList 和Repeater 裡面這樣做.它們唯一的區別在於對DataList 和Repeater 來說是為ItemDataBound 創建event handler (而不是RowDataBound ).
在我們的例子裡,我們將標題“Product Information”用<h3> 顯示在DataList的results 的頂部.為了達到這個目的,在HeaderTemplate 中添加合適的標記語言.或者通過DataList的智能標簽中的Edit Templates 來實現.從下拉列表中選擇Header Template ,從style 下拉列表中選擇Heading 3 並輸入Text(見圖11).
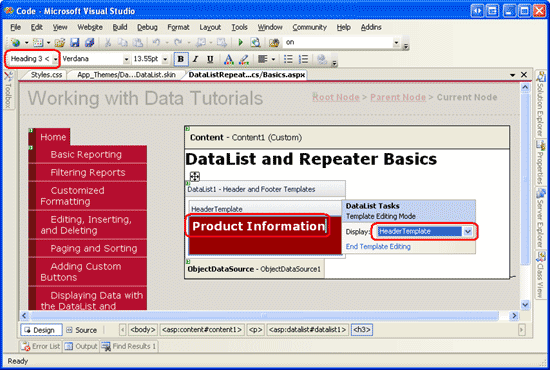
圖 11: 添加Text 為“Product Information”的HeaderTemplate
同樣,直接在<asp:DataList>標記裡加入以下代碼也可以達到上面的目的.
<HeaderTemplate>
 <h3>Product Information</h3>
</HeaderTemplate>
為了在每個列出的product 之間保留一些空間,我們現在來添加一個SeparatorTemplate .<hr>標簽可以完成這種分割的功能.見下面的標記語言
<SeparatorTemplate>
 <hr />
</SeparatorTemplate>
注意:與HeaderTemplate 和FooterTemplates一樣,SeparatorTemplate 並不和數據源裡的任何數據綁定.因此,並不能直接的和DataList綁定的數據發生關系.
現在在浏覽器裡浏覽這個頁面,看起來應該和圖12差不多.注意header 和各個product 之間的線.

圖 12: DataList 現在包含了 Header Row 和每個Product 之間有一條線
第五步: 使用Repeater
在浏覽圖12的例子時,你可以看看頁面的源文件.你會看到DataList 包含有<tr>和<td>標記的HTML<table>.這個實際上和GridView一樣.我們會在將來的教程裡看到,DataList允許每一行顯示多條記錄.
但如果你不想使用HTML<table>呢?我們將使用Repeater .Repeater 也是基於templates構建的.它提供以下5種template:
HeaderTemplate — 在items前加指定的標記
ItemTemplate — 用來呈現items
AlternatingItemTemplate — 用來呈現alternating items
SeparatorTemplate —在各個item 之間加指定的標記
FooterTemplate - 在items後加指定的標記
在ASP.NET 1.x版本裡.Repeater 通常用來顯示一些數據列.在這種情況下,HeaderTemplate 和FooterTemplates 包含一對<ul>標記,而ItemTemplate 包含 <li> 和數據綁定語法.這種方法在ASP.NET 2.0也適用,比如我們在母板頁和站點導航一章裡看到的例子:
在Site.master母板頁裡, Repeater 用來顯示頂級站點內容(Basic Reporting, Filtering Reports, Customized Formatting, and so on); 嵌套的Repeater 用來顯示 子區域的內容.
在SectionLevelTutorialListing.ascx用戶控件裡, Repeater 用來顯示當前站點區域的子區域內容.
注意:ASP.NET 2.0可以使用BulletedList control.使用它的時候不需要指定任何和list有關的HTML.而僅僅是指定每個list item的字段.
Repeater 是一個"全能"的控件,如果你找不到控件可以產生需要的標記語言,那麼可以使用Repeater .我們來舉例說明,在第二步裡創建的顯示Product信息的DataList上顯示出categoried.我們將每個categorie作為一列顯示在單行的HTML<table>裡.從工具箱裡拖一個Repeater 到顯示Product 的DataList上.和DataList一樣,在定義templates前,Repeater 是灰色的.
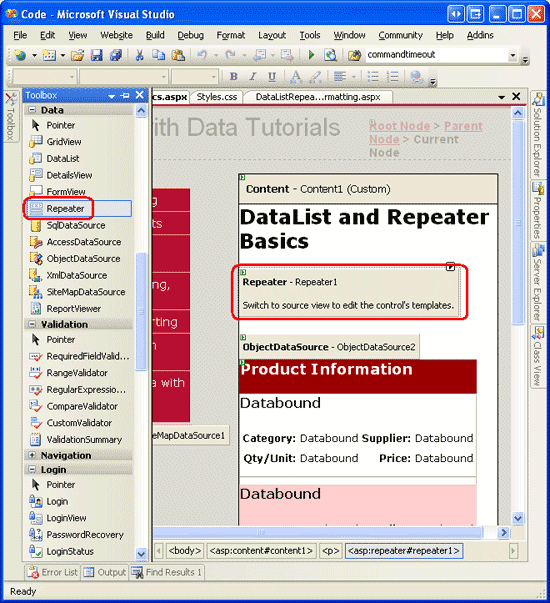
圖 13: 添加一個 Repeater 控件
在Repeater 的智能標簽裡只有一個可選項:選擇數據源.創建一個ObjectDataSource ,用CategoriesBLL 類的GetCategories 方法配置它.
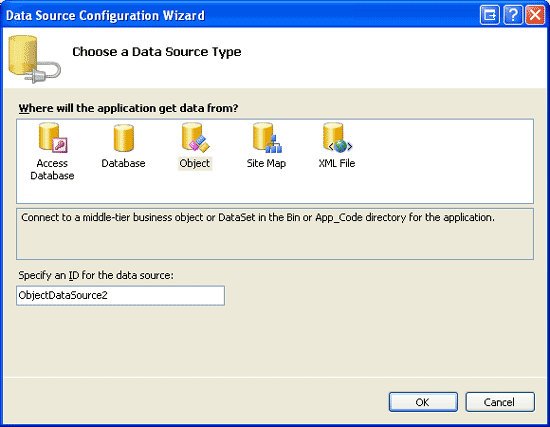
圖 14: 創建ObjectDataSource
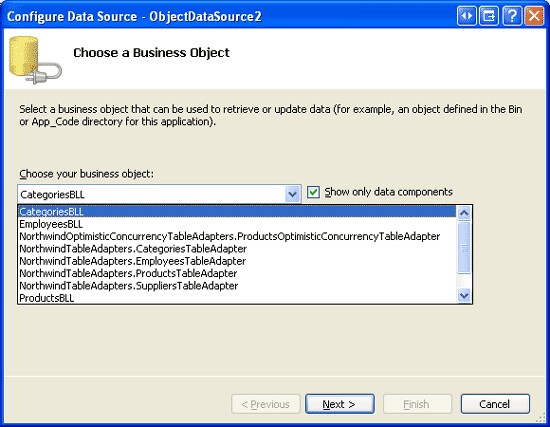
圖 15: 用 CategoriesBLL 類配置ObjectDataSource
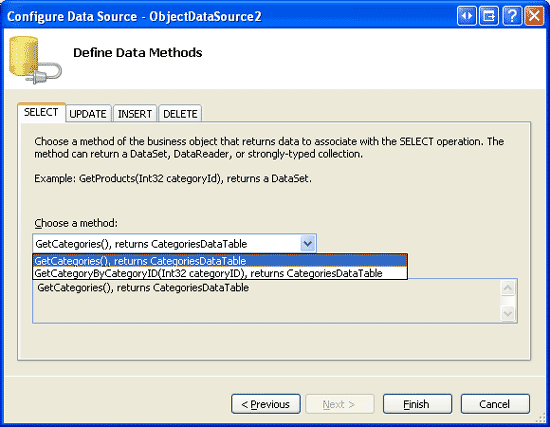
圖16: 用 GetCategories Method獲取所有Categories的信息
和DataList不一樣,在綁定到數據源後,Visual Studio不會為Repeater 自動創建ItemTemplate .而且Repeater 的templates 不能通過設計器來配置,只能寫頁面代碼.
我們用如下標記來將每個category作為一列顯示在單行的<table>裡:
<table>
 <tr>
  <td>Category 1</td>
  <td>Category 2</td>
  ...
  <td>Category N</td>
 </tr>
</table>
由於<td>Category X</td>是重復的一部分,因此會顯示在Repeater的ItemTemplate裡.在它之前的標記<table><tr>會放在HeaderTemplate裡,而結束標記</tr></table>會放在FooterTemplate裡.在設計器的左下角點源視圖按鈕進入ASP.NET頁的聲明代碼部分,輸入以下代碼:
<asp:Repeater ID="Repeater1" runat="server" DataSourceID="ObjectDataSource2"
 EnableViewState="False">
 <HeaderTemplate>
  <table>
   <tr>
 </HeaderTemplate>
 <ItemTemplate>
    <td><%# Eval("CategoryName") %></td>
 </ItemTemplate>
 <FooterTemplate>
   </tr>
  </table>
 </FooterTemplate>
</asp:Repeater>
Repeater 精確的包含在它模板裡指定的標記,不會有任何多余的部分.圖17顯示通過浏覽器浏覽Repeater的樣子.
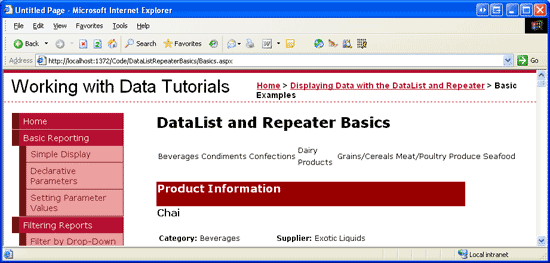
圖 17: 在單行的HTML <table> 用單獨的列列出每個Category
第六步: 改善Repeater的外觀
既然Repeater 是精確呈現在templates裡指定的標記,那麼你應該可以想到它不包含任何和風格有關的屬性.為了改變Repeater產生的內容的外觀,我們需要手動的將HTML或CSS加到它的templates裡.
在這個例子裡,我們將做一個類似DataList的alternating rows那樣的東西,改變category 的背景色.我們通過ItemTemplate 和AlternatingItemTemplate 來為每個Repeater item 指定RowStyle CSS class ,為每個alternating Repeater item 指定AlternatingRowStyle CSS class ,象下面的代碼一樣:
<ItemTemplate>
 <td class="RowStyle"><%# Eval("CategoryName") %></td>
</ItemTemplate>
<AlternatingItemTemplate>
 <td class="AlternatingRowStyle"><%# Eval("CategoryName") %></td>
</AlternatingItemTemplate>
我們還要添加一個text為“Product Categories”的header .由於我們不知道 <table>會由多少列組成,最簡單的方法保證產生的header 可以跨越所有的列是使用兩個<table>.第一個<table>包含兩行 — header 和一行包含第二個 <table>的行.第二個 <table>裡每個category 為一列.
<table>
 <tr>
  <th>Product Categories</th>
 </tr>
 <tr>
  <td>
   <table>
   <tr>
    <td>Category 1</td>
    <td>Category 2</td>
    ...
    <td>Category N</td>
   </tr>
   </table>
  </td>
 </tr>
</table>
下面的 HeaderTemplate 和FooterTemplate 產生需要的標記:
<asp:Repeater ID="Repeater1" runat="server" DataSourceID="ObjectDataSource2"
 EnableViewState="False">
 <HeaderTemplate>
  <table cellpadding="0" cellspacing="0">
   <tr>
    <th class="HeaderStyle">Product Categories</th>
   </tr>
   <tr>
    <td>
     <table cellpadding="4" cellspacing="0">
      <tr>
 </HeaderTemplate>
 <ItemTemplate>
       <td class="RowStyle"><%# Eval("CategoryName") %></td>
 </ItemTemplate>
 <AlternatingItemTemplate>
       <td class="AlternatingRowStyle">
        <%# Eval("CategoryName") %></td>
 </AlternatingItemTemplate>
 <FooterTemplate>
      </tr>
     </table>
    </td>
   </tr>
  </table>
 </FooterTemplate>
</asp:Repeater>
圖18 裡可以看到現在Repeater的樣子.
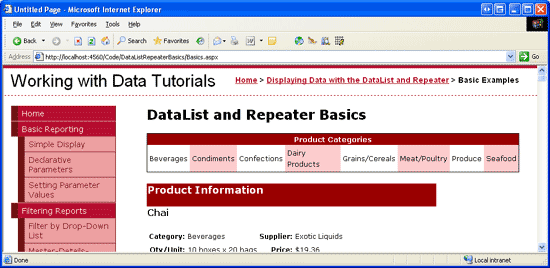
圖 18: Category 列的背景色交替變換and Includes a Header Row
總結
雖然使用GridView 來顯示,編輯,刪除,排序和分頁數據都非常容易,但是很臃腫.為了更好的控制外觀,我們需要使用DataList 或Repeater .這些控件使用templates 來顯示記錄,而不是BoundFields.
DataList 包含一個HTML <table>,默認情況下table的一行顯示數據源的一條記錄,和GridView一樣.我們在以後的教程裡會看到,DataList 可以在一個table 行裡表示多條記錄.而另一方面,Repeater嚴格的顯示在templates指定的標記.它不會添加任何額外的信息,因此通常被用來在除了 <table> 以外的HTML元素裡顯示數據.
DataList 和Repeater 在輸出上提供了更大的靈活性,而和GridView相比,它們又缺少很多內置的特性.在以後的教程裡我們會看到,有一些特性我們可以很簡單的加上.但是要記住,使用DataList 和Repeater而不是GridView ,如果想使用這些特性的話,你必須去實現它們.
祝編程快樂!
作者簡介
Scott Mitchell,著有六本ASP/ASP.NET方面的書,是4GuysFromRolla.com的創始人,自1998年以來一直應用 微軟Web技術。Scott是個獨立的技術咨詢顧問,培訓師,作家,最近完成了將由Sams出版社出版的新作,24小時內精通ASP.NET 2.0。他的聯系電郵為mitchell@4guysfromrolla.com,也可以通過他的博客http://ScottOnWriting.NET與他聯系。