課程設計需要實現上傳文件模塊,本來ASP.NET是有內置的控件,但是ASP.NET MVC沒有,所以就有兩種方 法:自定義和采用第三方插件。由於時間的關系,故采用第三方插件:uploadify。
uploadify的使用必 須下載相應的文件,下載地址:http://www.uploadify.com/download/。
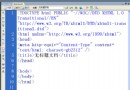
先是視 圖:
<asp:Content ID="Content3" ContentPlaceHolderID="head" runat="server">
    <script src="/Scripts/swfobject.js" type="text/javascript"></script>
    <script src="/Scripts/jquery-1.4.1.min.js" type="text/javascript"></script>
    <script src="/Scripts/jquery.uploadify.v2.1.0.min.js" type="text/javascript"></script>
    <link href="/Content/uploadify.css" rel="stylesheet" type="text/css" />

    <style type="text/css">
        .SuccessText
        {
            color: Red;
            font-weight: bold;
        }

        .FaileText
        {
            color: Green;
            font-weight: bold;
        }
    </style>

    <script type="text/javascript">
        $(function () {
            $('#fileInput1').uploadify({
                'uploader': '/Content/uploadify.swf',
                'script': '/Home/LoadFile',
                'folder': '/UploadFiles',
                'cancelImg': '/Content/cancel.png',
                'sizeLimit': 1024 * 1024 * 4, //4M
                'multi': true,
                'onComplete': Complete
            });

        });
        function Complete(event, queueID, fileObj, response, data) {
            if (response != "") {
                showInfo("成功上傳" + response, true);
            }
            else {
                showInfo("文件上傳出錯!", false);
            }
        }
        //顯示提示信息,SuccessText為綠色,即上傳成功;FalseText為紅色,即上傳失敗

function showInfo(msg, type) {
            var msgClass = type == true ? "SuccessText" : "FaileText";
            $("#result").removeClass();
            $("#result").addClass(msgClass);
            $("#result").html(msg);
        }
        //如果點擊‘導入文件’時選擇文件為空,則提示
        function checkLoad() {
            if ($.trim($('#fileInput1Queue').html()) == "") {
                alert('請先選擇要上傳的文件!');
                return false;
            }
            return true;
        }
    </script>
</asp:Content>

<asp:Content ID="Content2" ContentPlaceHolderID="MainContent" runat="server">

    <p>
        <p>
            <input id="fileInput1" name="fileInput1" type="file" />
        </p>
        <p style="margin-top: 5px; font-size: 14px; font-weight: bold;">
            <a href="javascript:if(checkLoad()){$('#fileInput1').uploadifySettings

('scriptData',{'name':$('#test').val()});$('#fileInput1').uploadifyUpload();}">上傳</a>
        </p>
        <p style="margin-top: 5px; font-size: 14px; font-weight: bold;"><span

id="result"></span></p>
    </p>
</asp:Content>