這裡,我們同樣是使用ZPhotoEngine庫來實現,畢竟這個庫中實現的效果跟PS是幾乎一模一樣的,關於下載地址,文章最後會給出,廢話不多說了,磨皮步驟如下:
一,對原圖的副本a執行表面模糊,半徑15;
二,對原圖執行高反差保留,半徑1.0;
三,對高反差結果與原圖做線性光圖層處理,50%透明度即可;
根據以上三步,我的磨皮類主要代碼如下:
using System;
using System.Collections.Generic;
using System.Linq;
using System.Text;
using System.Drawing;
using System.Drawing.Imaging;

namespace TestDemo
{
    unsafe class ImageFilter
    {
        ZPhotoEngineDll zp = new ZPhotoEngineDll();
        public Bitmap SoftSkinFilter(Bitmap src, int blurRadius)
        {
            //表面模糊圖層
            Bitmap a = zp.SurfaceBlur(src, 28, blurRadius);
            //高反差圖層
            Bitmap highPass = zp.HighPassProcess(src, 1.0f);
            BitmapData srcData = a.LockBits(new Rectangle(0, 0, a.Width, a.Height), ImageLockMode.ReadWrite, PixelFormat.Format32bppArgb);
            BitmapData dstData = highPass.LockBits(new Rectangle(0, 0, highPass.Width, highPass.Height), ImageLockMode.ReadWrite, PixelFormat.Format32bppArgb);
            byte* p = (byte*)srcData.Scan0;
            byte* dstP = (byte*)dstData.Scan0;
            int offset = srcData.Stride - a.Width * 4;
            int temp = 0;
            for (int j = 0; j < a.Height; j++)
            {
                for (int i = 0; i < a.Width; i++)
                {
                    ////////////////Process image...
                    //線性光圖層混合
                    temp = zp.ModeLinearLight(p[0], dstP[0]);
                    //透明度50%
                    dstP[0] = (byte)((p[0] + temp) >> 1);
                    temp = zp.ModeLinearLight(p[1], dstP[1]);
                    dstP[1] = (byte)((p[1] + temp) >> 1);
                    temp = zp.ModeLinearLight(p[2], dstP[2]);
                    dstP[2] = (byte)((p[2] + temp) >> 1);
                    dstP += 4;
                    p += 4;
                }
                dstP += offset;
                p += offset;
            }
            a.UnlockBits(srcData);
            highPass.UnlockBits(dstData);
            return highPass;
        }

    }
}
界面部分主要代碼如下:
using System;
using System.Collections.Generic;
using System.ComponentModel;
using System.Data;
using System.Drawing;
using System.Linq;
using System.Text;
using System.Windows.Forms;
using System.Drawing.Imaging;

namespace TestDemo
{
    public partial class Form1 : Form
    {
        public Form1()
        {
            InitializeComponent();
        }

        #region  變量聲明
        //圖像路徑
        private String curFileName = null;
        //當前圖像變量
        private Bitmap curBitmap = null;
        //原始圖像變量
        private Bitmap srcBitmap = null;
        //
        ImageFilter imfilter = new ImageFilter();
        #endregion

        #region  圖像打開保存模塊
        //打開圖像函數
        public void OpenFile()
        {
            OpenFileDialog ofd = new OpenFileDialog();
            ofd.Filter = "所有圖像文件 | *.bmp; *.pcx; *.png; *.jpg; *.gif;" +
                   "*.tif; *.ico; *.dxf; *.cgm; *.cdr; *.wmf; *.eps; *.emf|" +
                   "位圖( *.bmp; *.jpg; *.png;...) | *.bmp; *.pcx; *.png; *.jpg; *.gif; *.tif; *.ico|" +
                   "矢量圖( *.wmf; *.eps; *.emf;...) | *.dxf; *.cgm; *.cdr; *.wmf; *.eps; *.emf";
            ofd.ShowHelp = true;
            ofd.Title = "打開圖像文件";
            if (ofd.ShowDialog() == DialogResult.OK)
            {
                curFileName = ofd.FileName;
                try
                {
                    curBitmap = (Bitmap)System.Drawing.Image.FromFile(curFileName);
                    srcBitmap = new Bitmap(curBitmap);
                }
                catch (Exception exp)
                { MessageBox.Show(exp.Message); }
            }
        }
        //保存圖像函數
        public void SaveFile()
        {
            SaveFileDialog sfd = new SaveFileDialog();
            sfd.Filter = "PNG文件(*.png)|*.png";
            if (sfd.ShowDialog() == DialogResult.OK)
            {
                pictureBox1.Image.Save(sfd.FileName, ImageFormat.Png);
            }

        }
        //打開圖像
        private void openBtn_Click(object sender, EventArgs e)
        {
            OpenFile();
            if (curBitmap != null)
            {
                pictureBox1.Image = (Image)curBitmap;
            }
        }
        //保存圖像
        private void saveBtn_Click(object sender, EventArgs e)
        {
            if (pictureBox1.Image != null)
                SaveFile();
        }
        #endregion

        //確定
        private void okBtn_Click(object sender, EventArgs e)
        {
            if (pictureBox1.Image != null)
            {
                int radius =  Convert.ToInt32(textBox1.Text.ToString());
                if (radius >= 0 && radius <= 20)
                {
                    pictureBox1.Image = (Image)imfilter.SoftSkinFilter(curBitmap, radius);
                }
            }
        }

    }
}
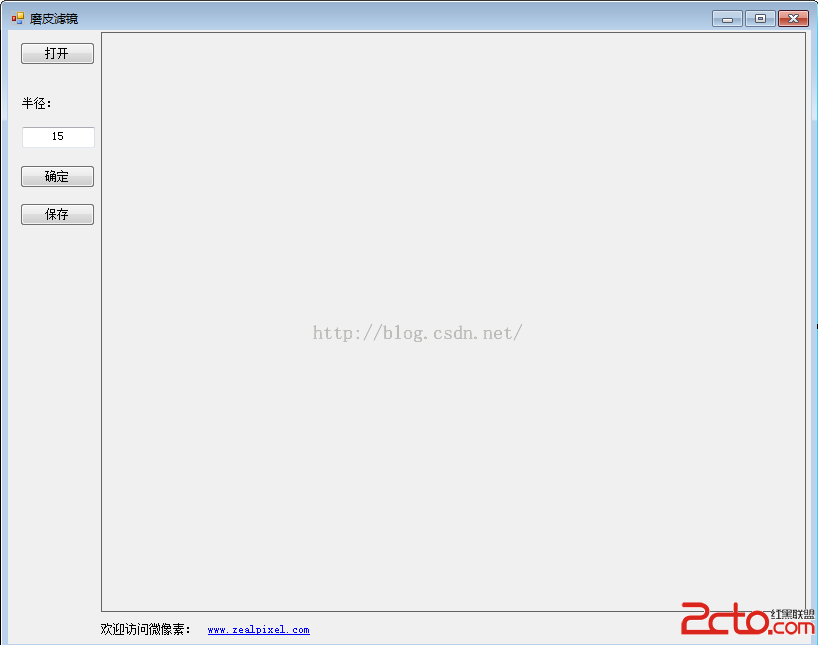
程序界面如下:
最後,放上效果圖:


原圖 C#程序效果圖

PS效果圖
大家可以對比一下,PS效果跟本文實現效果是一模一樣的,差別幾乎是肉眼看不到的呵呵。