C#中若何應用Winform完成炫酷的通明動畫界面。本站提示廣大學習愛好者:(C#中若何應用Winform完成炫酷的通明動畫界面)文章只能為提供參考,不一定能成為您想要的結果。以下是C#中若何應用Winform完成炫酷的通明動畫界面正文
做過.NET Winform窗體丑化的人應當都很熟習UpdateLayeredWindow吧,UpdateLayeredWindow可以完成窗體的隨意率性通明,後果很好,不會有毛邊。不外應用這個API以後,會有一個成績就是沒法應用通俗控件,並且沒有Paint新聞。為懂得決這個成績,有兩種辦法。

1、應用雙層窗體,底層窗體應用UpdateLayeredWindow作為配景,下層窗體用通俗窗體,而且可使用TransparencyKey或許Region來完成去除不須要的窗體內容,讓下層窗體能看究竟層的窗體。
2、直接單層窗體,應用控件的DrawToBitmap把控件圖象繪制到UpdateLayeredWindow 的窗體上,如許便可以看到通俗控件了。不外這個也有成績:1.控件內容不克不及主動更新 2.效力低,許多控件應用DrawToBitmap繪制出的圖象不完全,乃至繪制不出圖象。好比TextBox沒法顯示光標,WebBrowser沒法 顯示內容。
3、采取DirectUI技巧,重寫一切基本控件。後果最好,不外任務量偉大。
應用UpdateLayeredWindow時,普通是須要對Bitmap緩存起來,經由過程設置剪輯區域,部分重繪來進步效力。別的還可以異步重繪,模仿Winform的掉效到重繪。
有些人會說為何不直接用WPF啊,Wpf和Winform各有優缺陷,順應分歧的場所。Winform絕對於應用更簡略一些,體系請求更低。固然須要看人的習氣了和善於的。
UpdateLayeredWindow 根本應用辦法:
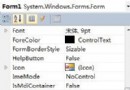
protected  override CreateParams CreateParams
      {
       get
         {
         CreateParams cp =  base .CreateParams;
         cp.ExStyle |=  0x00080000 ; // WS_EX_LAYERED 擴大款式
         return cp;
       }
     }
重寫窗體的 CreateParams 屬性
API挪用:
public  void SetBitmap(Bitmap bitmap, byte opacity)
  {
   if (bitmap.PixelFormat != PixelFormat.Format32bppArgb)
     throw  new ApplicationException( "位圖必需是32位包括alpha 通道" );

  IntPtr screenDc = Win32.GetDC(IntPtr.Zero);
  IntPtr memDc = Win32.CreateCompatibleDC(screenDc);
  IntPtr hBitmap = IntPtr.Zero;
  IntPtr oldBitmap = IntPtr.Zero;

   try
     {
    hBitmap = bitmap.GetHbitmap(Color.FromArgb( 0 ));  // 創立GDI位圖句柄,效力較低
    oldBitmap = Win32.SelectObject(memDc, hBitmap);

    Win32.Size size =  new Win32.Size(bitmap.Width, bitmap.Height);
    Win32.Point pointSource =  new Win32.Point( 0 , 0 );
    Win32.Point topPos =  new Win32.Point(Left, Top);
    Win32.BLENDFUNCTION blend =  new Win32.BLENDFUNCTION();
    blend.BlendOp       = Win32.AC_SRC_OVER;
    blend.BlendFlags      =  0 ;
    blend.SourceConstantAlpha = opacity;
    blend.AlphaFormat     = Win32.AC_SRC_ALPHA;

    Win32.UpdateLayeredWindow(Handle, screenDc, ref topPos, ref size, memDc, ref pointSource, 0 , ref blend, Win32.ULW_ALPHA);
  }
   finally
     {
    Win32.ReleaseDC(IntPtr.Zero, screenDc);
     if (hBitmap != IntPtr.Zero)
       {
      Win32.SelectObject(memDc, oldBitmap);

      Win32.DeleteObject(hBitmap);
    }
    Win32.DeleteDC(memDc);
  }
}
API聲明:
class Win32
  {
   public  enum Bool
    {
    False =  0 ,
    True
  } ;


  [StructLayout(LayoutKind.Sequential)]
   public  struct Point
     {
     public Int32 x;
     public Int32 y;

     public Point(Int32 x, Int32 y)
     { this .x = x; this .y = y; }
  }


  [StructLayout(LayoutKind.Sequential)]
   public  struct Size
     {
     public Int32 cx;
     public Int32 cy;

     public Size(Int32 cx, Int32 cy)
      { this .cx = cx; this .cy = cy; }
  }


  [StructLayout(LayoutKind.Sequential, Pack =  1 )]
   struct ARGB
    {
     public  byte Blue;
     public  byte Green;
     public  byte Red;
     public  byte Alpha;
  }


  [StructLayout(LayoutKind.Sequential, Pack =  1 )]
   public  struct BLENDFUNCTION
     {
     public  byte BlendOp;
     public  byte BlendFlags;
     public  byte SourceConstantAlpha;
     public  byte AlphaFormat;
  }


   public  const Int32 ULW_COLORKEY =  0x00000001 ;
   public  const Int32 ULW_ALPHA =  0x00000002 ;
   public  const Int32 ULW_OPAQUE =  0x00000004 ;

   public  const  byte AC_SRC_OVER =  0x00 ;
   public  const  byte AC_SRC_ALPHA =  0x01 ;


  [DllImport( " user32.dll " , ExactSpelling =  true , SetLastError =  true )]
   public  static  extern Bool UpdateLayeredWindow(IntPtr hwnd, IntPtr hdcDst, ref Point pptDst, ref Size psize, IntPtr hdcSrc, ref Point pprSrc, Int32 crKey, ref BLENDFUNCTION pblend, Int32 dwFlags);

  [DllImport( " user32.dll " , ExactSpelling =  true , SetLastError =  true )]
   public  static  extern IntPtr GetDC(IntPtr hWnd);

  [DllImport( " user32.dll " , ExactSpelling =  true )]
   public  static  extern  int ReleaseDC(IntPtr hWnd, IntPtr hDC);

  [DllImport( " gdi32.dll " , ExactSpelling =  true , SetLastError =  true )]
   public  static  extern IntPtr CreateCompatibleDC(IntPtr hDC);

  [DllImport( " gdi32.dll " , ExactSpelling =  true , SetLastError =  true )]
   public  static  extern Bool DeleteDC(IntPtr hdc);

  [DllImport( " gdi32.dll " , ExactSpelling =  true )]
   public  static  extern IntPtr SelectObject(IntPtr hDC, IntPtr hObject);

  [DllImport( " gdi32.dll " , ExactSpelling =  true , SetLastError =  true )]
   public  static  extern Bool DeleteObject(IntPtr hObject);

  [DllImport( " user32.dll " , EntryPoint =  " SendMessage " )]
   public  static  extern  int SendMessage( int hWnd, int wMsg, int wParam, int lParam);
  [DllImport( " user32.dll " , EntryPoint =  " ReleaseCapture " )]

   public  static  extern  int ReleaseCapture();
   public  const  int WM_SysCommand =  0x0112 ;
   public  const  int SC_MOVE =  0xF012 ;

   public  const  int SC_MAXIMIZE =  61488 ;
   public  const  int SC_MINIMIZE =  61472 ;
}
須要出現圖象的時刻挪用 SetBitmap 辦法。只需優化好,出現效力比通俗的Paint重繪方法高許多,而且不卡不閃耀,支撐隨意率性通明。
上面是本身開辟出來的後果:


這個是用OpenGL繪制的

後果是否是很酷呀,經由過程以上內容的引見,願望對年夜家的進修有所贊助。