介紹
重新想象 Windows 8 Store Apps 之 後台任務
推送通知
示例
1、客戶端
BackgroundTask/PushNotification.xaml
<Page
    x:Class="XamlDemo.BackgroundTask.PushNotification"
    xmlns="http://schemas.microsoft.com/winfx/2006/xaml/presentation"
    xmlns:x="http://schemas.microsoft.com/winfx/2006/xaml"
    xmlns:local="using:XamlDemo.BackgroundTask"
    xmlns:d="http://schemas.microsoft.com/expression/blend/2008"
    xmlns:mc="http://schemas.openxmlformats.org/markup-compatibility/2006"
    mc:Ignorable="d">

    <Grid Background="Transparent">
        <StackPanel Margin="120 0 0 0">

            <TextBlock Name="lblMsg" FontSize="14.667" TextWrapping="Wrap"  />

            <Button Name="btnCreateChannel" Content="create the channel" Margin="0 10 0 0" Click="btnCreateChannel_Click"  />

            <TextBox Name="txtUri" Margin="0 10 10 0"  />

            <Image Source="wns.png" Margin="0 10 0 0" HorizontalAlignment="Left" Width="800"  />

        </StackPanel>
    </Grid>
</Page>
BackgroundTask/PushNotification.xaml.cs
/*
* 演示如何接收推送通知
*
* 注:
* 需要在 Package.appxmanifest 中增加後台任務聲明,並勾選“推送通知”
* 在 win8 商店創建了應用後,需要將此 app 的商店中的 identity 復制到 Package.appxmanifest 的 identity 節點
* 不能在模擬器中運行
* 每次新建的 channel 有效期為 30 天
*
* 另:
* WNS - Windows Push Notification Service
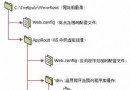
* 推送通知的服務端參見:WebServer/PushNotification 內的文件
*/
using System;
using Windows.ApplicationModel.Background;
using Windows.Networking.PushNotifications;
using Windows.UI.Notifications;
using Windows.UI.Popups;
using Windows.UI.Xaml;
using Windows.UI.Xaml.Controls;
namespace XamlDemo.BackgroundTask
{
public sealed partial class PushNotification : Page
{
public PushNotification()
{
this.InitializeComponent();
}
private async void btnCreateChannel_Click(object sender, RoutedEventArgs e)
{
// 當收到推送的 raw 通知時,如果 app 在鎖屏,則可以觸發後台任務以執行相關的邏輯(PushNotificationTrigger)
BackgroundAccessStatus status = BackgroundExecutionManager.GetAccessStatus();
if (status == BackgroundAccessStatus.Unspecified)
{
status = await BackgroundExecutionManager.RequestAccessAsync();
}
if (status == BackgroundAccessStatus.Denied)
{
await new MessageDialog("請先將此 app 添加到鎖屏").ShowAsync();
return;
}
// 創建一個推送通知信道,每個新建的 channel 有效期為 30 天,所以建議每次進入 app 後都重新建一個 channel(但是需要注意間隔較短的話,則會復用之前的 channel)
PushNotificationChannel channel = await PushNotificationChannelManager.CreatePushNotificationChannelForApplicationAsync();
// 接收到通知後所觸發的事件
channel.PushNotificationReceived += channel_PushNotificationReceived;
// channel.Close(); // 關閉 channel
// 查看本欄目
/*
* 用於反序列化從 https://login.live.com/accesstoken.srf 獲取到的結果
*/
using System.Runtime.Serialization;
namespace WebServer.PushNotification
{
[DataContract]
public class OAuthToken
{
[DataMember(Name = "access_token")]
public string AccessToken { get; set; }
[DataMember(Name = "token_type")]
public string TokenType { get; set; }
}
}
WebServer/PushNotification/OAuthHelper.cs
/*
* https://login.live.com/accesstoken.srf 的 OAuth 驗證的幫助類
*/
using System;
using System.IO;
using System.Net;
using System.Runtime.Serialization.Json;
using System.Text;
namespace WebServer.PushNotification
{
public class OAuthHelper
{
/// <summary>
/// 獲取 https://login.live.com/accesstoken.srf 的 OAuth 驗證的 access-token
/// </summary>
/// <param name="secret">在 win8 商店創建 app 後獲取到的 “客戶端密鑰”</param>
// 查看本欄目