在上一篇文章中,我們討論了如何通過CallContextInitializer實現Localization的例子,具體的做法是將client端的culture通過SOAP header傳到service端,然後通過自定義的CallContextInitializer設置當前方法執行的線程culture。在client端,當前culture信息是通過OperationContext.Current.OutgoingMessageHeaders手工至於SOAP Header中的。實際上,我們可以通過基於WCF的另一個可擴展對象來實現這段邏輯,這個可擴展對象就是MessageInspector。我們今天來討論MessageInspector應用的另外一個場景:如何通過MessageInspector來傳遞Context信息。
1. Ambient Context
在一個多層結構的應用中,我們需要傳遞一些上下文的信息在各層之間傳遞,比如:為了進行Audit,需要傳遞一些當前當前user profile的一些信息。在一些分布式的環境中也可能遇到context信息從client到server的傳遞。如何實現這種形式的Context信息的傳遞呢?我們有兩種方案:
一、將Context作為參數傳遞:將context作為API的一部分,context的提供者在調用context接收者的API的時候顯式地設置這些Context信息,context的接收者則直接通過參數將context取出。這雖然能夠解決問題,但決不是一個好的解決方案,因為API應該只和具體的業務邏輯有關,而context 一般是與非業務邏輯服務的,比如Audit、Logging等等。此外,將context納入API作為其一部分,將降低API的穩定性, 比如,今天只需要當前user所在組織的信息,明天可能需求獲取當前客戶端的IP地址,你的API可以會經常變動,這顯然是不允許的。
二、創建Ambient Context來保存這些context信息,Ambient Context可以在不同的層次之間、甚至是分布式環境中每個節點之間共享或者傳遞。比如在ASP.NET 應用中,我們通過SessionSate來存儲當前Session的信息;通過HttpContext來存儲當前Http request的信息。在非Web應用中,我們通過CallContext將context信息存儲在TLS(Thread Local Storage)中,當前線程下執行的所有代碼都可以訪問並設置這些context數據。
2、Application Context
介於上面所述,我創建一個名為Application Context的Ambient Context容器,Application Context實際上是一個dictionary對象,通過key-value pair進行context元素的設置,通過key獲取相對應的context元素。Application Context通過CallContext實現,定義很簡單:
namespace Artech.ContextPropagation

{

  [Serializable]

  public class ApplicationContext:Dictionary<string,object>

  {

    private const string CallContextKey = "__ApplicationContext";

    internal const string ContextHeaderLocalName = "__ApplicationContext";

    internal const string ContextHeaderNamespace = "urn:artech.com";


    private void EnsureSerializable(object value)

    {

      if (value == null)

      {

        throw new ArgumentNullException("value");

      }

      if (!value.GetType().IsSerializable)

      {

        throw new ArgumentException(string.Format("The argument of the type \"{0}\" is not serializable!", value.GetType().FullName));

      }

    }


    public new object this[string key]

    {

      get

      {

        return base[key];

      }

      set

      {

        this.EnsureSerializable(value);

        base[key] = value;

      }

    }


    public int Counter

    {

      get

      {

        return (int)this["__Count"];

      }

      set

      {

        this["__Count"] = value;

      }

    }


    public static ApplicationContext Current

    {

      get

      {

        if (CallContext.GetData(CallContextKey) == null)

        {

          CallContext.SetData(CallContextKey, new ApplicationContext());

        }


        return CallContext.GetData(CallContextKey) as ApplicationContext;

      }

      set

      {

        CallContext.SetData(CallContextKey, value);

      }

    }

  }

}
由於此Context將會置於SOAP Header中從client端向service端進行傳遞,我們需要為此message header指定一個local name和namespace,那麼在service端,才能通過此local name和namespace獲得此message header。同時,在lcoal domain, client或者service,context是通過CallContext進行存取的,CallContext也是一個類似於disctionary的結構,也需要為此定義一個Key:
private const string CallContextKey = "__ApplicationContext"; internal const string ContextHeaderLocalName = "__ApplicationContext";
internal const string ContextHeaderNamespace = "urn:artech.com";
由於ApplicaitonContext直接繼承自Dictionary<string,object>,我們可以通過Index進行元素的設置和提取,考慮到context的跨域傳播,需要進行序列化,所以重寫了Indexer,並添加了可序列化的驗證。為了後面演示方面,我們定義一個context item:Counter。
Static類型的Current屬性通過CallContext的SetData和GetData方法對當前的ApplicationContext進行設置和提取:
public static ApplicationContext Current

    {

      get

      {

        if (CallContext.GetData(CallContextKey) == null)

        {

          CallContext.SetData(CallContextKey, new ApplicationContext());

        }


        return CallContext.GetData(CallContextKey) as ApplicationContext;

      }

      set

      {

        CallContext.SetData(CallContextKey, value);

      }

}
3、通過MessageInspector將AppContext置於SOAP header中
通過本系列第3部分對Dispatching system的介紹了,我們知道了在client端和service端,可以通過MessageInspector對request message或者reply message (incoming message或者outgoings message)進行檢驗。MessageInspector可以對MessageHeader進行自由的添加、修改和刪除。在service端的MessageInspector被稱為DispatchMessageInspector,相對地,client端被稱為ClientMessageInspector。我們現在自定義我們自己的ClientMessageInspector。
namespace Artech.ContextPropagation

{

  public class ContextAttachingMessageInspector:IClientMessageInspector

  {

    public bool IsBidirectional

    { get; set; }


    public ContextAttachingMessageInspector()

      : this(false)

    { }


    public ContextAttachingMessageInspector(bool isBidirectional)

    {

      this.IsBidirectional = IsBidirectional;

    }


    IClientMessageInspector Members#region IClientMessageInspector Members


    public void AfterReceiveReply(ref Message reply, object correlationState)

    {

      if (IsBidirectional)

      {

        return;

      }


      if (reply.Headers.FindHeader(ApplicationContext.ContextHeaderLocalName, ApplicationContext.ContextHeaderNamespace) < 0)

      {

        return;

      }


      ApplicationContext context = reply.Headers.GetHeader<ApplicationContext>(ApplicationContext.ContextHeaderLocalName, ApplicationContext.ContextHeaderNamespace);

      if (context == null)

      {

        return;

      }


      ApplicationContext.Current = context;

    }


    public object BeforeSendRequest(ref Message request, IClientChannel channel)

    {

      MessageHeader<ApplicationContext> contextHeader = new MessageHeader<ApplicationContext>(ApplicationContext.Current);

      request.Headers.Add(contextHeader.GetUntypedHeader(ApplicationContext.ContextHeaderLocalName, ApplicationContext.ContextHeaderNamespace));

      return null;

    }


    #endregion

  }

}
一般地,我們僅僅需要Context的單向傳遞,也就是從client端向service端傳遞,而不需要從service端向client端傳遞。不過回來應付將來潛在的需求,也許可能需要這樣的功能:context從client端傳向service端,service對其進行修改後需要將其返回到client端。為此,我們家了一個屬性:IsBidirectional表明是否支持雙向傳遞。
在BeforeSendRequest,我們將ApplicationContext.Current封裝成一個MessageHeader, 並將此MessageHeader添加到request message 的header集合中,local name和namespace采用的是定義在ApplicationContext中常量:
public object BeforeSendRequest(ref Message request, IClientChannel channel)

{

      MessageHeader<ApplicationContext> contextHeader = new MessageHeader<ApplicationContext>(ApplicationContext.Current);

      request.Headers.Add(contextHeader.GetUntypedHeader(ApplicationContext.ContextHeaderLocalName, ApplicationContext.ContextHeaderNamespace));

      return null;

}
如何支持context的雙向傳遞,我們在AfterReceiveReply負責從reply message中接收從service傳回的context,並將其設置成當前的context:
public void AfterReceiveReply(ref Message reply, object correlationState)

{

    if (IsBidirectional)

    {

      return;

    }


    if (reply.Headers.FindHeader(ApplicationContext.ContextHeaderLocalName, ApplicationContext.ContextHeaderNamespace) < 0)

    {

       return;

    }


    ApplicationContext context = reply.Headers.GetHeader<ApplicationContext>(ApplicationContext.ContextHeaderLocalName, ApplicationContext.ContextHeaderNamespace);

    if (context == null)

    {

      return;

    }


    ApplicationContext.Current = context;

}
4、通過ContextInitializer實現對Context的接收
上面我們介紹了在client端通過ClientMessageInspector將context信息存儲到request message header中,照理說我們通過可以通過DispatchMessageInspector實現對context信息的提取,但是考慮到我們設置context是通過CallContext來實現了,我們最好還是使用CallContextInitializer來做比較好一些。CallContextInitializer的定義,我們在上面一章已經作了詳細的介紹了,在這裡就不用多說什麼了。
namespace Artech.ContextPropagation

{

  public class ContextReceivalCallContextInitializer : ICallContextInitializer

  {

    public bool IsBidirectional

    { get; set; }


    public ContextReceivalCallContextInitializer()

      : this(false)

    { }


    public ContextReceivalCallContextInitializer(bool isBidirectional)

    {

      this.IsBidirectional = isBidirectional;

    }


    ICallContextInitializer Members#region ICallContextInitializer Members


    public void AfterInvoke(object correlationState)

    {

      if (!this.IsBidirectional)

      {

        return;

      }


      ApplicationContext context = correlationState as ApplicationContext;

      if (context == null)

      {

        return;

      }

      MessageHeader<ApplicationContext> contextHeader = new MessageHeader<ApplicationContext>(context);

      OperationContext.Current.OutgoingMessageHeaders.Add(contextHeader.GetUntypedHeader(ApplicationContext.ContextHeaderLocalName, ApplicationContext.ContextHeaderNamespace));

      ApplicationContext.Current = null;

    }


    public object BeforeInvoke(InstanceContext instanceContext, IClientChannel channel, Message message)

    {

      ApplicationContext context = message.Headers.GetHeader<ApplicationContext>(ApplicationContext.ContextHeaderLocalName, ApplicationContext.ContextHeaderNamespace);

      if (context == null)

      {

        return null;

      }


      ApplicationContext.Current = context;

      return ApplicationContext.Current;

    }


    #endregion

  }

}
代碼其實很簡單,BeforeInvoke中通過local name和namespace提取context對應的message header,並設置當前的ApplicationContext。如果需要雙向傳遞,則通過AfterInvoke方法將context保存到reply message的header中被送回client端。
5. 為MessageInspector和CallContextInitializer創建behavior:
namespace Artech.ContextPropagation

{

  public class ContextPropagationBehavior: IEndpointBehavior

  {

    public bool IsBidirectional

    { get; set; }


    public ContextPropagationBehavior()

      : this(false)

    { }


    public ContextPropagationBehavior(bool isBidirectional)

    {

      this.IsBidirectional = isBidirectional;

    }


    IEndpointBehavior Members#region IEndpointBehavior Members


    public void AddBindingParameters(ServiceEndpoint endpoint, BindingParameterCollection bindingParameters)

    {

    }


    public void ApplyClientBehavior(ServiceEndpoint endpoint, ClientRuntime clientRuntime)

    {

      clientRuntime.MessageInspectors.Add(new ContextAttachingMessageInspector(this.IsBidirectional));

    }


    public void ApplyDispatchBehavior(ServiceEndpoint endpoint, EndpointDispatcher endpointDispatcher)

    {

      foreach (var operation in endpointDispatcher.DispatchRuntime.Operations)

      {

        operation.CallContextInitializers.Add(new ContextReceivalCallContextInitializer(this.IsBidirectional));

      }

    }


    public void Validate(ServiceEndpoint endpoint)

    {

    }


    #endregion

  }

}
在ApplyClientBehavior中,創建我們的ContextAttachingMessageInspector對象,並將其放置到ClientRuntime 的MessageInspectors集合中;在ApplyDispatchBehavior,將ContextReceivalCallContextInitializer對象放到每個DispatchOperation的CallContextInitializers集合中。
因為我們需要通過配置的方式來使用我們的ContextPropagationBehavior,我們還需要定義對應的BehaviorExtensionElement:
namespace Artech.ContextPropagation

{

  public class ContextPropagationBehaviorElement:BehaviorExtensionElement

  {

    [ConfigurationProperty("isBidirectional", DefaultValue = false)]

    public bool IsBidirectional

    {

      get

      {

        return (bool)this["isBidirectional"];

      }

      set

      {

        this["isBidirectional"] = value;

      }

    }


    public override Type BehaviorType

    {

      get

      {

        return typeof(ContextPropagationBehavior);


      }

    }


    protected override object CreateBehavior()

    {

      return new ContextPropagationBehavior(this.IsBidirectional);

    }

  }

}
我們IsBidirectional則可以通過配置的方式來指定。
6. Context Propagation的運用
我們現在將上面創建的對象應用到真正的WCF調用環境中。我們依然創建我們經典的4層結構:

Artech.ContextPropagation.Contract:
namespace Artech.ContextPropagation.Contract

{

  [ServiceContract]

  public interface IContract

  {

    [OperationContract]

    void DoSomething();

  }

}
Artech.ContextPropagation.Services
namespace Artech.ContextPropagation.Services

{

  public class Service:IContract

  {

    IContract Members#region IContract Members


    public void DoSomething()

    {

      Console.WriteLine("ApplicationContext.Current.Count = {0}", ApplicationContext.Current.Counter);

      ApplicationContext.Current.Counter++;

    }


    #endregion

  }

}
打印出ApplicationContext.Current.Count 的值,並加1。
Hosting的Config:
<configuration>

  <system.serviceModel>

    <behaviors>

      <endpointBehaviors>

        <behavior name="contextPropagationBehavior">

          <contextPropagationElement isBidirectional="true" />

        </behavior>

      </endpointBehaviors>

    </behaviors>

    <client>

      <endpoint address="http://127.0.0.1/service" behaviorConfiguration="contextPropagationBehavior"

         binding="basicHttpBinding" contract="Artech.ContextPropagation.Contract.IContract"

        name="service" />

    </client>

    <extensions>

      <behaviorExtensions>

        <add name="contextPropagationElement" type="Artech.ContextPropagation.ContextPropagationBehaviorElement, Artech.ContextPropagation, Version=1.0.0.0, Culture=neutral, PublicKeyToken=null" />

      </behaviorExtensions>

    </extensions>

  </system.serviceModel>

</configuration>
Artech.ContextPropagation.Client
namespace Artech.ContextPropagation.Client

{

  class Program

  {

    static void Main(string[] args)

    {

      using (ChannelFactory<IContract> channelFactory = new ChannelFactory<IContract>("service"))

      {

        IContract proxy = channelFactory.CreateChannel();

        ApplicationContext.Current.Counter = 100;

        Console.WriteLine("Brfore service invocation: ApplicationContext.Current.Count = {0}", ApplicationContext.Current.Counter);

        proxy.DoSomething();

        Console.WriteLine("After service invocation: ApplicationContext.Current.Count = {0}", ApplicationContext.Current.Counter);

        Console.Read();

      }

    }

  }

}
以及config:
<configuration>

  <system.serviceModel>

    <behaviors>

      <endpointBehaviors>

        <behavior name="contextPropagationBehavior">

          <contextPropagationElement isBidirectional="true" />

        </behavior>

      </endpointBehaviors>

    </behaviors>

    <client>

      <endpoint address="http://127.0.0.1/service" behaviorConfiguration="contextPropagationBehavior"

         binding="basicHttpBinding" contract="Artech.ContextPropagation.Contract.IContract"

        name="service" />

    </client>

    <extensions>

      <behaviorExtensions>

        <add name="contextPropagationElement" type="Artech.ContextPropagation.ContextPropagationBehaviorElement, Artech.ContextPropagation, Version=1.0.0.0, Culture=neutral, PublicKeyToken=null" />

      </behaviorExtensions>

    </extensions>

  </system.serviceModel>

</configuration>
我們運行整個程序,你將會看到如下的輸出結果:
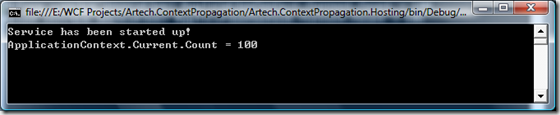
可見,Context被成功傳播到service端。再看看client端的輸出:
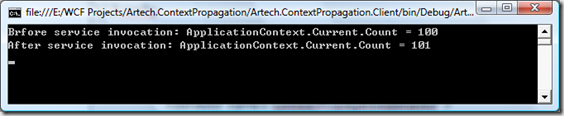
由此可見,在service端設置的context的值也成功返回到client端,真正實現了雙向傳遞。
P.S: SOA主張Stateless的service,也就是說每次調用service都應該是相互獨立的。context的傳遞實際上卻是讓每次訪問有了狀態,這實際上是違背了SOA的原則。所以,如何對於真正的SOA的設計與架構,個人覺得這種方式是不值得推薦的。但是,如何你僅僅是將WCF作為傳統的分布式手段,那麼這可能會給你的應用帶了很大的便利。
本文配套源碼