本文版權歸博客園和作者吳雙本人共同所有,轉載和爬蟲請注明博客園蝸牛原文地址,cnblogs.com/tdws
寫在前面請原諒我這個標題黨,寫到了第100篇隨筆,說是深度優化,其實也並沒有什麼深度。源碼也沒怎麼修改,如果你想使用WebApi Swagger文檔,請先移步到上一篇的中度優化。
第一篇:ASP.NET WebApi 文檔Swagger中度優化 http://www.cnblogs.com/tdws/p/6100126.html
第二篇:ASP.NET WebApi 文檔Swashbuckle.Core與SwaggerUI深度定制
1.文檔前後端分離
2.項目結構
3.實現分Area(模塊)來篩選所需展示的Controller
文檔前後端分離
本篇文章提供源碼,下載鏈接: https://github.com/coderws/CustomSwagger (由於博客園只能上傳10MB,就放github上吧,不求star,只為了方便大家下載)
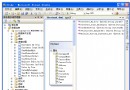
由於Swagger原版的swagger頁面和資源js css等文件被嵌入到dll當中,雖然我們可以找到swagger UI的源碼,但用起來依然感到有些不便。所以使用了github上另一個開源項目sosoapi,它的文檔功能也是基於swagger的,不過為我們做好了一定得拓展,比如現成的中英切換一類的。並且資源完全與之前的嵌入性資源不同,直接分離出來一個swagger UI的文件夾,包括js,css,images,html等等,這樣的話,我們修改起來很方便呀,可以做到你想要的定制化,並且我將swagger的後台處理源碼down下來,加到解決方案當中,以後遇到問題,再也不用收到dll不能修改和新增功能的困擾。可以將swagger作為你框架中的一部分。
項目結構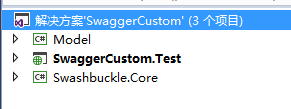
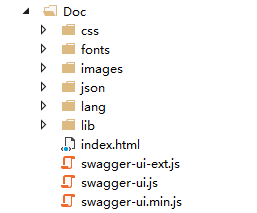
你可以看到Swashbuckle.Core。就是Swagger的後台源碼,展開Test項目,其中的Doc文件夾,就是全部的SwaggerUI的內容啦,index.html就是我們的文檔首頁:
實現分Area(模塊)來篩選所需展示的Controller
再說Area分組前提一點小的改動
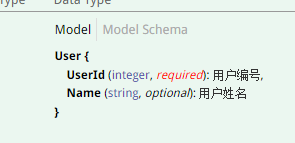 Required為醒目紅色
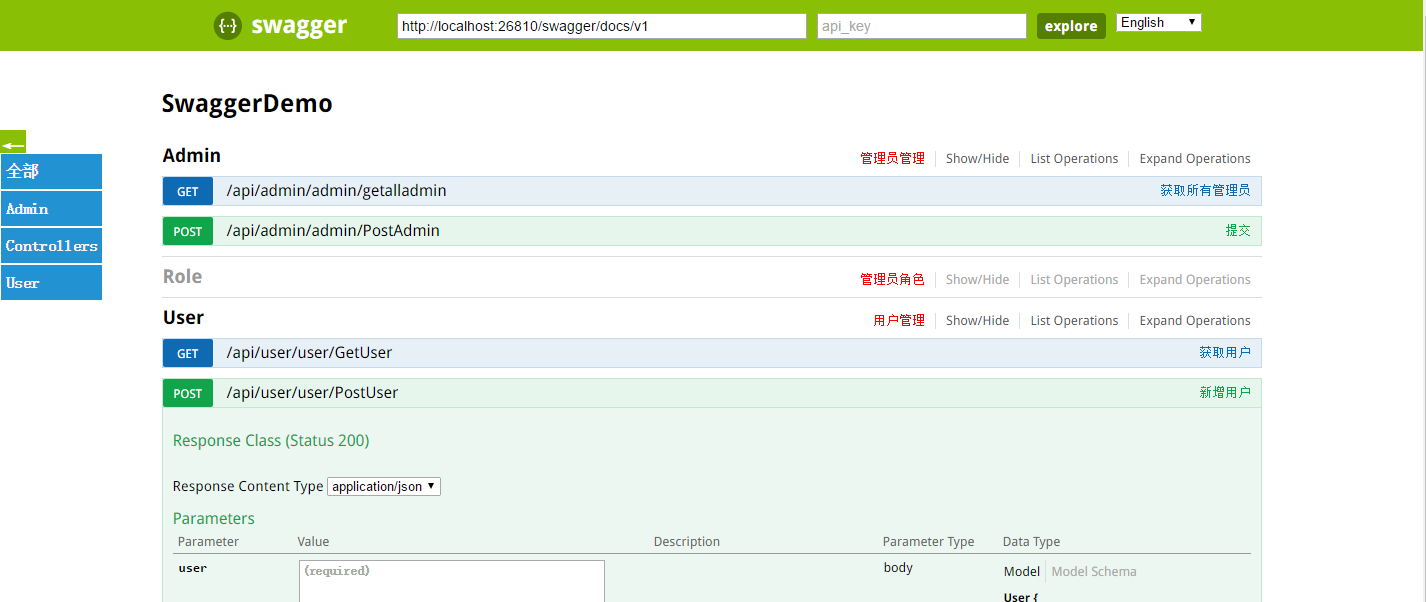
Swagger 最大寬度增加到1100px,
左側增加模塊篩選,點擊篩選後,將只顯示對應模塊下。
具體的實現方式,就是根據你的模塊名稱,來篩選api訪問路徑
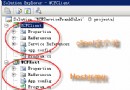
如上圖第一個user,就代表user模塊了,第二個user才是控制器名稱。這樣的定義,使用了MVC5的新特性RouteAttribute和RoutePrefixAttribute,他們用於在controller中自定義路由,你可以下載源碼看到。
那我們左側菜單欄的數據是哪兒來的呢。請看源碼SwaggerConfig中,我定義了這樣一個方法:
/// <summary>
        /// 從API文檔中讀取控制器描述
        /// </summary>
        /// <returns>所有控制器描述</returns>
        public static ConcurrentDictionary<string, string> GetControllerDesc(HashSet<string> moduleList)
        {
            string xmlpath = String.Format("{0}/bin/SwaggerCustom.Test.XML", AppDomain.CurrentDomain.BaseDirectory);
            ConcurrentDictionary<string, string> controllerDescDict = new ConcurrentDictionary<string, string>();
            if (File.Exists(xmlpath))
            {
                XmlDocument xmldoc = new XmlDocument();
                xmldoc.Load(xmlpath);
                string type = String.Empty, path = String.Empty, controllerName = String.Empty;
                string[] arrPath;
                int length = -1, cCount = "Controller".Length;
                XmlNode summaryNode = null;
                foreach (XmlNode node in xmldoc.SelectNodes("//member"))
                {
                    type = node.Attributes["name"].Value;
                    if (type.StartsWith("T:"))
                    {
                        //控制器
                        arrPath = type.Split('.');
                        length = arrPath.Length;
                        controllerName = arrPath[length - 1];
                        if (controllerName.EndsWith("Controller"))
                        {
                            //模塊信息
                            var moduleName = arrPath[length - 2];
                            moduleList.Add(moduleName);

                            //獲取控制器注釋
                            summaryNode = node.SelectSingleNode("summary");
                            string key = controllerName.Remove(controllerName.Length - cCount, cCount);
                            if (summaryNode != null && !String.IsNullOrEmpty(summaryNode.InnerText) && !controllerDescDict.ContainsKey(key))
                            {

                                controllerDescDict.TryAdd(key, summaryNode.InnerText.Trim());
                            }
                        }
                    }
                }
            }
            return controllerDescDict;
        }
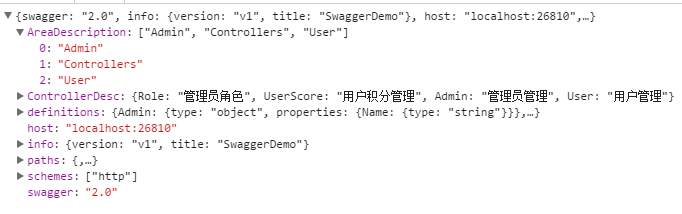
本來這個方法僅用於讀取Controller注釋的,但是既然這裡讀取了xml,我也就沒必要再讀一遍了。我增加了一個HashSet<string>類型的參數,在集合中數據每一個元素的數據是唯一的,所以使用它來存模塊信息,xml每次遍歷到Controller的時候,我都會將其Modules信息讀取出來(比如namespace SwaggerCustom.Test.Controllers.Admin.AdminRoleController ),那麼倒數第二位的單詞就是模塊名稱。這樣一來我們的模塊信息也包含在了json中,看下圖AreaDescription,他說明了我有三個模塊。
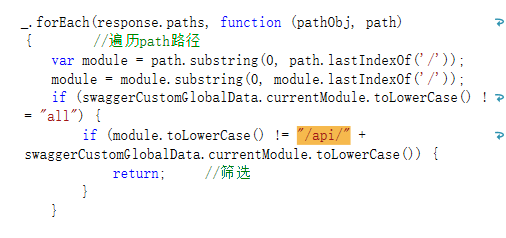
那麼接下來就是要做頁面渲染前的篩選工作了。我首先猜測渲染一定和返回json中的path(接口路徑)有關,所以我在swagger-ui-ext.js中搜索path,總算找到了結果:
如下所示:遍歷時,通過篩選Module模塊,對不符合我所想要的module進行直接return,而不向下執行,最終達到想要的目的。之所以說我沒有做深度優化的原因也是這裡,真正的深度優化應該是在後台代碼中所篩選,只返回自己想要的json結果,偷懶了。
所以下圖,就是我點擊Admin選項後所篩選的結果,該模塊下只有兩個Controller。

有關我個人所增加的js代碼,在Doc/lib/swagger-custom.js中。
//獲取Controller描述
function SwaggerCustom() {
    this.setControllerSummary = function () {
        $.ajax({
            type: "get",
            async: true,
            url: $("#input_baseUrl").val(),
            dataType: "json",
            success: function (data) {
                var summaryDict = data.ControllerDesc;
                var id, controllerName, strSummary;
                $("#resources_container .resource").each(function (i, item) {
                    id = $(item).attr("id");
                    if (id) {
                        controllerName = id.substring(9);
                        strSummary = summaryDict[controllerName];
                        if (strSummary) {
                            $(item).children(".heading").children(".options").prepend('<li>);
                        }
                    }
                });
                swaggerCustom.loadMenu(data.AreaDescription);
                expendtoggle();//注冊菜單收縮事件
            }
        });

    };
    //獲取當前參數
    this.getQueryString = function (name) {
        var reg = new RegExp("(^|&)" + name + "=([^&]*)(&|$)");
        var r = window.location.search.substr(1).match(reg);
        if (r != null) return unescape(r[2]); return null;
    },
    this.loadMenu = function (modules) {
        var url = window.location.href;
        url = url.substring(0, url.lastIndexOf('?'));
        $('body').prepend('<div class="menu-expender" id="menuExpend">←</div><div id="moduleMenu"><div onclick="menuClick(this)" data-url="' + url + '?module=all"  " data-module="all" class="menu-inner" >全部</div></div>');
        var menuInner = '';
        modules.forEach(function (item) {
            menuInner += '<div onclick="menuClick(this)" data-url="' + url + '?module=' + item.toLowerCase() + '" data-module="' + item.toLowerCase() + '" class="menu-inner" >' + item + '</div>';
        });
        $('#moduleMenu').append(menuInner);
        $('#moduleMenu').css("position", "fixed").css("top", "20%");
    }
}
var swaggerCustom = new SwaggerCustom();
var swaggerCustomGlobalData = {
    currentModule: "all"
}
$(function () {
    swaggerCustomGlobalData.currentModule = swaggerCustom.getQueryString('module') == null ? "all" : swaggerCustom.getQueryString('module');
    //alert(swaggerCustomGlobalData.currentModule);
});
var swaggerStyle = {
    showActionLink: function () {
        $("li .toggleEndpointList").css("color", "#2392f7");
    },
    titleStyle: function () {
        $("h2 .toggleEndpointList").css("color", "green");
    },
    showDetailLink: function () {
        $("li .expandResource").css('color', '#996633');
    },
    paramTable: function () {
        $('.fullwidth.parameters thead tr th:nth-child(1)').width('50px');
        $('.fullwidth.parameters thead tr th:nth-child(2)').width('350px');
        $('.fullwidth.parameters thead tr th:nth-child(3)').width('100px');
        $('.fullwidth.parameters thead tr th:nth-child(4)').width('60px');
        $('.fullwidth.parameters thead tr th:nth-child(5)').width('400px');
        $('td textarea').width('380px');
    },
    init: function () {
        this.showActionLink();
        this.titleStyle();
        this.showDetailLink();
        //this.paramTable();
    }
}

function menuClick(ele) {
    window.location.href = (ele.dataset.url);
}
function expendtoggle() {
    $('#menuExpend').toggle(function () {
        $(this).html('→');
        $('#moduleMenu').hide();
    }, function () {
        $(this).html('←');
        $('#moduleMenu').show();
    });
}
該如何使用??
使用直接copy走SwaggerConfig.cs和Doc文件放到你項目下,並且引用Swashbuckle就沒問題(可以直接拿源碼類庫,也可以直接從nuget上安裝)。並且你想使用這個模塊劃分的功能,就一定要符合路由規則api/modulename/controller/action.因為模塊的篩選就是通過modulename嘛。如果你只想使用swagger的基本功能,看上一篇的分享就足夠了。拿到本次分享的源碼,你就可以在其中合理的修改源碼,自定義你的功能
寫在最後
依然請原諒我這個標題黨。
如果我的點滴分享對你有點滴幫助,歡迎點下方紅色按鈕關注,我將持續輸出分享。也歡迎為我,也為你自己點贊。關於本篇源碼有任何問題,歡迎留言。