Swift下使用UICollectionView 實現長按拖拽功能。本站提示廣大學習愛好者:(Swift下使用UICollectionView 實現長按拖拽功能)文章只能為提供參考,不一定能成為您想要的結果。以下是Swift下使用UICollectionView 實現長按拖拽功能正文
導讀
簡單用Swift寫了一個collectionview的拖拽點擊排序效果;
拖拽排序是新聞類的App可以說是必有的交互設計,如今日頭條,網易新聞等。
GitHub地址:https://github.com/wangliujiayou/Swift-dragLabel 歡迎Star.
效果
主要代碼
手勢長按移動
1.給CollectionViewCell添加一個長按手勢.
private lazy var collectionView: UICollectionView = {
  let clv = UICollectionView(frame: self.view.frame, collectionViewLayout: ChannelViewLayout())
  clv.backgroundColor = UIColor.white
  clv.delegate = self
  clv.dataSource = self
  clv.register(ChannelViewCell.self, forCellWithReuseIdentifier: ChannelViewCellIdentifier)
  clv.register(ChannelHeaderView.self, forSupplementaryViewOfKind: UICollectionElementKindSectionHeader, withReuseIdentifier: ChannelViewHeaderIdentifier)
  let longPress = UILongPressGestureRecognizer(target: self, action: #selector(longPressGesture(_:)))
  clv.addGestureRecognizer(longPress)
  return clv
 }()
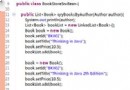
2.開始長按時對cell進行截圖或拷貝一個cell,並隱藏cell.
 //MARK: - 長按開始
 private func dragBegan(point: CGPoint) {
  indexPath = collectionView.indexPathForItem(at: point)
  if indexPath == nil || (indexPath?.section)! > 0 || indexPath?.item == 0
  {return}
  let item = collectionView.cellForItem(at: indexPath!) as? ChannelViewCell
  item?.isHidden = true
  dragingItem.isHidden = false
  dragingItem.frame = (item?.frame)!
  dragingItem.text = item!.text
  //放大效果(此處可以根據需求隨意修改)
  dragingItem.transform = CGAffineTransform(scaleX: 1.1, y: 1.1)
 }
3.在手勢移動的時候,找到目標是的indexPatch,再調用系統的api交換這個cell和隱藏cell的位置,並且更新數據.
 //MARK: - 移動過程
 private func drageChanged(point: CGPoint) {
  if indexPath == nil || (indexPath?.section)! > 0 || indexPath?.item == 0 {return}
  dragingItem.center = point
  targetIndexPath = collectionView.indexPathForItem(at: point)
  if targetIndexPath == nil || (targetIndexPath?.section)! > 0 || indexPath == targetIndexPath || targetIndexPath?.item == 0 {return}
  // 更新數據
  let obj = selectedArr[indexPath!.item]
  selectedArr.remove(at: indexPath!.row)
  selectedArr.insert(obj, at: targetIndexPath!.item)
  //交換位置
  collectionView.moveItem(at: indexPath!, to: targetIndexPath!)
  //進行記錄
  indexPath = targetIndexPath
 }
4.手勢停止或取消時,移除view,顯示隱藏cell. (這裡手勢取消也要掉用此方法)
//MARK: - 長按結束或取消
 private func drageEnded(point: CGPoint) {
  if indexPath == nil || (indexPath?.section)! > 0 || indexPath?.item == 0 {return}
  let endCell = collectionView.cellForItem(at: indexPath!)
  UIView.animate(withDuration: 0.25, animations: {
   self.dragingItem.transform = CGAffineTransform.identity
   self.dragingItem.center = (endCell?.center)!
  }, completion: {
   (finish) -> () in
   endCell?.isHidden = false
   self.dragingItem.isHidden = true
   self.indexPath = nil
  })
 }
點擊移動
collectionView的點擊方法,我這裡分為兩段,第一段為點擊處理事件,第二段為點擊添加添加標簽(編輯狀態下第一段可以點擊排序)
 func collectionView(_ collectionView: UICollectionView, didSelectItemAt indexPath: IndexPath) {
  if indexPath.section > 0 {
   // 更新數據
   let obj = recommendArr[indexPath.item]
   recommendArr.remove(at: indexPath.item)
   selectedArr.append(obj)
   //移動方法
   collectionView.moveItem(at: indexPath, to: NSIndexPath(item: selectedArr.count - 1, section: 0) as IndexPath)
  } else {
   if isEdite {
    if indexPath.item == 0 {return}
    // 更新數據
    let obj = selectedArr[indexPath.item]
    selectedArr.remove(at: indexPath.item)
    recommendArr.insert(obj, at: 0)
    //移動方法
    collectionView.moveItem(at: indexPath, to: NSIndexPath(item: 0, section: 1) as IndexPath)
   } else {
    if switchoverCallback != nil {
     //處理點擊的閉包
     switchoverCallback!(selectedArr, recommendArr, indexPath.item)
     _ = navigationController?.popViewController(animated: true)
    }
   }
  }
 }
其他
此代碼只是一個效果,沒有怎麼封裝,如果仔細看過的朋友可以知道其實沒有多麼復雜
點擊移動
collectionView.moveItem(at: indexPath, to: NSIndexPath(item: 0, section: 1) as IndexPath)
拖拽移動
collectionView.moveItem(at: indexPath!, to: targetIndexPath!)
主要就是這兩個方法,其他都是處理邏輯以及視圖效果.
提示
如果你們是從iOS9開始適配的話,那麼可以用系統的Api,非常簡單好用,大家這裡可以自己去試試.
 // Support for reordering
 @available(iOS 9.0, *)
 open func beginInteractiveMovementForItem(at indexPath: IndexPath) -> Bool // returns NO if reordering was prevented from beginning - otherwise YES
 @available(iOS 9.0, *)
 open func updateInteractiveMovementTargetPosition(_ targetPosition: CGPoint)
 @available(iOS 9.0, *)
 open func endInteractiveMovement()
 @available(iOS 9.0, *)
 open func cancelInteractiveMovement()
源碼可以從這裡下載
以上所述是小編給大家介紹的Swift下使用UICollectionView 實現長按拖拽功能,希望對大家有所幫助,如果大家有任何疑問請給我留言,小編會及時回復大家的。在此也非常感謝大家對網站的支持!