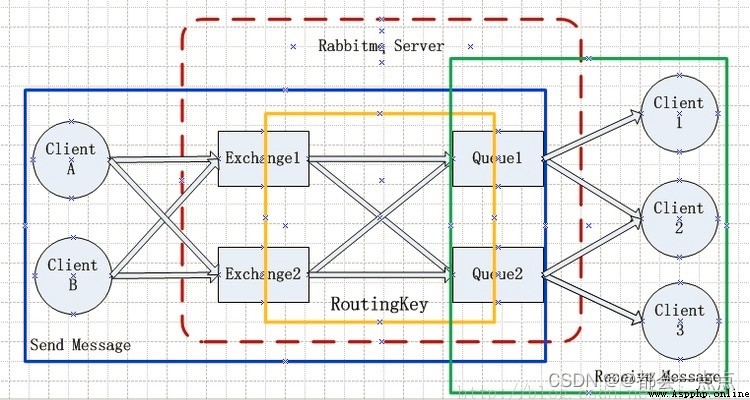
RabbitMQ是一個由erlang開發的AMQP(Advanced Message Queue )的開源實現的產品,RabbitMQ是一個消息代理,從“生產者”接收消息並傳遞消息至“消費者”,Periods can be routed according to rules、緩存、持久化消息.“生產者”也即message發送者以下簡稱P,相對應的“消費者”乃message接收者以下簡稱C,message通過queue由P到C,queue存在於RabbitMQ,Can store as many as possiblemessage,多個P可向同一queue發送message,多個C可從同一個queue接收message
Broker:消息隊列服務器實體.
Exchange:消息交換機,它指定消息按什麼規則,路由到哪個隊列.
Queue:消息隊列載體,每個消息都會被投入到一個或多個隊列.
Binding:綁定,它的作用就是把exchange和queue按照路由規則綁定起來.
Routing Key:路由關鍵字,exchange根據這個關鍵字進行消息投遞.
vhost:虛擬主機,一個broker裡可以開設多個vhost,用作不同用戶的權限分離.
producer:消息生產者,就是投遞消息的程序.
consumer:消息消費者,就是接受消息的程序.
channel:消息通道,在客戶端的每個連接裡,可建立多個channel,每個channel代表一個會話任務.
1、客戶端連接到消息隊列服務器,打開一個channel
2、客戶端聲明一個exchange,並設置相關屬性
3、客戶端聲明一個queue,並設置相關屬性
4、客戶端使用routing key,在exchange和queue之間建立好綁定關系
5、客戶端投遞消息到exchange
6、exchange接收到消息後,就根據消息的key和已經設置的binding,將消息投遞到一個或多個隊列裡
# 注:after declaring a queue,If you make it persistent,The declaration is not required next time,Because the queue is already thererabbitMQ中了!!!
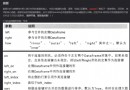
1、direct交換機
特點:依據key進行投遞
For example, it is set when bindingrouting key為”hello”,那麼客戶端提交的消息,只有設置了key為”hello”的才會投遞到隊列.
2、topic交換機
特點:對keyDelivery after pattern matching,符號”#”匹配一個或多個詞,符號” * ”匹配一個詞
例如”abc.#”匹配”abc.def.ghi”,”abc.*”只匹配”abc.def”.
3、fanout交換機
特點:不需要key,采取廣播模式,一個消息進來時,投遞到與該交換機綁定的所有隊列
""" After the client removes the message from the queue,可能需要一段時間才能處理完成,如果在這個過程中,客戶端出錯了,異常退出了,而數據還沒有處理完成,那麼非常不幸,這段數據就丟失了,因為rabbitmq默認會把此消息標記為已完成,然後從隊列中移除, """
消息確認是客戶端從rabbitmq中取出消息,並處理完成之後,會發送一個ack告訴rabbitmq,消息處理完成,當rabbitmq收到客戶端的獲取消息請求之後,或標記為處理中,當再次收到ack之後,才會標記為已完成,然後從隊列中刪除.當rabbitmq檢測到客戶端和自己斷開鏈接之後,還沒收到ack,則會重新將消息放回消息隊列,交給下一個客戶端處理,保證消息不丟失,也就是說,RabbitMQ給了客戶端足夠長的時間來做數據處理.
在客戶端使用no_ack來標記是否需要發送ack,默認是False,開啟狀態
https://juejin.cn/post/6992383077435572260
python使用rabbitmq服務,Ready-made class libraries can be usedpika、txAMQP或者py-amqplib,這裡選擇了pika
在命令行中直接使用pip命令:
pip install pika
The sample test content is fromproducer.py發送消息到RabbitMQ,consumer從RabbitMQ接受消息
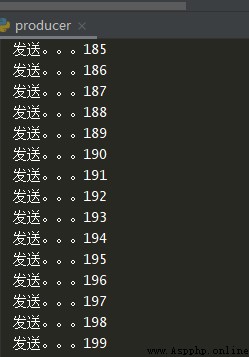
producer.py
# 消息生產者
import json
import time
import pika
# 隊列名稱
queue = 'queue_test'
# 路由關鍵字
routing_key = 'hello'
# Message exchange name
exchange = 'exchange_test'
# 建立連接
hostname = '127.0.0.1'
port = 5672
Credentials = pika.PlainCredentials('guest', 'guest')
Connection = pika.BlockingConnection(
pika.ConnectionParameters(
host=hostname,
port=port,
virtual_host='/', # 虛擬主機
credentials=Credentials
)
)
# 連接建立成功後,建立通道
channel = Connection.channel()
# 創建exchange
channel.exchange_declare(exchange=exchange, exchange_type='direct', durable=True)
# 聲明隊列,Both the producer and the consumer declare the same queue,Used to prevent one party from hanging up,The other side can function normally
channel.queue_declare(queue=queue, durable=True)
# Bind the queue to the message exchange
channel.queue_bind(queue=queue, exchange=exchange, routing_key=routing_key)
# 交換機; 隊列名,Specify which queue to send the message to; 消息內容
# routing_keyIt only needs to be specified when using an anonymous switch,Indicates which queue to send to,Note when undefinedexchange時,routing_key需和queue的值保持一致
for i in range(200):
data = f'hello word{
i}'
time.sleep(2)
channel.basic_publish(exchange=exchange, routing_key=routing_key, body=data)
print(f'發送...{
i}')
Connection.close()
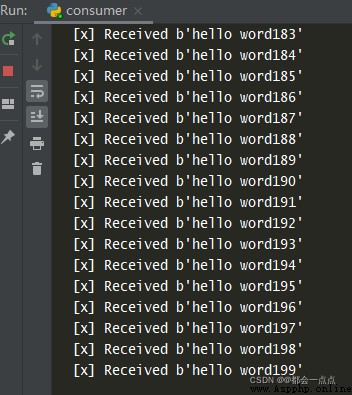
consumer.py
# 消息消費者
import pika
queue = 'queue_test'
hostname = 'localhost'
port = 5672
Credentials = pika.PlainCredentials('guest', 'guest')
ConnectionParam= pika.ConnectionParameters(host=hostname,port=port,credentials=Credentials)
Connection = pika.BlockingConnection(parameters=ConnectionParam)
# 連接建立成功後,建立通道
channel = Connection.channel()
# 創建exchange
channel.queue_declare(queue=queue,durable=True)
# 接受數據
def call_back(ch, method, properties, body):
print(" [x] Received %r" % (body,))
ch.basic_ack(delivery_tag=method.delivery_tag) # 發送ack消息
# 告訴RabbitMQ使用call_back來接受數據
channel.basic_consume(queue=queue,on_message_callback=call_back,auto_ack=False)#no_ack來標記是否需要發送ack,默認是False,開啟狀態
# 開始接收信息,並進入阻塞狀態,隊列裡有信息才會調用callback進行處理,按ctrl+c退出
print(' [*] Waiting for messages. To exit press CTRL+C')
channel.start_consuming()
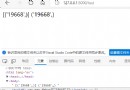
先運行producer.py發送消息
在運行consumer.py接收消息
再看web端的展示:http://localhost:15672/#/
You can see the number of messages in the queue and the time period for both parties to put and retrieve messages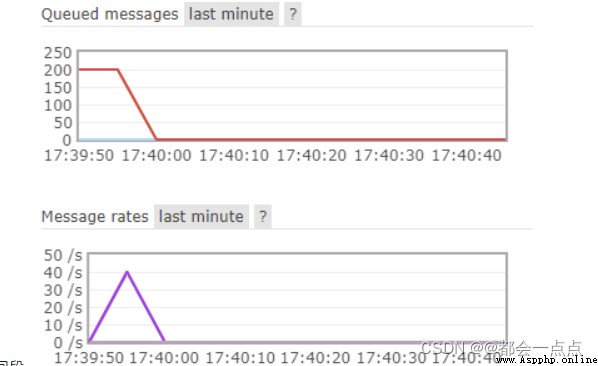
Show a queue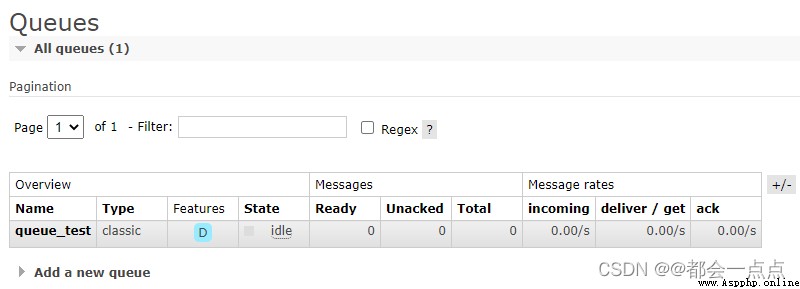
消息持久化 The message acknowledgment mechanism makes the client crash,Server messages are not lost,但是如果rabbitmqcrashed?How to ensure that messages in the queue are not lost? 此就需要product在往隊列中push消息的時候,告訴rabbitmq,此隊列中的消息需要持久化,用到的參數:durable=True,再次強調,Producer和client都應該去創建這個queue,Although the creation of only one place actually works:
channel.basic_publish(exchange='',
routing_key="test",
body=message,
properties=pika.BasicProperties(
delivery_mode = 2, # make message persistent
))
具體代碼:
# 建立連接
hostname = '127.0.0.1'
port = 5672
Credentials = pika.PlainCredentials('guest', 'guest')
Connection = pika.BlockingConnection(
pika.ConnectionParameters(
host=hostname,
port=port,
virtual_host='/', # 虛擬主機
credentials=Credentials
)
)
# 連接建立成功後,建立通道
channel = Connection.channel()
# 創建exchange
channel.exchange_declare(exchange=exchange, exchange_type='direct', durable=True)
# 聲明隊列,Both the producer and the consumer declare the same queue,Used to prevent one party from hanging up,The other side can function normally
channel.queue_declare(queue=queue, durable=True)
# Bind the queue to the message exchange
channel.queue_bind(queue=queue, exchange=exchange, routing_key=routing_key)
# 交換機; 隊列名,Specify which queue to send the message to; 消息內容
# routing_keyIt only needs to be specified when using an anonymous switch,Indicates which queue to send to,Note when undefinedexchange時,routing_key需和queue的值保持一致
for i in range(200):
data = f'hello word{
i}'
time.sleep(2)
channel.basic_publish(exchange=exchange, routing_key=routing_key, body=data,properties=pika.BasicProperties(delivery_mode=2))
print(f'發送...{
i}')
Connection.close()
# 消息消費者
import pika
queue = 'queue_test'
hostname = 'localhost'
port = 5672
Credentials = pika.PlainCredentials('guest', 'guest')
ConnectionParam= pika.ConnectionParameters(host=hostname,port=port,credentials=Credentials)
Connection = pika.BlockingConnection(parameters=ConnectionParam)
# 連接建立成功後,建立通道
channel = Connection.channel()
# 創建exchange
channel.queue_declare(queue=queue,durable=True)
# 接受數據
def call_back(ch, method, properties, body):
print(" [x] Received %r" % (body,))
ch.basic_ack(delivery_tag=method.delivery_tag) # 發送ack消息
# 告訴RabbitMQ使用call_back來接受數據
channel.basic_consume(queue=queue,on_message_callback=call_back,auto_ack=False)#no_ack來標記是否需要發送ack,默認是False,開啟狀態
# 開始接收信息,並進入阻塞狀態,隊列裡有信息才會調用callback進行處理,按ctrl+c退出
print(' [*] Waiting for messages. To exit press CTRL+C')
channel.start_consuming()
配置完之後,發現product往rabbitmq端push消息之後,重啟rabbitmq,消息依然存在