pip3 install -i https://pypi.tuna.tsinghua.edu.cn/simple virtualenv
virtualenv myVenv
source myVenv/bin/activate
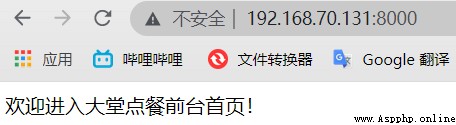
python3 manage.py runserver 0.0.0.0:8000
在虛擬環境下安裝uWSGI
pip3 install -i https://pypi.tuna.tsinghua.edu.cn/simple uwsgi
從一個簡單的 “Hello World” 開始,創建文件 test_uwsgi.py,代碼如下:
def application(env, start_response):
start_response('200 OK', [('Content-Type','text/html')])
return [b"Hello World"]
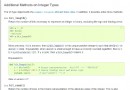
uWSGI Python 加載器將會搜索的默認函數 application .
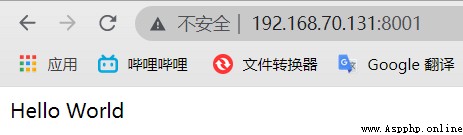
接下來我們啟動 uWSGI 來運行一個 HTTP 服務器,將程序部署在HTTP端口 8001 上:
uwsgi --http :8001 --wsgi-file test_uwsgi.py
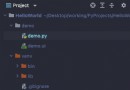
在項目根目錄下(與manage.py同級)新建一個uwsgi.ini文件,內容如下:
[uwsgi]
socket = 0.0.0.0:8001
chdir = /data/myobject/
wsgi-file = myobject/wsgi.py
processes = 4
threads = 2
buffer-size = 65536
# .sock文件目錄需與Nginx文件內的配置相同
# socket = /data/myobject/my_sock.sock
# chmod-socket = 666
# 存儲pid進程
pidfile=uwsgi.pid
# 存儲log日志
daemonize=uwsgi.log
啟動uWSGI,並指定配置文件
uwsgi --ini uwsgi.ini
web client <-> uWSGI <-> Django
sudo apt-get install nginx
/usr/sbin/nginx # 啟動Nginx
/usr/sbin/nginx -s stop # 停止Nginx
/usr/sbin/nginx -s reload # 重新啟動Nginx
vi /etc/nginx/nginx.conf # 編輯Nginx配置文件
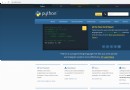
啟動Nginx後,浏覽器訪問ip地址: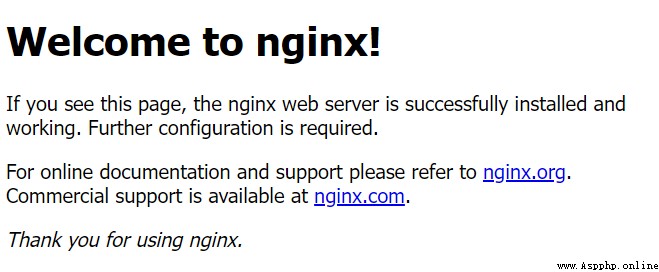
看到如上頁面,說明Nginx啟動成功.
將/etc/nginx/目錄下的uwsgi_params復制到項目文件夾,No changes are made to this file
cp /etc/nginx/uwsgi_params /data/myobject
在項目根目錄創建文件my_nginx.conf,並寫入以下內容
upstream django {
server 0.0.0.0:8001;
# server unix:///data/myobject/my_sock.sock;
}
server {
listen 8000; # 端口號
server_name 127.0.0.1; # 服務器 ip 或是域名
charset utf-8; # 字符集
# 最大上傳限制
client_max_body_size 75M;
location /static {
alias /data/myobject/static; # 靜態文件所在文件夾
}
# Forward all non-media requests toDjango服務器上
location / {
uwsgi_pass django; # Defined at the top
# Turn all parameters to uwsgi下
include /data/myobject/uwsgi_params; # uwsgi_params的路徑
}
}
This configuration file indicates that static files and media files will be served by Nginx處理,And other requests go inuWSGI處理
與NginxThe configuration directory establishes a soft link
sudo ln -s /data/myobject/my_nginx.conf /etc/nginx/sites-enabled/
Put a test picturetest.jpg放入static文件夾中,在浏覽器中輸入<YOUR_SERVER_IP>:8000/static/test.jpg,如果出現403Change the permissions of the image to 666,成功顯示圖片.
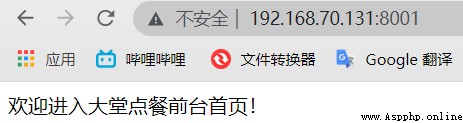
回到項目根目錄,輸入以下命令
uwsgi --socket :8001 --wsgi-file test_uwsgi.py
打開浏覽器,地址欄輸入<YOUR_SERVBER_IP>,看是否能正常顯示’Hello World’.
修改my_nginx.conf,最終版如下:
upstream django {
# server 0.0.0.0:8001;
server unix:///data/myobject/my_sock.sock;
}
server {
listen 8000; # 端口號
server_name 127.0.0.1; # 服務器 ip 或是域名
charset utf-8; # 字符集
# 最大上傳限制
client_max_body_size 75M;
location /static {
alias /data/myobject/static; # 靜態文件所在文件夾
}
# Forward all non-media requests toDjango服務器上
location / {
uwsgi_pass django; # Defined at the top
# Turn all parameters to uwsgi下
include /data/myobject/uwsgi_params; # uwsgi_params的路徑
}
}
修改uwsgi.ini,最終版如下:
# socket = 0.0.0.0:8001
chdir = /data/myobject/
wsgi-file = myobject/wsgi.py
processes = 4
threads = 2
buffer-size = 65536
# .sock文件目錄需與Nginx文件內的配置相同
socket = /data/myobject/my_sock.sock
chmod-socket = 666
# 存儲pid進程
pidfile=uwsgi.pid
# 存儲log日志
daemonize=uwsgi.log
重啟Nginx和uWSGI
/usr/sbin/nginx -s reload
uwsgi --stop uwsgi.pid
uwsgi --ini uwsgi.ini
打開浏覽器,地址欄輸入網址<YOUR_SERVER_IP>:8000,Check if the pictures and text are displayed properly
At this point, the following links have all been opened
web client <-> web server(nginx) <-> the socket <-> uwsgi <-> Django