API是一些預先定義函數,目的是用來提供應用程序與開發人員基於某軟件或者某硬件得以訪問一組例程的能力,並且無需訪問源碼或無需理解內部工作機制細節。
API就是操作系統給應用程序的調用接口,應用程序通過調用操作系統的 API而使操作系統去執行應用程序的命令(動作)。在 Windows 中,系統API是以函數調用的方式提供的。
可以認為API是包含在SDK中的:SDK是一系列文件的組合,包括lib、dll、.h、文檔、示例等;API是對程序而言的,提供用戶編程時的接口,即一系列模塊化的類和函數。
python中的xml.etree.ElementTree模塊實現了簡單高效的API,可以用來解析和創建XML數據。
<annotation verified="yes">
<folder>Annotation</folder>
<filename>invoice_direction_0_0.jpg</filename>
<path>invoice_stamp-PascalVOC-export/Annotations/invoice_direction_0_0.jpg</path>
<source>
<database>Unknown</database>
</source>
<size>
<width>2962</width>
<height>1753</height>
<depth>3</depth>
</size>
<segmented>0</segmented>
<object>
<name>stamp</name>
<pose>Unspecified</pose>
<truncated>0</truncated>
<difficult>0</difficult>
<bndbox>
<xmin>1872.3010033444816</xmin>
<ymin>1216.3294491525423</ymin>
<xmax>2370.9208472686732</xmax>
<ymax>1579.474458568738</ymax>
</bndbox>
</object><object>
<name>stamp</name>
<pose>Unspecified</pose>
<truncated>0</truncated>
<difficult>0</difficult>
<bndbox>
<xmin>1152.4392419175028</xmin>
<ymin>123.59310263653484</ymin>
<xmax>1505.7658862876256</xmax>
<ymax>351.3840630885122</ymax>
</bndbox>
</object>
</annotation>
import xml.etree.ElementTree as ET
import os
from PIL import Image, ImageDraw, ImageFont
def parse_rec(filename):
tree = ET.parse(filename) # 解析讀取xml函數
objects = []
img_dir =[]
# Element.findall()查找當前元素的直接子元素中帶有指定標簽的元素
# Element.find()找帶有特定標簽的第一個子級
# Elemtn.text 訪問元素的文本內容
# Element.get 訪問元素的屬性。
for xml_name in tree.findall('filename'):
img_path = os.path.join(pic_path, xml_name.text)
img_dir.append(img_path)
for obj in tree.findall('object'):
obj_struct = {
}
obj_struct['name'] = obj.find('name').text
obj_struct['pose'] = obj.find('pose').text
obj_struct['truncated'] = int(obj.find('truncated').text)
obj_struct['difficult'] = int(obj.find('difficult').text)
bbox = obj.find('bndbox')
obj_struct['bbox'] = [int(bbox.find('xmin').text),
int(bbox.find('ymin').text),
int(bbox.find('xmax').text),
int(bbox.find('ymax').text)]
objects.append(obj_struct)
return objects,img_dir
# 可視化目標框,並顯示標簽
def visualise_gt(objects,img_dir):
for id,img_path in enumerate(img_dir):
img = Image.open(img_path)
draw = ImageDraw.Draw(img)
for a in objects:
xmin =int(a['bbox'][0])
ymin =int(a['bbox'][1])
xmax =int(a['bbox'][2])
ymax =int(a['bbox'][3])
label = a['name']
draw.rectangle((xmin,ymin,xmax,ymax), fill=None, outline=(0,255,0),width=2)
draw.text((xmin-10,ymin-15), label, fill = (0,255,0),font=font) # 利用ImageDraw的內置函數,在圖片上寫入文字
img.show()
fontPath = "C:\Windows\Fonts\Consolas\consola.ttf" # 字體路徑
root = 'F:/dataset/AQM'
ann_path = os.path.join(root, 'Annotations') # xml文件所在路徑
pic_path = os.path.join(root, 'JPEGImages') # 樣本圖片路徑
font = ImageFont.truetype(fontPath, 16)
for filename in os.listdir(ann_path):
xml_path = os.path.join(ann_path,filename)
object,img_dir = parse_rec(xml_path)
visualise_gt(object,img_dir )
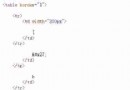
xml文件:
<?xml version="1.0" encoding="utf-8"?>
<annotation>
<folder>null</folder>
<filaname>img.raw</filaname>
<path>null</path>
<size>
<width>2048</width>
<height>2048</height>
<depth>16</depth>
</size>
<imgclass>SAR</imgclass>
<condition>
<azimuth>0</azimuth>
<pitch>20</pitch>
<irazimuth>NULL</irazimuth>
<time>NULL</time>
<season>NULL</season>
<area>NULL</area>
<ceshijiao>20</ceshijiao>
<resolution>2</resolution>
<seastate>5</seastate>
<velocity>3800</velocity>
<range>630000</range>
</condition>
<object>
<name>0</name>
<bndbox>
<xmin>1006</xmin>
<xmax>1042</xmax>
<ymin>1169</ymin>
<ymax>1271</ymax>
</bndbox>
</object>
</annotation>
python解析得到左上角和右下角坐標:
# input: /images/ and single xml name
# output: img_path and list[dict[xyxy]]
def parse_rec(labelme_path, xml_file_, xml_filename):
out_file = open('%s/%s.txt' % (labelme_path, xml_file_), 'w')
tree = ET.parse(xml_filename)
objects = []
img_dir = []
for xml_name in tree.findall('filename'):
img_path = os.path.join(labelme_path, xml_name.text)
img_dir.append(img_path)
# height, width, channels = cv2.imread(imagePath).shape
width = int(tree.find('size').find('width').text)
height = int(tree.find('size').find('height').text)
for obj in tree.findall('object'):
obj_struct = {
}
obj_struct['name'] = obj.find('name').text
bbox = obj.find('bndbox')
xmin = int(bbox.find('xmin').text)
ymin = int(bbox.find('ymin').text)
xmax = int(bbox.find('xmax').text)
ymax = int(bbox.find('ymax').text)
obj_struct['bbox'] = [xmin, ymin, xmax, ymax]
# obj_struct['bbox'] = [int(bbox.find('xmin').text),
# int(bbox.find('ymin').text),
# int(bbox.find('xmax').text),
# int(bbox.find('ymax').text)]
objects.append(obj_struct)
if xmax <= xmin:
pass
elif ymax <= ymin:
pass
else:
cls_id = classes.index(label) # label name to index ID
b = (float(xmin), float(xmax), float(ymin), float(ymax))
bb = convert((width, height), b) # absolute' coordinates to relative' coordinates.
out_file.write(str(cls_id) + " " + " ".join([str(a) for a in bb]) + '\n')
print(xml_filename, xmin, ymin, xmax, ymax, cls_id)
return objects, img_dir
參考:https://blog.csdn.net/xinming_365/article/details/109039354