sudo apt-get install python-dev (or python3-dev)
sudo apt-get install cmake
sudo pip install pytest
sudo pip install numpy
sudo pip install scipy
sudo pip install pybind11
mkdir buildcd buildcmake ..make check -j 4sudo make installbrew install pybind11
Here we use ROS Column , obtain Baxter The picture above the robot , For simplicity and convenience , Only header files and cmake file
#ifndef _ROS_H_
#define _ROS_H_
#include<ros/ros.h>
#include <std_msgs/Float64.h>
#include<string.h>
#include<robotstates_su/robotstates.h>
class rosBase{

public:
rosBase(const std::string node_name,int argc=0,char**argv=nullptr);
};
#endif
#include<rosBase.hpp>
#include<image_transport/image_transport.h>
#include<cv_bridge/cv_bridge.h>
#include<sensor_msgs/image_encodings.h>
#include <opencv2/opencv.hpp>
#include "opencv2/core/core.hpp"
#include<opencv2/imgproc/imgproc.hpp>
#include<opencv2/highgui/highgui.hpp>
#include<opencv/cv.h>
#include<zeromqConnect.hpp>
#include<vector>
#include<Python.h>
#include<pybind11/embed.h>
static const std::string OPENCV_WINDOW = "Open-CV display window";
#define headImage "/cameras/head_camera/image"
#define leftImage "/cameras/left_hand_camera/image"
#define rightImage "/cameras/right_hand_camera/image"
class baxterImage:public rosBase{

public:
baxterImage(const std::string nodeName, std::string IP="*",int Port=5556,int rate=1000);
void getImage(const std::string cameraName);
void processImageCallBack(const sensor_msgs::ImageConstPtr& msg);
bool baxterOk();
void baxterSleep();
void baxterRate(int rate);
void baxterSpinOnce();
private:
ros::NodeHandle nh;
ros::Subscriber headSub;
ros::Subscriber leftSub;
ros::Subscriber rigthSub;
void *publisher=NULL;
int rate;
const std::string Port;
const std::string IP;
rosBase rosbase;
};
Used for holding C++ Code and python Code binding
#include<pybind11/pybind11.h>
#include<baxterImage.hpp>
#include<pybind11/stl.h>
#include<pybind11/eigen.h>
namespace py = pybind11;
PYBIND11_MODULE(baxter,m)
{

py::class_<rosBase>rosbase(m,"rosBase");
rosbase.def(py::init<const std::string&>());
py::class_<baxterImage>(m,"baxterImage",rosbase)
.def(py::init<const std::string &,const std::string&,int ,int>())
.def("getImage",&baxterImage::getImage)
.def("baxterOk",&baxterImage::baxterOk)
.def("baxterSleep",&baxterImage::baxterSleep)
.def("baxterSpinOnce",&baxterImage::baxterSpinOnce)
.def("baxterRate",&baxterImage::baxterRate);
}
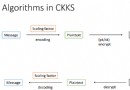
You can understand the following image 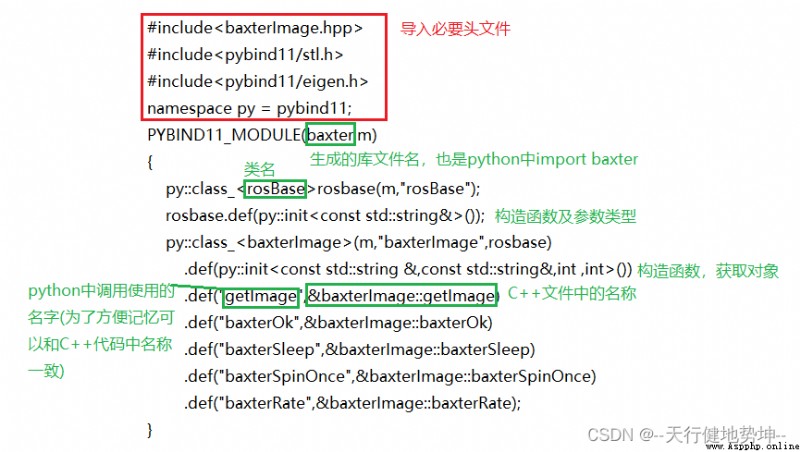
cmake_minimum_required(VERSION 2.8.3)
project(Ros_control)
## Compile as C++11, supported in ROS Kinetic and newer
add_compile_options(-std=c++11)
find_package( OpenCV REQUIRED)
find_package(Eigen3 REQUIRED)
include_directories(
include
"/opt/ros/kinetic/include/"
"/usr/include/"
"/usr/include/boost/"
"/usr/lib/python3.7/dist-packages/numpy/core/include/"
"/usr/include/python3.7m/"
"/headless/baxter_ws/devel/include/"
)
LINK_DIRECTORIES(
"/opt/ros/kinetic/lib/"
"/usr/lib/x86_64-linux-gnu/"
"/opt/ros/kinetic/lib/x86_64-linux-gnu/"
"/lib64/"
)
include_directories(SYSTEM ${
EIGEN3_INCLUDE_DIRS})
add_subdirectory(
lib/pybind11
)
pybind11_add_module(baxter "src/rosBase.cpp" "src/baxterImage.cpp" "src/bindings.cpp")
target_link_libraries(
baxter PRIVATE ${
OpenCV_LIBS}
)
You can put pybind11 Of lib Copy the library into the compiled directory lib In the library ( It's not necessary , Just find the corresponding library )
Compile according to python Version generation baxter.cpython-37m-x86_64-linux-gnu.so file
Generative so Files in python Where documents are used , Or let the file you use find this so file
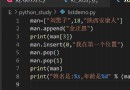
import baxter
#push = baxter.baxterImage("pushimage","*",6666,1000)
push = baxter.baxterImage("pushimage","192.168.1.105",6666,1000)
push.getImage("h")
while push.baxterOk():
push.baxterSpinOnce()
Reference learning