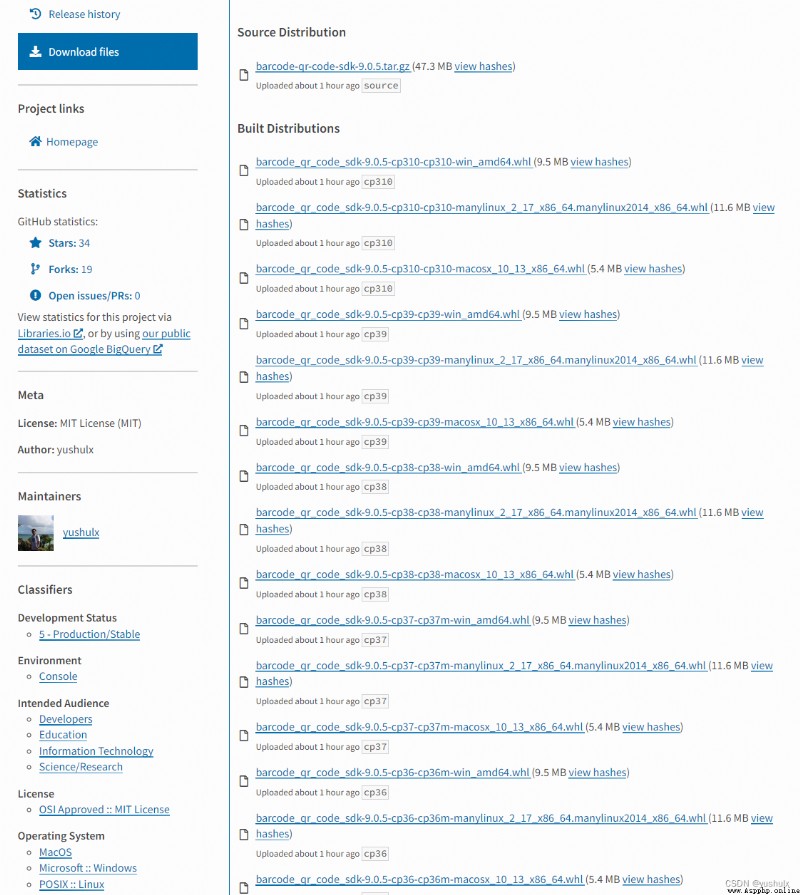
如果你用CPython寫了一個擴展,然後要打包到wheel中發布,應該如何操作?你搜索網絡,不管英文還是中文,得到的都是一知半解的答案。根據官方的粗淺文檔,你可能可以很快完成一個wheel包,但和真正的wheel包差了十萬八千裡。這裡主要考慮兩個問題:1.包的結構,2.依賴庫如何打包。
因為涉及C/C++代碼,那麼最好的學習資源就是opencv-python的源碼。理想情況下,做出來的包應該可以通過pip命令在任意平台安裝。
那麼opencv-python是如何來為不同平台編譯wheel的?通過源碼可以發現,它用到了scikit-build,通過CMake來編譯C/C++代碼。我們可以直接運行GitHub上的示例工程來體驗下。
這個工程很簡單,setup.py裡只寫了一個包名:
from skbuild import setup
setup(
name="hello-cpp",
version="1.2.3",
description="a minimal example package (cpp version)",
author='The scikit-build team',
license="MIT",
packages=['hello'],
python_requires=">=3.7",
)
其它的都交給CMakeLists.txt去完成:
cmake_minimum_required(VERSION 3.4...3.22)
project(hello)
find_package(PythonExtensions REQUIRED)
add_library(_hello MODULE hello/_hello.cxx)
python_extension_module(_hello)
install(TARGETS _hello LIBRARY DESTINATION hello)
pyproject.toml中配置了編譯環境。
[build-system]
requires = [
"setuptools>=42",
"scikit-build>=0.13",
"cmake>=3.18",
"ninja",
]
build-backend = "setuptools.build_meta"
[tool.cibuildwheel]
manylinux-x86_64-image = "manylinux2014"
manylinux-aarch64-image = "manylinux2014"
skip = ["pp*", "*-win32", "*-manylinux_i686", "*-musllinux_*"]
[tool.cibuildwheel.windows]
archs = ["AMD64"]
[tool.cibuildwheel.linux]
repair-wheel-command = "auditwheel repair -w {
dest_dir} {
wheel} --plat manylinux2014_x86_64"
archs = ["x86_64"]
[tool.cibuildwheel.macos]
archs = ["x86_64"]
repair-wheel-command = [
"delocate-listdeps {wheel}",
"delocate-wheel --require-archs {delocate_archs} -w {dest_dir} {wheel}",
]
我們運行pip wheel .就可以得到一個*.whl包。
現在用解壓軟件打開這個包來看下。我們看到根目錄中包含了兩個文件夾,一個是*dist-info,一個是你定義的package。在package中可以找到編譯出來的庫文件以及__init__.py文件。這就是正確的wheel包結構。如果你按照官方教程直接用python setup.py bdist_wheel打包一個C Extension工程,你會發現,編譯出來的庫是打包在根目錄的。這有什麼問題?安裝之後打開安裝目錄Lib\site-packages,你會發現庫是直接拷貝到這個目錄下的,污染環境。
當你的C/C++代碼還依賴別的庫,那麼就要考慮庫的鏈接和打包問題。Windows上很簡單,所有的庫都放在同一個目錄下即可,但Linux和macOS就需要設置相對路徑。注意,設置的方法是不一樣的。方法如下:
if(CMAKE_HOST_UNIX)
if(CMAKE_HOST_APPLE)
SET(CMAKE_CXX_FLAGS "-std=c++11 -O3 -Wl,-rpath,@loader_path")
SET(CMAKE_INSTALL_RPATH "@loader_path")
else()
SET(CMAKE_CXX_FLAGS "-std=c++11 -O3 -Wl,-rpath=$ORIGIN")
SET(CMAKE_INSTALL_RPATH "$ORIGIN")
endif()
SET(CMAKE_INSTALL_RPATH_USE_LINK_PATH TRUE)
endif()
其它的鏈接,安裝這裡省略,稍後直接看源碼。
那麼不用CMake能不能做到一樣的打包效果呢?用setuptools是完全可以實現的。
我們在setup.py中要做這樣幾件事情:1.配置編譯參數。2.拷貝依賴庫。
首先判斷系統和CPU架構,然後添加對應的編譯參數。
dbr_lib_dir = ''
dbr_include = ''
dbr_lib_name = 'DynamsoftBarcodeReader'
if sys.platform == "linux" or sys.platform == "linux2":
# linux
if platform.uname()[4] == 'AMD64' or platform.uname()[4] == 'x86_64':
dbr_lib_dir = 'lib/linux'
elif platform.uname()[4] == 'aarch64':
dbr_lib_dir = 'lib/aarch64'
else:
dbr_lib_dir = 'lib/arm32'
elif sys.platform == "darwin":
# OS X
dbr_lib_dir = 'lib/macos'
pass
elif sys.platform == "win32":
# Windows
dbr_lib_name = 'DBRx64'
dbr_lib_dir = 'lib/win'
if sys.platform == "linux" or sys.platform == "linux2":
ext_args = dict(
library_dirs = [dbr_lib_dir],
extra_compile_args = ['-std=c++11'],
extra_link_args = ["-Wl,-rpath=$ORIGIN"],
libraries = [dbr_lib_name],
include_dirs=['include']
)
elif sys.platform == "darwin":
ext_args = dict(
library_dirs = [dbr_lib_dir],
extra_compile_args = ['-std=c++11'],
extra_link_args = ["-Wl,-rpath,@loader_path"],
libraries = [dbr_lib_name],
include_dirs=['include']
)
if sys.platform == "linux" or sys.platform == "linux2" or sys.platform == "darwin":
module_barcodeQrSDK = Extension('barcodeQrSDK', ['src/barcodeQrSDK.cpp'], **ext_args)
else:
module_barcodeQrSDK = Extension('barcodeQrSDK',
sources = ['src/barcodeQrSDK.cpp'],
include_dirs=['include'], library_dirs=[dbr_lib_dir], libraries=[dbr_lib_name])
我們設置自定義函數來實現python setup.py build:
def copylibs(src, dst):
if os.path.isdir(src):
filelist = os.listdir(src)
for file in filelist:
libpath = os.path.join(src, file)
shutil.copy2(libpath, dst)
else:
shutil.copy2(src, dst)
class CustomBuildExt(build_ext.build_ext):
def run(self):
build_ext.build_ext.run(self)
dst = os.path.join(self.build_lib, "barcodeQrSDK")
copylibs(dbr_lib_dir, dst)
filelist = os.listdir(self.build_lib)
for file in filelist:
filePath = os.path.join(self.build_lib, file)
if not os.path.isdir(file):
copylibs(filePath, dst)
# delete file for wheel package
os.remove(filePath)
setup (name = 'barcode-qr-code-sdk',
...
cmdclass={

'build_ext': CustomBuildExt,},
)
當執行build_ext.build_ext.run(self)的時候,觸發了默認的編譯。這個時候會生成我們需要的Python庫。然後把我們用到的庫都拷貝到輸出目錄中。在執行打包命令的時候,build命令是首先被觸發的,然後會把輸出目錄中的所有文件都打包到wheel裡。這樣就實現了和
scikit-build一樣的效果。
Linux做出來的包,還需要通過auditwheel的repair命令重新生成一個支持manylinux的wheel包。
auditwheel repair *.whl --plat manylinux2014_x86_64"
如果不做這個處理,生成的Linux包是不能上傳pypi的。
現在在GitHub Action創建一個自動化編譯打包發布流程:
name: Build and upload to PyPI
on: [push, pull_request]
jobs:
build_wheels:
name: Build wheels on ${
{
 matrix.os }}
runs-on: ${
{
 matrix.os }}
strategy:
matrix:
os: [ubuntu-20.04, windows-2019, macos-10.15]
steps:
- uses: actions/[email protected]
- name: Build wheels
uses: pypa/[email protected]
- uses: actions/upload-[email protected]
with:
path: ./wheelhouse/*.whl
build_sdist:
name: Build source distribution
runs-on: ubuntu-latest
steps:
- uses: actions/[email protected]
- name: Build sdist
run: pipx run build --sdist
- uses: actions/upload-[email protected]
with:
path: dist/*.tar.gz
upload_pypi:
needs: [build_wheels, build_sdist]
runs-on: ubuntu-latest
# upload to PyPI on every tag starting with 'v'
if: github.event_name == 'push' && startsWith(github.ref, 'refs/tags/v')
# alternatively, to publish when a GitHub Release is created, use the following rule:
# if: github.event_name == 'release' && github.event.action == 'published'
steps:
- uses: actions/download-[email protected]
with:
name: artifact
path: dist
- uses: pypa/gh-action-pypi-[email protected]
with:
user: __token__
password: ${
{
 secrets.pypi_password }}
skip_existing: true
各種主流python對應的包就做出來了。
https://github.com/yushulx/python-barcode-qrcode-sdk
 I want to see it, but what if the computer doesnt have a network? Python teaches you to save the whole book into TXT~
Everybody, good duck ! Its my
 129. sum the numbers from root node to leaf node (Python Implementation)
subject : Give you the root no